Discover the different types of fishing knots, essential tools, step-by-step instructions, and expert tips for securing the knot when tying on a hook.
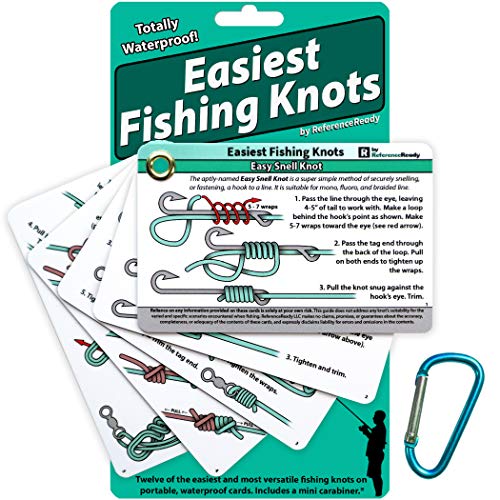
Types of Fishing Knots
Improved Clinch Knot
The Improved Clinch Knot is one of the most popular and commonly used fishing knots by anglers of all levels. It is known for its reliability and strength, making it a go-to choice for securing hooks, lures, and swivels to the fishing line. To tie an Improved Clinch Knot, follow these simple steps:
- Thread the line through the eye of the hook.
- Make 5 to 7 wraps around the standing line.
- Pass the tag end through the loop near the eye of the hook.
- Moisten the knot and pull tight.
Palomar Knot
The Palomar Knot is another versatile and strong fishing knot that is favored for its simplicity and effectiveness. It is especially useful for attaching hooks and lures to the fishing line, as well as for creating leader connections. To tie a Palomar Knot, here’s what you need to do:
- Double the line and pass it through the eye of the hook.
- Tie a simple overhand knot, leaving a loop.
- Pass the hook through the loop.
- Moisten the knot and pull tight.
Uni Knot
The Uni Knot, also known as the Duncan Loop, is a reliable knot that is widely used for connecting the fishing line to terminal tackle such as hooks, swivels, and lures. It is valued for its strength and versatility in various fishing situations. Here’s how you can tie a Uni Knot:
- Run the line through the eye of the hook and double back, forming a loop.
- Make 5 to 7 wraps around the doubled line.
- Pass the tag end through the loop and moisten the knot before tightening.
These three fishing knots are essential for every angler to master, as they provide the foundation for securely attaching tackle to the fishing line. By practicing and perfecting these knots, you can increase your chances of landing that prized catch on your next fishing adventure.

Tools Needed for Tying Hooks
Fishing Line
When it comes to tying hooks, having the right fishing line is essential. The type of fishing line you choose can greatly impact the strength and durability of your knots. There are various types of fishing lines available, including monofilament, fluorocarbon, and braided lines. Each type has its own strengths and weaknesses, so it’s important to choose the one that best suits your needs. Monofilament lines are popular for their stretch and ease of handling, while fluorocarbon lines are known for their invisibility underwater. Braided lines, on the other hand, are incredibly strong and resistant to abrasion.
Hook
The hook is the crucial link between your fishing line and the fish you’re trying to catch. When selecting a hook for tying, consider the size and type of fish you’re targeting. Hooks come in various sizes and styles, such as J-hooks, circle hooks, and treble hooks. J-hooks are commonly used for general fishing purposes, while circle hooks are popular for catch-and-release fishing as they are less likely to cause harm to the fish. Treble hooks, with their three points, are often used for fishing lures. Make sure to choose a hook that is appropriate for the type of fishing you plan to do.
Scissors
Having a good pair of scissors is essential for cutting and trimming your fishing line when tying hooks. Sharp scissors are important for cleanly cutting the line without causing fraying or damage. Look for scissors with a fine tip that can easily maneuver around knots and tight spaces. Keeping a pair of scissors in your tackle box or fishing bag will ensure that you are always prepared to make precise cuts when tying on hooks. Remember, a clean cut will help ensure that your knots are secure and reliable.
Steps to Tie on a Hook
Thread the Line Through the Eye of the Hook
When it comes to tying a hook onto your fishing line, the first step is to thread the line through the eye of the hook. This may seem like a simple task, but it is crucial to do it correctly to ensure that your knot is secure. Make sure to leave a sufficient amount of line on the tag end to work with when tying the knot.
Make Several Wraps Around the Standing Line
After threading the line through the eye of the hook, the next step is to make several wraps around the standing line. This helps to create a strong and secure connection between the hook and the fishing line. The number of wraps you make will depend on the type of knot you are using and the size of the hook.
Secure with a Tight Knot
Once you have made the wraps around the standing line, it is time to secure the knot with a tight finish. This is where the strength of your knot will come into play, so be sure to tighten it as much as possible without causing the line to break. A secure knot is essential for preventing the hook from coming loose while you are fishing.
- Remember to always moisten the line before tightening the knot to reduce friction and prevent damage to the line.
- After securing the knot, trim any excess line to prevent it from getting caught on anything while casting or reeling in your catch.
- Before heading out to fish, always test the knot by giving it a gentle tug to ensure that it is secure and will hold up under pressure.
By following these steps and tips, you can confidently tie on a hook and be ready to catch some fish on your next fishing adventure. Happy fishing!
Tips for Securing the Knot
Moisten the Line
When it comes to tying a secure fishing knot, one important tip is to moisten the line before cinching it tight. This simple step can make a big difference in the strength and durability of your knot. By moistening the line, you reduce friction and heat generated during the tying process, allowing the knot to slide into place smoothly. This helps to prevent any weak spots or abrasions in the line that could compromise its strength when under pressure. So, before you pull the knot tight, take a moment to moisten the line with a bit of saliva or water to ensure a solid and secure connection.
Pull Tight and Trim Excess Line
Once you have tied your knot and moistened the line, the next step is to pull it tight. This is where you really test the strength and integrity of your knot. Use steady, even pressure to cinch the knot down securely, making sure there are no loose or slack areas that could potentially come undone while you’re out on the water. After you’ve pulled the knot tight, it’s important to trim any excess line to avoid any tangles or snags while casting or reeling in your catch. A clean, trimmed knot not only looks more professional but also helps to prevent any unwanted twists or knots in your fishing line.
Test the Knot Before Fishing
Before you cast your line out into the water, it’s crucial to test the strength of your knot. Give it a gentle tug to ensure that it holds firm and doesn’t slip or come undone. This simple step can save you from losing a fish due to a poorly tied knot. Additionally, testing the knot before fishing gives you the opportunity to make any necessary adjustments or re-tie the knot if needed. It’s always better to be safe than sorry when it comes to securing your fishing line, so take the time to test your knot and make sure it’s strong and reliable before you start reeling in your next big catch.

In conclusion, by following these tips for securing your fishing knot, you can ensure that your line stays strong and secure while out on the water. Remember to moisten the line, pull tight and trim excess line, and test the knot before fishing to maximize your chances of a successful and enjoyable fishing experience. With a little extra care and attention to detail, you can tie knots that will hold up to the toughest conditions and help you land your dream catch. Happy fishing!


