In this comprehensive guide, we will walk you through the process of tying a fly line to backing. From gathering the necessary materials to troubleshooting common issues, you’ll be ready to hit the water in no time.
Materials Needed for Tying a Fly Line to Backing
When it comes to tying a fly line to backing, having the right materials is essential. Let’s take a closer look at the key items you’ll need to ensure a successful and secure connection.
Fly Line
The fly line is the main line that you will be attaching to the backing. It is designed specifically for fly fishing and comes in various weights and tapers to suit different fishing conditions. When selecting a fly line, consider factors such as the type of fishing you’ll be doing and the species of fish you’ll be targeting.
Backing
Backing is a thin, strong line that is attached to the reel before the fly line. It serves as an additional support for the fly line and provides extra length for those times when a fish takes a long run. Backing is typically made of braided Dacron or gel-spun polyethylene and comes in different pound test ratings. Make sure to choose a backing that is compatible with your fly line and reel.
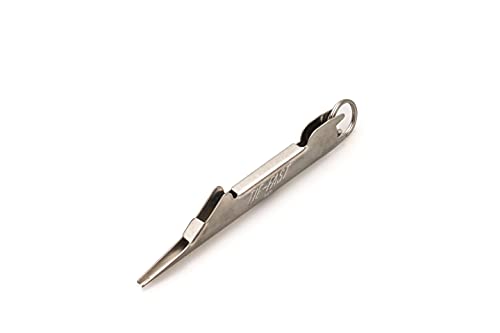
Nail Knot Tool
A nail knot tool is a handy device that helps you tie a secure knot between the fly line and backing. It consists of a small metal tube with a groove on one end and a pointed tip on the other. The groove is used to hold the line while wrapping it around the nail or tube, creating a neat and tight knot. Having a nail knot tool makes the tying process much easier and ensures a strong connection.

Scissors
Scissors are an essential tool for any fly angler. You’ll need them to cut the backing and fly line to the desired length. It’s important to use sharp scissors that can cleanly cut through the line without fraying or damaging it. A clean cut ensures a smooth connection between the backing and fly line, reducing the risk of any weak points that could lead to line failure.
Now that we’ve covered the materials you’ll need, let’s move on to preparing the fly line and backing for the tying process.
Preparing the Fly Line and Backing
Before you can tie the fly line to the backing, it’s important to properly prepare both components. This involves unspooling the fly line, straightening it, measuring and cutting the backing, and finally, attaching the backing to the fly line. Let’s go through each step in detail.
Unspooling the Fly Line
To unspool the fly line, start by removing any packaging or protective coverings. Hold the reel spool in one hand and gently pull the fly line out with the other. Make sure to do this slowly and avoid any tangles or twists in the line. It’s best to unspool the line in a controlled manner to prevent any unnecessary frustration later on.
Straightening the Fly Line
Fly lines can sometimes become coiled or twisted, especially when stored for long periods. Before attaching the backing, it’s important to straighten the fly line to ensure a smooth and even connection. One effective method is to stretch the line between your hands, applying gentle tension to remove any kinks or coils. Another option is to use a line straightener tool, which can help remove any stubborn twists in the line.

Measuring and Cutting the Backing
Once the fly line is straightened, it’s time to measure and cut the backing. The length of the backing will depend on personal preference and the size of the reel. A general guideline is to have enough backing to fill the reel to about 1/8 inch from the edge. Measure the desired length and use sharp scissors to make a clean cut. Remember to account for any knots or connections that will be made during the tying process.
Attaching the Backing to the Fly Line
Now that you have the appropriate length of backing, it’s time to attach it to the fly line. One common method is to use a nail knot, which provides a secure and streamlined connection. We will explore the nail knot technique in more detail in the next section. However, it’s important to note that there are alternative methods such as the loop-to-loop connection or the Albright knot. These options may be suitable for specific fishing situations or personal preferences.
With the fly line and backing prepared, we’re ready to move on to the next step: tying the nail knot.
Preparing the Fly Line and Backing
Before you can begin tying a fly line to backing, it’s important to properly prepare both the fly line and the backing. This ensures that your knot will be secure and your equipment will function optimally. In this section, we will cover the steps of unspooling the fly line, straightening the fly line, measuring and cutting the backing, and attaching the backing to the fly line.
Unspooling the Fly Line
To get started, you’ll need to unspool the fly line from its packaging. Find the end of the fly line and begin to carefully unwind it, making sure to avoid any tangles or twists. As you unspool the line, it’s important to keep it organized and prevent it from becoming tangled. You can use your fingers or a line spool to help keep the line organized as you work.
Straightening the Fly Line
Once the fly line is unspooled, it’s common for it to have some memory from being coiled up. This means that it may have a slight curl or kink to it. To straighten the fly line, you can stretch it out between your hands. Hold one end of the line firmly and use your other hand to stretch the line out, applying gentle and even pressure. This will help remove any kinks or curls and ensure that the line is straight and ready for use.
Measuring and Cutting the Backing
Next, you’ll need to measure and cut the backing. Backing is a strong, thin line that is attached to the fly line to provide extra length and to prevent the loss of a fish by running out of line. To measure the backing, you can use a tape measure or ruler. Determine the desired length of backing based on your fishing needs and cut it using a pair of scissors. It’s important to note that the length of backing may vary depending on personal preference and the type of fishing you will be doing.
Attaching the Backing to the Fly Line
Now that you have both the fly line and backing prepared, it’s time to attach the two together. There are several methods for attaching the backing to the fly line, including the nail knot, loop-to-loop connection, and Albright knot. In this guide, we will focus on the nail knot method.
To tie a nail knot, you will need a nail knot tool. This tool is designed to assist in creating a secure knot between the backing and the fly line. Begin by inserting the nail knot tool through the center of the fly line, leaving a small loop at the end. Take the end of the backing and wrap it around the tool and the fly line, making sure to leave a tag end.
Next, carefully thread the tag end of the backing through the loop at the end of the fly line. Hold the tag end and the standing end of the backing and begin to pull the nail knot tool out. As you do this, the loop will tighten around the backing, securing it to the fly line. Once the knot is tight, you can remove the nail knot tool and trim any excess backing.

Attaching the backing to the fly line is a crucial step in ensuring that your equipment is ready for a successful fishing experience. The nail knot provides a strong and secure connection between the two lines, allowing for smooth casting and retrieval.
In the next section, we will explore in detail the process of tying the nail knot, including the steps of inserting the nail knot tool, wrapping the backing around the tool, forming the nail knot, and tightening the knot. Stay tuned for our step-by-step instructions to help you master this essential knot tying technique.
Tying the Nail Knot
Tying the nail knot is an essential skill for fly fishers who want to ensure a secure connection between their fly line and backing. This knot provides strength and reliability, giving you the confidence to cast your line without worrying about it coming apart. In this section, we will guide you through the process of tying the nail knot step by step, from inserting the nail knot tool to tightening the knot.
Inserting the Nail Knot Tool
To begin tying the nail knot, you will need a nail knot tool. This handy device helps you create a compact and sturdy knot. Start by threading the end of your backing through the small hole at the bottom of the tool. Make sure to leave a few inches of backing hanging out, as you will need this later for wrapping.
Wrapping the Backing around the Tool
Once the backing is threaded through the tool, hold onto the tool firmly with one hand while using your free hand to wrap the backing around the tool. Make approximately six to eight wraps, ensuring that each wrap is tight and snug against the previous one. This will create a strong foundation for the nail knot.

Forming the Nail Knot
After wrapping the backing around the tool, carefully slide the wraps off the tool, keeping them in place. You should now have a series of wraps that resemble a coiled spring. Hold the wraps in your hand, making sure they don’t come undone.
Next, take the loose end of the backing and thread it through the small gap between the tool and the wrapped coils. Gently pull the loose end through until it emerges from the other side. This will form the initial structure of the nail knot.
Tightening the Knot
With the loose end of the backing now through the wraps, it’s time to tighten the knot. Hold the loose end and the standing part of the backing firmly, then pull them in opposite directions. As you do this, you will notice the wraps becoming more compact and the knot taking shape.
Continue pulling until the knot is snug against the fly line. Take a moment to ensure that the wraps are neatly aligned and that the knot is secure. A well-tied nail knot should be tight and streamlined, minimizing any potential snagging or tangling.
Congratulations! You have successfully tied a nail knot, creating a strong connection between your fly line and backing. This knot will give you the confidence to tackle even the most challenging fishing conditions.
Now that you have mastered the nail knot, let’s move on to the next steps in preparing your fly line and backing. We will cover important topics such as cutting excess backing, securing the knot, and testing its strength. Remember to refer back to our earlier sections for comprehensive instructions and tips on each aspect of tying a fly line to backing.
Trimming and Finishing
When it comes to tying a fly line to backing, the process doesn’t end with forming the nail knot. Trimming and finishing are essential steps to ensure a secure connection that will withstand the rigors of fly fishing. In this section, we will discuss cutting excess backing, securing the knot, and testing its strength.
Cutting Excess Backing
Once you have tied the nail knot and tightened it properly, you may notice that there is excess backing extending beyond the knot. It is important to trim this excess to achieve a neat and tidy finish. Using a pair of sharp scissors, carefully cut the backing as close to the knot as possible without damaging the knot itself. This will prevent any loose ends from tangling or interfering with your casting.
Securing the Knot
After trimming the excess backing, it is crucial to ensure that the nail knot is securely fastened. You can do this by applying a small amount of adhesive or glue to the knot. This will help to prevent any slippage or loosening of the knot over time. There are specialized knot sealants available in the market that are designed specifically for this purpose. Apply a thin layer of the sealant to the knot and let it dry completely before proceeding.
Testing the Knot
Before you head out to the water, it is important to test the strength and reliability of the knot. A weak or faulty knot can lead to lost fish and frustration. To test the knot, hold the fly line and backing firmly and give it a strong pull. Apply steady pressure to ensure that the knot holds without slipping or breaking. If the knot feels secure and shows no signs of weakness, you can have confidence in its performance.
It is also a good practice to periodically inspect the knot during your fishing trips. Check for any signs of wear or damage, such as fraying or unraveling. If you notice any issues, it is best to re-tie the knot before it fails on you.
To summarize, trimming and finishing are important steps in tying a fly line to backing. Cutting excess backing, securing the knot with adhesive, and testing its strength are all crucial for a secure and reliable connection. By paying attention to these details, you can ensure that your fly line remains securely attached to the backing, giving you the confidence to cast with ease and focus on landing that perfect catch.
Now that we have covered trimming and finishing, let’s move on to alternative methods for tying a fly line to backing in the next section.
Alternative Methods for Tying a Fly Line to Backing
Loop-to-Loop Connection
When it comes to tying a fly line to backing, one popular alternative method is the loop-to-loop connection. This technique offers several advantages and is commonly used by anglers. The loop-to-loop connection allows for a quick and easy way to attach and detach the fly line from the backing, making it convenient for changing lines or leaders.
To create a loop-to-loop connection, you will need to have a loop at the end of your fly line and a loop at the end of your backing. If your fly line does not have a loop, you can easily create one using a loop knot or a nail knot. Similarly, if your backing does not have a loop, you can use a bimini twist or an Albright knot to form a loop.
Once you have the loops prepared, simply pass the loop of the backing through the loop of the fly line and vice versa. Make sure the loops are aligned and then pull both ends to tighten the connection. This will create a strong and secure link between the fly line and backing.
Using a loop-to-loop connection provides several benefits. Firstly, it allows for easy line changes, which can be particularly useful when switching between different fishing conditions or target species. Additionally, it reduces the risk of line damage when attaching or detaching the fly line, as there is no need to knot or manipulate the line directly.
Another advantage of the loop-to-loop connection is that it creates a smooth transition between the fly line and backing. This ensures that there are no bulky knots or obstacles that could impede the line’s movement through the rod guides, resulting in improved casting performance and line control.
Albright Knot
Another alternative method for tying a fly line to backing is the Albright knot. This knot is known for its strength and reliability, making it a popular choice among anglers.
To tie an Albright knot, start by doubling the end of your backing and create a small loop. Pass the end of the fly line through the loop and make several wraps around the doubled section of the backing. The number of wraps will depend on the diameter of your lines, but usually, 8-10 wraps are sufficient. After wrapping, pass the end of the fly line back through the loop and pull it tight. Finally, trim any excess line.
The Albright knot creates a strong and secure connection between the fly line and backing. Its structure allows for a smooth transfer of energy during casting and retrieving, ensuring efficient line control and accuracy.
One advantage of the Albright knot is that it can be used to connect lines of different diameters. This makes it a versatile option, as it allows anglers to use different types of backing or fly lines without needing additional connectors or adapters.
When tying an Albright knot, it’s important to ensure that the wraps are tight and neat. Loose wraps may cause the knot to slip or fail under pressure. Taking the time to carefully wrap and tighten the knot will greatly increase its strength and reliability.
In summary, both the loop-to-loop connection and the Albright knot are effective alternative methods for tying a fly line to backing. The loop-to-loop connection offers convenience and easy line changes, while the Albright knot provides strength and versatility. Experiment with both methods to find the one that works best for your fishing needs. Remember to practice tying these knots until you can confidently tie them on the water, and always double-check the integrity of your connections before casting.
Tips for Tying a Secure Knot
When it comes to fly fishing, tying a secure knot is essential for ensuring that your fly line is securely attached to the backing. A poorly tied knot can lead to lost fish and frustrating moments on the water. In this section, we will explore some valuable tips that will help you tie a knot that will hold strong and withstand the pressure of a fighting fish.
Wetting the Knot
One of the most important tips for tying a secure knot is to wet it before tightening. Why is wetting the knot so crucial? Well, when you wet the knot, it reduces friction and allows the knot to slide more smoothly into place. This prevents the knot from weakening or breaking when you tighten it.
To wet the knot, simply moisten it with saliva or water. Take your time to ensure that the entire knot is thoroughly wetted. This small step can make a big difference in the strength and reliability of your knot.
Applying Pressure While Tightening
Another key tip for tying a secure knot is to apply pressure while tightening. Many anglers make the mistake of simply pulling on the line without applying any pressure. This can result in a loose knot that is prone to slipping or coming undone.
To tie a knot that will hold, it’s important to apply pressure while tightening. This can be done by holding the fly line and backing firmly between your fingers and pulling on the tag end of the knot. As you pull, gradually increase the pressure until the knot is snug and secure. The extra pressure will help to ensure that the knot stays in place even when faced with the force of a hooked fish.
Checking for Slippage
After tying a knot, it’s crucial to check for slippage. This is especially important if you’re using monofilament or fluorocarbon line, as these materials can sometimes slip when tied incorrectly.
To check for slippage, gently tug on the line above and below the knot. If the knot holds firm and doesn’t slip, you’re good to go. However, if you notice any slippage, it’s important to re-tie the knot before heading out on the water. Taking the time to double-check your knots will help prevent any potential disappointment or frustration when you hook into a fish.
In summary, tying a secure knot is essential for successful fly fishing. By wetting the knot, applying pressure while tightening, and checking for slippage, you can ensure that your fly line is securely attached to the backing. These simple yet effective tips will give you the confidence to know that your knots will hold, allowing you to focus on the thrill of hooking into that elusive fish.
Remember, practice makes perfect, so take the time to practice tying knots and become comfortable with the process. With time and experience, you’ll develop your own technique and find what works best for you. So, go out there, tie those knots, and enjoy the incredible world of fly fishing!
Troubleshooting Common Issues
When it comes to tying a fly line to backing, there are a few common issues that anglers may encounter. Understanding these issues and knowing how to troubleshoot them can ensure that your knot is secure and reliable. In this section, we will discuss three common problems that may arise: knot slipping, knot breaking, and tangled backing.
Knot Slipping
One of the most frustrating issues that anglers may face when tying a fly line to backing is the knot slipping. This can happen if the knot is not properly tightened or if the materials used are not suitable for creating a secure knot.
To prevent knot slipping, it is important to ensure that you apply enough pressure while tightening the knot. Use your nail knot tool or a similar device to wrap the backing tightly around the fly line, forming a secure knot. Additionally, wetting the knot before tightening can help reduce friction and increase the knot’s strength.
Another tip to prevent knot slipping is to check for any signs of slippage after the knot is tightened. Gently tug on the fly line and backing to ensure that the knot holds its ground. If you notice any slippage, it is crucial to re-tighten the knot before heading out to fish. Taking the time to double-check the knot’s security can save you from losing a fish due to a slipped knot.
Knot Breaking
While a properly tied knot should be strong and reliable, there may be instances where the knot breaks unexpectedly. This can be frustrating and can potentially cost you a fish.
To avoid knot breaking, it is essential to choose the right materials for tying the knot. High-quality backing and a strong fly line are crucial for creating a secure knot. Additionally, using the proper technique for tying the knot can also help prevent breakage.
Applying pressure while tightening the knot is important, but it is equally important not to apply too much force. Over-tightening the knot can weaken the materials and increase the risk of breakage. Find a balance between tightness and strength when tying the knot.
If you experience knot breaking, it may be necessary to inspect the materials you are using. Check for any signs of wear or damage that could compromise the knot’s integrity. Replace any worn or damaged materials to ensure a strong and reliable connection between the fly line and backing.
Tangled Backing
Another issue that anglers may encounter when tying a fly line to backing is tangled backing. This can happen when the backing is not properly stored or when the line is being unspooled.
To prevent tangled backing, it is important to coil the line and backing properly when not in use. Avoid loosely wrapping the line around your hand or storing it in a tangled mess. Instead, use a line spool or reel case to keep the line and backing organized and tangle-free.
When unspooling the fly line, take care to avoid creating any twists or tangles in the backing. Slowly and evenly unspool the line, ensuring that the backing remains straight and untangled. If you notice any tangles or twists, take the time to untangle them before proceeding with tying the knot.
In some cases, tangled backing may occur despite your best efforts. If you find yourself with tangled backing, take a moment to unwind and straighten it before continuing. Trying to tie a knot with tangled backing can result in a weak and unreliable connection.
By being aware of these common troubleshooting issues and implementing the necessary preventative measures, you can ensure that your fly line is securely tied to the backing. Knot slipping, knot breaking, and tangled backing can be frustrating obstacles, but with the right techniques and materials, you can overcome them and enjoy a successful day on the water.
Properly Storing Tied Fly Line to Backing
When it comes to fly fishing, properly storing your tied fly line and backing is essential for maintaining their longevity and performance. In this section, we will explore some best practices for coiling the line and backing, using line spools or reel cases, and avoiding direct sunlight and extreme temperatures. By following these tips, you can ensure that your equipment remains in top condition, ready for your next fishing adventure.
Coiling the Line and Backing
Coiling the line and backing is a crucial step in storing them properly. By coiling them carefully, you prevent tangles and kinks that can affect their performance on the water. Here are some steps to follow:
- Start by holding the end of the fly line and backing together.
- Create a small loop by crossing the line and backing over each other.
- Hold the loop with one hand and continue to make large, loose coils with the line and backing.
- Make sure to keep the coils loose and avoid twisting the line and backing.
- Once you have coiled the entire line and backing, secure the coils with a rubber band or a piece of string.
- Store the coiled line and backing in a cool, dry place away from direct sunlight.
By coiling the line and backing in this manner, you can prevent knots and tangles that can be frustrating to deal with when you’re out on the water.
Using Line Spools or Reel Cases
Using line spools or reel cases is another excellent method for storing your tied fly line and backing. Line spools are designed specifically for this purpose and provide a convenient way to keep your line organized and protected. Here are some benefits of using line spools or reel cases:
- Organization: Line spools or reel cases allow you to keep your fly line and backing neatly organized, making it easier to access when you’re ready to hit the water.
- Protection: Line spools and reel cases provide protection against dust, dirt, and UV rays, which can degrade the quality of your line over time.
- Portability: Line spools are lightweight and compact, making them easy to transport. You can simply pack them in your fishing bag or tackle box without taking up much space.
When using line spools or reel cases, make sure to wind the line and backing onto the spool or reel carefully. Avoid any twists or tangles that may affect the line’s performance.
Avoiding Direct Sunlight and Extreme Temperatures
Direct sunlight and extreme temperatures can have a detrimental effect on the quality and lifespan of your fly line and backing. Here’s why it’s important to avoid exposing them to these elements:
- Sunlight: Prolonged exposure to direct sunlight can cause the line and backing to fade, weaken, and become brittle. UV rays can degrade the materials, resulting in decreased performance and durability.
- Extreme Temperatures: Extreme heat or cold can also impact the structural integrity of the line and backing. High temperatures can cause the line to expand, while freezing temperatures can make it more prone to cracking and breaking.
To protect your fly line and backing from these elements, consider the following tips:
- Storage: Store your line and backing in a cool, dry place away from direct sunlight. A closet or drawer is an ideal location.
- Cover Up: If you’re fishing in hot and sunny conditions, consider using a line cover or a reel cover to shield the line and backing from direct sunlight.
- Transportation: When transporting your gear, avoid leaving it in a hot car or exposed to extreme temperatures for extended periods. Instead, bring it inside or find a shaded area to keep it cool.
By taking these precautions, you can extend the lifespan of your fly line and backing, ensuring they remain in excellent condition for your future fishing trips.
In summary, properly storing your tied fly line and backing is essential for maintaining their performance and longevity. Coiling the line and backing, using line spools or reel cases, and avoiding direct sunlight and extreme temperatures are all crucial steps in ensuring their proper care. By following these guidelines, you can protect your equipment investment and enjoy many successful fishing adventures to come.


