Want to learn how to tie a blood knot? Follow our step-by-step instructions and tips for a secure knot. Wet the line, overlap the ends, wrap and pass through the loop. Also, discover alternative knots for similar purposes.
Materials Needed for Tying a Blood Knot
To tie a blood knot successfully, you will need a few essential materials. These materials will ensure that you have everything you need to tie the knot effectively and securely. Let’s take a closer look at the materials you’ll need:
Fishing Line
The first material you’ll need for tying a blood knot is fishing line. The type of fishing line you choose is crucial, as it needs to be strong and durable. Monofilament or fluorocarbon fishing lines are commonly used when tying blood knots. They offer the necessary strength and flexibility required for a secure knot.
When selecting the fishing line, consider the pound test rating that matches the type of fish you are targeting. Different fish species require different line strengths, so choose accordingly. Additionally, make sure the fishing line is in good condition, without any knots or tangles that could weaken the knot.
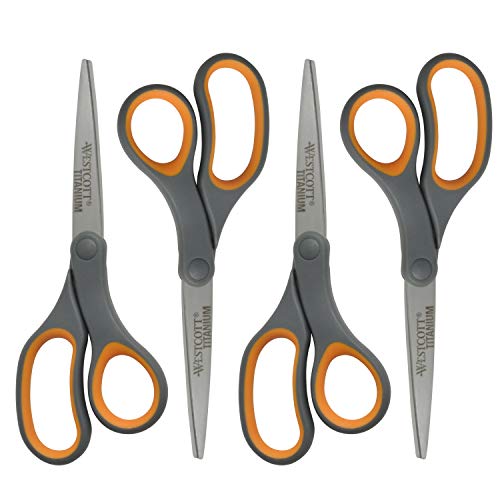
Scissors
Another essential material for tying a blood knot is a pair of scissors. Scissors will be used to cut the fishing line once the knot is complete. It’s crucial to have a sharp pair of scissors to ensure clean and precise cuts. Dull scissors may lead to frayed edges, compromising the strength of the knot.

When choosing scissors, opt for a pair with small, sharp blades. This will allow you to cut the fishing line easily without causing any damage. It’s also a good idea to have a dedicated pair of scissors for fishing, as they can become coated with fish slime and other debris over time.
Having the right materials is the first step towards successfully tying a blood knot. Make sure you have a suitable fishing line and a sharp pair of scissors to ensure a secure and reliable knot.
Here is a table summarizing the materials needed for tying a blood knot:
| Materials |
|---|
| Fishing Line |
| Scissors |
By gathering these materials, you’ll be well-prepared to move on to the step-by-step instructions for tying a blood knot.
Step-by-Step Instructions for Tying a Blood Knot
Tying a blood knot may seem daunting at first, but with practice and patience, it can become second nature. In this section, we will go through each step of tying a blood knot in detail. By following these instructions, you’ll be able to tie a strong and reliable blood knot for your fishing needs.

Step 1: Overlap the Ends
To begin tying a blood knot, you will need to overlap the ends of the two fishing lines. Make sure the ends are parallel and facing in opposite directions. The length of overlap will depend on your preference and the thickness of the lines. As a general guide, a 6-inch overlap should be sufficient.
Step 2: Wrap the First End
Take the first end of the fishing line and start wrapping it around the second line. Make sure to wrap it at least 5 to 7 times. The wraps should be tight and close together, without overlapping each other. This will ensure that the knot is secure and won’t slip during use.
Step 3: Wrap the Second End
Next, take the second end of the fishing line and wrap it around the first line. Just like in the previous step, make 5 to 7 wraps around the first line. Ensure that the wraps are tight and evenly spaced. These wraps will interlock with the wraps from the first end, creating the blood knot.
Step 4: Pass the First End Through the Loop
Now, it’s time to pass the first end of the fishing line through the loop that was formed by the wraps. Insert the end through the loop from the side opposite to where it came out. Gently pull the end until it is snug against the knot. This will create a loop with the first end passing through it.
Step 5: Pass the Second End Through the Loop
Similarly, take the second end of the fishing line and pass it through the same loop that the first end went through. Again, insert the end through the loop from the opposite side. As you pull the end, make sure to keep the knot tight and secure. This step completes the interlocking of the two ends.

Step 6: Tighten the Knot
To finish tying the blood knot, hold onto both ends of the fishing lines and gently pull them in opposite directions. As you tighten the knot, make sure to maintain tension on both ends. This will ensure that the wraps and interlocking loops are snug and secure. Once the knot is tightened, trim off any excess line.
Congratulations! You have successfully tied a blood knot. Practice this process repeatedly to improve your knot-tying skills and to achieve a stronger and more reliable knot.
Now that you have learned the step-by-step instructions for tying a blood knot, let’s move on to some and tricks that will help you master this knot even further.
Tips for Tying a Blood Knot
Tying a blood knot can be challenging, especially for beginners. However, with the following tips, you’ll be able to tie a blood knot more efficiently and effectively.
Wet the Line Before Tying
Before starting the knot-tying process, it’s helpful to wet the fishing line. This will reduce friction and make it easier to manipulate and tighten the knot. Wetting the line also helps to prevent it from overheating and potentially weakening the knot during the tying process.
Use Your Teeth to Hold the Ends
When wrapping the ends of the fishing lines around each other, it can be tricky to hold them securely in place. To make this step easier, you can use your teeth to grip the ends while wrapping. Be careful not to bite down too hard, as this may damage the line. Using your teeth as an extra hand can provide the stability needed for a neat and tight blood knot.
Practice Makes Perfect
As with any skill, practice is key to becoming proficient at tying a blood knot. Take the time to practice this knot-tying technique regularly, even when you’re not out fishing. By repetitively tying blood knots, you’ll develop muscle memory and improve your dexterity, making it easier to tie the knot quickly and accurately in real fishing situations.
Remember, the more you practice, the more confident you will become in your ability to tie a blood knot effectively. So, dedicate some time to honing your skills and soon enough, you’ll be able to tie this knot with ease.
Now that you are familiar with the tips and tricks for tying a blood knot, it’s important to be aware of some common mistakes that could compromise the integrity of the knot.
Common Mistakes to Avoid When Tying a Blood Knot
Even experienced anglers can make mistakes when tying a blood knot. By being aware of these common errors, you can avoid them and ensure that your blood knots are strong and reliable.

Crossing the Lines Improperly
One of the most common mistakes when tying a blood knot is crossing the lines improperly. When wrapping the ends around each other, it’s essential to ensure that they cross over the opposite line, rather than crossing over themselves. Crossing the lines improperly can weaken the knot and make it prone to slipping or breaking.
Pulling the Ends Too Tight
Another mistake to avoid is pulling the ends of the fishing lines too tight when tightening the knot. While it’s important to have a snug and secure knot, excessive pulling can put unnecessary strain on the lines. This can lead to weakened knots or even line breakage. Remember to maintain control and apply even tension to both ends during the tightening process.
By being mindful of these common mistakes, you can greatly improve the quality and reliability of your blood knots. Now, let’s explore some alternative knots that serve a similar purpose.
Alternative Knots for Similar Purposes
While the blood knot is an excellent choice for joining two fishing lines of similar thickness, there are other knots that can also serve a similar purpose. Here are two alternative knots that you can consider for your fishing needs.
Surgeon’s Knot
The surgeon’s knot is a reliable knot for connecting fishing lines of different diameters or materials. It is particularly useful when joining a thicker line to a thinner one. To tie a surgeon’s knot, overlap the ends of the lines and make a simple overhand knot. Then, pass the ends through the loop created by the overhand knot one more time. Finally, tighten the knot by pulling the ends and trim any excess line.
Double Uni Knot
The double uni knot is another versatile knot that can be used to join two fishing lines together. It is especially effective when connecting lines of the same diameter. To tie a double uni knot, overlap the ends of the lines and make a loop with each end. Then, wrap one end around the other line and through the loop created by the opposite end. Repeat this process with the other line. Finally, tighten the knot by pulling both ends simultaneously and trim any excess line.
These alternative knots provide anglers with options when it comes to joining fishing lines. Depending on your specific needs and the lines you are working with, you can choose the knot that best suits your requirements.
Additionally, be aware of common mistakes such as crossing the lines improperly and pulling the ends too tight. By avoiding these errors, you can ensure that your blood knots are sturdy and secure. Lastly, consider alternative knots like the surgeon’s knot and double uni knot for different fishing line joining purposes.
Now that you have mastered the art of tying a blood knot, you can confidently tackle any fishing situation that comes your way. Happy fishing!
Tips for Tying a Blood Knot
Tying a blood knot may seem like a daunting task at first, but with a few tips and tricks, you’ll be able to master it in no time. In this section, we will explore some helpful techniques that will make the process easier and more efficient. So, let’s dive in and discover the secrets to tying a perfect blood knot!
Wet the Line Before Tying
One of the most important tips for tying a blood knot is to wet the fishing line before you begin. This simple step helps to lubricate the line, making it easier to manipulate and reducing the chances of it tangling or breaking. By wetting the line, you create a smoother surface that allows the knots to slide more easily into place.
To wet the line, you can either dip it in water or simply run it through your mouth. Yes, you read that right! Many experienced anglers swear by using their teeth to wet the line. By doing so, you add a layer of saliva that acts as a natural lubricant. Just be sure to clean the line thoroughly before using it again to avoid any unwanted taste or bacteria.
Use Your Teeth to Hold the Ends
Once you have wetted the line, the next tip is to use your teeth to hold the ends while tying the blood knot. This technique may sound peculiar, but it provides a secure grip and allows for better control during the tying process. By using your teeth, you can keep the ends in place without having to worry about them slipping or getting tangled.
To use your teeth effectively, hold the two ends of the line between your molars. Make sure to maintain a firm grip while still allowing some flexibility for maneuvering. This method frees up your hands, making it easier to follow the step-by-step instructions without any hindrance. Just be mindful of not applying too much pressure to avoid damaging the line or hurting yourself.
Practice Makes Perfect
As with any skill, practice is key to becoming proficient at tying a blood knot. While the instructions may seem overwhelming at first, repetition and perseverance will help you develop muscle memory and improve your technique. Don’t be disheartened if your initial attempts result in messy knots or frustration. Remember that even the most experienced anglers started from scratch.
Set aside some dedicated practice time, and focus on tying the blood knot repeatedly. Start with thicker lines and gradually move on to thinner ones as your skills progress. By practicing regularly, you will gain confidence in your abilities and be able to tie the knot effortlessly. Before you know it, you’ll be able to tie a blood knot with your eyes closed!
- Need to wet the line before tying
- Use your teeth to hold the ends
- Practice regularly to improve your technique
Common Mistakes to Avoid When Tying a Blood Knot
Crossing the Lines Improperly
When it comes to tying a blood knot, one of the most common mistakes that beginners make is crossing the lines improperly. This may seem like a simple step, but it is crucial for the strength and durability of the knot. Crossing the lines properly ensures that the knot holds tight and doesn’t unravel easily.
To avoid crossing the lines improperly, follow these steps:
Step 1: Overlap the Ends
Start by overlapping the ends of the two fishing lines. Make sure that the ends are aligned and parallel to each other. This will create a solid foundation for the knot.
Step 2: Wrap the First End
Take the first end of the fishing line and start wrapping it around the second line. Make sure to wrap it at least five times, keeping the wraps tight and close together. This will provide the necessary friction to secure the knot.
Step 3: Wrap the Second End
Next, take the second end of the fishing line and wrap it around the first line. Again, make sure to wrap it at least five times, keeping the wraps tight and close together. This will create a symmetrical and balanced knot.
Step 4: Pass the First End Through the Loop
After wrapping both ends, take the first end and pass it through the loop created by the two lines. This is a crucial step in tying a blood knot correctly. Make sure to pass the end through the loop from the same side it came out.
Step 5: Pass the Second End Through the Loop
Similarly, take the second end and pass it through the loop from the same side it came out. This will create a crossover point where the two lines intersect.
Step 6: Tighten the Knot
Once both ends are through the loop, it’s time to tighten the knot. Hold onto both ends firmly and slowly pull them away from each other. As you tighten the knot, make sure to keep the lines parallel and prevent any twisting or tangling. The knot should snugly secure the two lines together.
By following these steps and avoiding the mistake of crossing the lines improperly, you can tie a blood knot that is strong and reliable. Practice this technique, and soon you’ll be able to tie the knot effortlessly.
Pulling the Ends Too Tight
Another common mistake to avoid when tying a blood knot is pulling the ends too tight. While it’s important to tighten the knot, pulling the ends excessively can weaken the knot and even cause it to break under pressure.
To avoid pulling the ends too tight, keep these in mind:
- Don’t Overexert Force: When tightening the knot, apply a firm but gentle force. Avoid using excessive strength, as this can lead to over-tightening. Remember, the goal is to create a secure knot, not to strain the lines.
- Maintain Equal Tension: As you tighten the knot, make sure to maintain equal tension on both ends. This will ensure that the knot remains balanced and properly aligned. Unequal tension can weaken the knot and make it prone to slipping or unraveling.
- Test the Strength: After tightening the knot, give it a gentle tug to test its strength. The knot should hold firmly without any signs of slipping or loosening. If you notice any weakness, untie the knot and start again.
It’s important to strike the right balance between tightness and strength when tying a blood knot. By avoiding the mistake of pulling the ends too tight, you can ensure that your knot is reliable and effective in various fishing situations.
Remember, practice makes perfect. Take your time to master the technique, and soon you’ll be able to tie a blood knot flawlessly every time.
Now that you’re aware of the common mistakes to avoid when tying a blood knot, let’s move on to some alternative knots that serve similar purposes.
Alternative Knots for Similar Purposes
Surgeon’s Knot
The Surgeon’s Knot is a versatile knot that is commonly used in fishing and other outdoor activities. It is often used to join two fishing lines of different diameters or materials together. The knot is known for its strength and reliability, making it a popular choice among anglers.
To tie the Surgeon’s Knot, follow these simple steps:
- Step 1: Overlap the Ends – Start by overlapping the two ends of the fishing lines. Make sure that the overlapped section is long enough to work with.
- Step 2: Create a Loop – Take one end of the line and create a loop by making a simple overhand knot. Leave a small tag end hanging from the loop.
- Step 3: Pass the Other End Through the Loop – Take the other end of the line and pass it through the loop you created in the previous step. Make sure to pass the end through the loop twice.
- Step 4: Tighten the Knot – Hold both ends of the line and the loop, then pull them tight to tighten the knot. Make sure to wet the lines before tightening to prevent friction and heat buildup.
The Surgeon’s Knot is known for its simplicity and strength. It is a reliable knot that can be tied quickly, making it a great choice for anglers who want to spend more time fishing and less time tying knots.
Double Uni Knot
The Double Uni Knot is another popular knot that is often used in fishing. It is particularly useful for joining two fishing lines of similar diameters together, creating a strong and secure connection. This knot is commonly used when attaching a leader line to the main fishing line.
To tie the Double Uni Knot, follow these steps:
- Step 1: Overlap the Ends – Start by overlapping the two ends of the fishing lines. Make sure that the overlapped section is long enough to work with.
- Step 2: Create a Loop – Take one end of the line and create a loop by making a simple overhand knot. Leave a small tag end hanging from the loop.
- Step 3: Wrap the Other End Around the Loop – Take the other end of the line and wrap it around the loop multiple times, making sure to pass it through the loop each time.
- Step 4: Wrap the First End Around the Other Line – Take the first end of the line and wrap it around the other line multiple times, making sure to pass it through the loop each time.
- Step 5: Tighten the Knot – Hold both ends of the lines and the loop, then pull them tight to tighten the knot. Make sure to wet the lines before tightening to prevent friction and heat buildup.
The Double Uni Knot is a reliable and strong knot that is commonly used by anglers. It provides a secure connection between two lines and is relatively easy to tie. With practice, anglers can quickly tie this knot in various fishing scenarios.
In conclusion, both the Surgeon’s Knot and the Double Uni Knot are excellent alternatives to the Blood Knot. These knots offer strength, reliability, and ease of tying. Whether you need to join lines of different diameters or similar ones, these alternative knots will serve you well in your fishing adventures. Practice tying these knots to become proficient and confident in using them. Remember, the more knots you know, the more versatile and adaptable you become as an angler.


