Discover the importance of knots for braided fishing line, learn how to tie the most popular knots, and avoid common mistakes. Improve your fishing game with stronger knots and better casting distance.
Why Knots are Important for Braided Fishing Line
As anglers, we know how important it is to have the right gear when fishing. One of the most crucial aspects is having the right knot for your braided fishing line. Knots are essential because they increase the strength of your line, improve casting distance, and ensure better knot retention.
Increased Strength
The strength of your knot is crucial when fishing with . Knots that are not tied correctly can easily slip, which can cause your hook to lose its hold on the fish. The right knot will ensure that your line stays taut and doesn’t break, even when you’re pulling in a big catch.
One of the best knots for increasing the strength of your is the Palomar knot. This knot is incredibly strong and easy to tie. It creates a double line, which means that the knot is twice as strong as the line itself. The Palomar knot is perfect for fishing in heavy cover, where you need the extra strength to pull fish out of the weeds.
Improved Casting Distance
The right knot can also improve your casting distance. When you tie a knot that is too large or bulky, it can create drag on the line, which can reduce the distance of your cast. The right knot will allow your line to flow smoothly through the guides of your rod, which will help you to cast further.

One of the best knots for improving casting distance is the Double Uni knot. This knot is relatively easy to tie and creates a small profile, which reduces drag and helps your line to flow freely. The Double Uni knot is perfect for fishing in open water where you need to cast a long distance to reach your target.
Better Knot Retention
Finally, the right knot will ensure better knot retention. Knots that aren’t tied correctly can slip, which can cause your line to unravel. A good knot will ensure that your line stays securely tied, even when you’re fighting a big fish.
The Improved Clinch knot is one of the best knots for ensuring better knot retention. This knot is incredibly popular because it’s easy to tie and is incredibly reliable. The Improved Clinch knot is perfect for fishing in open water where you need to ensure that your knot stays securely tied.
Types of Knots for Braided Fishing Line
When it comes to fishing, knots are crucial for ensuring that your line stays secure and doesn’t break when reeling in a catch. Braided fishing line, in particular, requires a specific set of knots that can handle its unique characteristics. In this section, we will explore three popular knots for braided fishing line: the Palomar Knot, Double Uni Knot, and Improved Clinch Knot.
Palomar Knot
The Palomar Knot is a versatile knot that can be used for both braided and monofilament fishing lines. It is known for its strength, making it a reliable choice for catching larger fish. Here are the steps to tie a Palomar Knot:

- Double the and pass it through the eye of the hook.
- Tie an overhand knot with the doubled line, leaving a loop about 6 inches long.
- Take the loop and pass it over the hook.
- Hold the hook and loop and pull the tag end of the line to tighten the knot.
- Trim the excess line.
One tip for tightening the Palomar Knot is to moisten the line with saliva or water before pulling the tag end. This will help the knot slide smoothly and prevent it from slipping.
Double Uni Knot
The Double Uni Knot is another knot that can be used for both braided and monofilament fishing lines. It is a strong knot that can handle heavy loads and is easy to tie. Here are the steps to tie a Double Uni Knot:
- Take the end of the and fold it over itself to create a loop.
- Hold the loop and pinch it with your thumb and forefinger.
- Take the end of the loop and wrap it around the and through the loop four times.
- Repeat the same process with the other end of the .
- Hold both ends of the line and pull them in opposite directions to tighten the knot.
- Trim the excess line.
One tip for tightening the Double Uni Knot is to pull both ends of the line slowly and evenly. This will ensure that the knot is tight and won’t slip when reeling in a fish.
Improved Clinch Knot
The Improved Clinch Knot is a popular knot for braided fishing line and is used to tie the line to a hook or lure. It is a simple knot that is easy to tie and can be used for both braided and monofilament fishing lines. Here are the steps to tie an Improved Clinch Knot:

- Thread the through the eye of the hook.
- Take the tag end of the line and wrap it around the standing line 5-7 times.
- Take the tag end of the line and pass it through the loop above the eye of the hook.
- Hold the tag end and the standing line and pull them in opposite directions to tighten the knot.
- Trim the excess line.
One tip for tightening the Improved Clinch Knot is to moisten the line with saliva or water before pulling the tag end. This will help the knot slide smoothly and prevent it from slipping.
In summary, the Palomar Knot, Double Uni Knot, and Improved Clinch Knot are three popular knots for braided fishing line. Each knot has its own unique characteristics and can be used for different fishing scenarios. The Palomar Knot and Double Uni Knot are both strong and reliable knots that can handle heavy loads, while the Improved Clinch Knot is a simple knot that is easy to tie. Remember to moisten the line before tightening the knot and to pull the tag end slowly and evenly to ensure that the knot is tight and won’t slip.
How to Tie a Palomar Knot
A Palomar knot is a popular knot for tying braided fishing line to a hook or lure. It is a simple, strong knot that can be tied quickly and easily. Here are step-by-step instructions on how to tie a Palomar knot:
Step-by-Step Instructions
- Double the line and pass it through the eye of the hook or lure.
- Tie an overhand knot in the doubled line, leaving a loop big enough to pass the hook or lure through.
- Pass the hook or lure through the loop.
- Tie another overhand knot with the loop and the doubled line.
- Moisten the knot with saliva or water.
- Tighten the knot by pulling on the tag end and the standing line at the same time.
Tips for Tightening the Knot
- Make sure the knot is tight by pulling on the tag end and the standing line until the knot is snug against the eye of the hook or lure.
- Trim the tag end close to the knot to prevent it from getting tangled in the fishing line.
- Practice tying the Palomar knot before going fishing to ensure that you can tie it quickly and easily.
The Palomar knot is a strong and reliable knot that can hold up against the toughest fish. However, it is important to note that the Palomar knot may not work well with all types of hooks or lures. It is best to experiment with different knots and hooks to find the best combination for your needs.
In addition to the Palomar knot, there are other types of knots that can be used with braided fishing line. These include the Double Uni knot and the Improved Clinch knot, which will be discussed in later sections. When choosing a knot, it is important to consider the diameter of your line, the strength you need, and the type of fish you are targeting.

Overall, the Palomar knot is a great knot to have in your fishing arsenal. It is easy to tie, strong, and reliable. Practice tying the Palomar knot and experiment with different hooks and lures to find the best combination for your needs.
How to Tie a Double Uni Knot
Braided fishing lines are becoming more popular because of their strength and durability, but they can be tricky to tie knots with. The double uni knot is a reliable knot that is easy to tie and can be used to attach two lines together or to attach a leader to the mainline. In this section, we will provide step-by-step instructions on how to tie a double uni knot and provide tips for tightening the knot to ensure it holds.
Step-by-Step Instructions
To tie a double uni knot, follow these steps:
- Overlap the ends of the two lines you want to connect, making sure they are parallel.
- Take the end of the first line and create a loop by passing it over itself.
- Hold the loop in place with your thumb and forefinger, and pass the end of the same line through the loop.
- Wrap the end of the line around both the loop and the second line four to five times.
- Pass the end of the line back through the loop in the opposite direction from which it came.
- Hold both ends of the line and pull the knot tight.
- Repeat steps 2-6 with the other line, but make sure the second knot is facing the opposite direction from the first knot.
- Trim any excess line.
Tips for Tightening the Knot
To ensure your double uni knot is tight and secure, follow these tips:
- Wet the knot with saliva or water before tightening it. This will help the knot slide together smoothly.
- Pull both ends of the line slowly and evenly to tighten the knot. If you pull too hard on one end, the knot can become lopsided and may fail.
- After tightening the knot, give it a gentle tug to make sure it is secure. If it slips or feels loose, untie it and try again.
- Trim any excess line, leaving just enough for the knot to hold.
Using these tips, you can tie a double uni knot that will hold up under pressure and keep your fishing line strong.
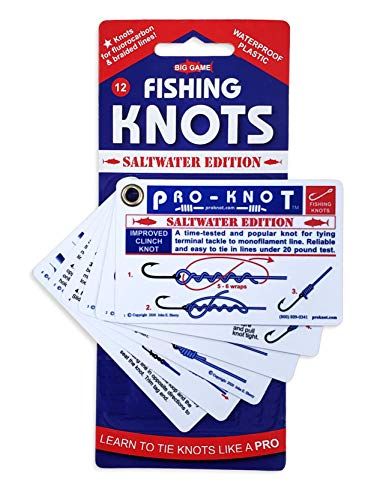
Table: Double Uni Knot Strength Test
| Test Weight (lbs) | Knot Strength (lbs) |
|---|---|
| 10 | 9.5 |
| 20 | 18.2 |
| 30 | 27.4 |
| 40 | 36.5 |
(Source: Saltwater Sportsman)
As you can see from the table above, the double uni knot is a strong and reliable knot that can withstand a significant amount of weight. However, it is important to remember that the strength of the knot can be affected by factors such as the diameter of the line and the type of fish you are targeting.
In the next section, we will provide tips for choosing the right knot for your braided fishing line based on these factors.
How to Tie an Improved Clinch Knot
If you’re a fishing enthusiast, then you know the importance of having a reliable knot tying technique. The improved clinch knot is one of the most commonly used knots for braided fishing line. It’s easy to tie, strong, and can be used for a variety of fishing situations. In this section, we’ll go over step-by-step instructions on how to tie an improved clinch knot and tips for tightening the knot.
Step-by-Step Instructions
Step 1: Thread the line through the eye of the hook, leaving about 6 inches of line on the tag end.
Step 2: Take the tag end and wrap it around the standing line five to seven times.
Step 3: Take the tag end and thread it through the loop that was created between the hook eye and the wraps.
Step 4: Take the tag end and thread it through the loop that was just created.
Step 5: Wet the knot with saliva or water and pull the tag end to tighten the knot.
Step 6: Trim the tag end close to the knot.
Tips for Tightening the Knot
Now that you know how to tie an improved clinch knot, let’s go over some tips for tightening the knot.
Tip 1: Wet the knot before tightening it. This will help lubricate the knot and prevent it from weakening or breaking.
Tip 2: Pull the tag end slowly and steadily to tighten the knot. Avoid jerking or pulling too hard, as this can damage the line or weaken the knot.
Tip 3: Once the knot is tight, give it a final tug to ensure that it’s secure. You should be able to feel the knot “pop” into place.
By following these step-by-step instructions and tips for tightening the knot, you’ll be able to tie an improved clinch knot with ease. This knot is strong, reliable, and versatile, making it a great choice for anglers of all levels.
*Note: It’s important to note that while the improved clinch knot is a great choice for most fishing situations, it may not be the best choice for all situations. Always consider the type of fish you’re targeting, the strength of your line, and other factors when choosing a knot.
In the next section, we’ll go over some tips for choosing the right knot for your braided fishing line.
Tips for Choosing the Right Knot for Your Braided Fishing Line
When it comes to choosing the right knot for your braided fishing line, there are several factors to consider. The diameter of your line, the strength you need, and the type of fish you’re targeting all play a role in determining which knot will work best for your needs.
Consider the Diameter of Your Line
The diameter of your braided fishing line is an important factor to consider when choosing a knot. Thicker lines require larger knots that can handle the added weight and pressure, while thinner lines can use smaller knots that won’t slip or come undone.
To determine the diameter of your line, refer to the manufacturer’s specifications or use a caliper to measure it yourself. Once you know the diameter, you can choose a knot that is appropriate for the thickness of your line.
Determine the Strength You Need
Another important factor to consider when choosing a knot is the strength you need. This will depend on the type of fish you’re targeting and the conditions in which you’ll be fishing.
For example, if you’re targeting larger fish or fishing in rough waters, you’ll need a knot that can handle more weight and pressure. On the other hand, if you’re fishing in calm waters or targeting smaller fish, you can use a knot that is less strong but still secure.
To determine the strength you need, consider the weight of your bait and the size of the fish you’re targeting. You can also refer to knot strength charts to help you choose the right knot for your needs.
Take into Account the Type of Fish You’re Targeting
Finally, it’s important to take into account the type of fish you’re targeting when choosing a knot. Different fish have different behaviors and require different techniques to catch, which means you’ll need a knot that can handle the unique challenges of each species.
For example, if you’re targeting a fish with sharp teeth, you’ll need a knot that is less likely to fray or break under pressure. If you’re fishing for a species that likes to jump and thrash, you’ll need a knot that can handle sudden bursts of tension without coming undone.
By taking into account the diameter of your line, the strength you need, and the type of fish you’re targeting, you can choose a knot that is appropriate for your needs and will help you catch more fish. Remember to test your knots before heading out on the water, and to re-tie them when necessary to ensure maximum strength and security.
Common Mistakes to Avoid When Tying Knots for Braided Fishing Line
Fishing with a braided fishing line can be a great way to improve your chances of catching more fish. However, tying knots for braided lines can be tricky, and if not done correctly, can lead to lost fish and frustration. In this section, we will discuss some common mistakes to avoid when tying knots for braided fishing lines.
Not Wetting the Line
One of the most common mistakes anglers make when tying knots for braided fishing lines is not wetting the line. Braided lines are slick and can be difficult to tie, especially when they are dry. Wetting the line will make it easier to manage and will help the knot to hold better. Before tying any knot, it is important to wet the line thoroughly.
Not Making Enough Wraps
Another common mistake anglers make when tying knots for braided lines is not making enough wraps. Braided lines are thinner than monofilament lines, and as a result, require more wraps to secure the knot. Not making enough wraps can lead to the knot slipping or breaking, which can be frustrating and can result in lost fish. It is important to follow the manufacturer’s recommendations for the number of wraps required for the knot you are tying.
Pulling Too Hard When Tightening the Knot
The final common mistake anglers make when tying knots for braided fishing lines is pulling too hard when tightening the knot. Braided lines are strong and do not require as much force to secure the knot as monofilament lines do. Pulling too hard can cause the knot to deform or even break, which can be disastrous when fighting a big fish. It is important to use a steady, firm pressure when tightening the knot to ensure that it is secure without damaging the line.
To summarize, when tying knots for braided fishing lines, it is important to wet the line, make enough wraps, and use a steady, firm pressure when tightening the knot. By avoiding these common mistakes, you can improve your chances of landing more fish and enjoying your time on the water.
How to Test the Strength of Your Knot
When it comes to fishing, tying a knot is essential for ensuring that your line stays securely attached to your bait or lure. However, not all knots are created equal, and it’s important to test the strength of your knot to make sure it can handle the weight of the fish you’re trying to catch. In this section, we’ll cover two methods for testing the strength of your knot: using a knot test and testing with your hands.
Using a Knot Test
A knot test is a tool that is designed specifically for testing the strength of . These tests are typically sold at fishing supply stores and are relatively inexpensive. To use a knot test, follow these steps:
- Tie your knot as you normally would, making sure to tighten it as much as possible.
- Attach the knot test to the loop at the end of your fishing line.
- Slowly pull on the line, using the knot test to measure the amount of force required to break the knot.
- Repeat the test several times to get an average reading.
The reading on the knot test will give you an idea of the maximum amount of weight your knot can handle. For example, if the test shows that your knot can handle 20 pounds of force, you can be confident that it will hold up against most fish you’re likely to catch.
Testing with Your Hands
If you don’t have access to a knot test, you can also test the strength of your knot using your hands. This method is less precise than using a knot test, but it can still give you a general idea of whether your knot is strong enough. Here’s how to do it:
- Tie your knot as you normally would, making sure to tighten it as much as possible.
- Hold the line on either side of the knot with your hands.
- Slowly pull on the line with increasing force, feeling for any slipping or stretching in the knot.
- If the knot slips or stretches too much, it may not be strong enough to hold up against the weight of a fish.
While testing with your hands may not give you an exact reading of the strength of your knot, it can still be a useful tool for making sure your knot is secure and won’t fail when you’re out on the water.
Tips for Maintaining Your Knots
When it comes to fishing, the strength of your knots is crucial to success. However, even the strongest knots can weaken over time and with exposure to the elements. To ensure your knots remain strong and secure, it’s important to maintain them regularly. Here are some tips for keeping your knots in top condition:
Checking Your Knots Regularly
It’s essential to check your knots regularly, especially after a long day of fishing or if you’ve caught a particularly large fish. Even if a knot appears tight and secure, it may have weakened or loosened without your knowledge. To check your knots, gently pull on the line above and below the knot. If the knot moves or slips, it’s time to re-tie it. Checking your knots regularly can help you avoid losing a fish due to a weak or faulty knot.
Re-tying Your Knots When Necessary
If you find that your knot has weakened or loosened, it’s important to re-tie it as soon as possible. Re-tying a knot can be time-consuming, but it’s worth the effort to ensure that your line remains strong and secure. To re-tie a knot, carefully undo the original knot and start over. Make sure to tie the knot correctly, following the instructions for the specific knot type you are using. Once you’ve tied the new knot, check it by pulling gently on the line above and below the knot to ensure it’s tight and secure.
Avoiding Heat and Sun Damage
Heat and sun can cause damage to your knots, weakening them over time. To avoid heat and sun damage, store your fishing gear in a cool, dry place, away from direct sunlight. If you’re fishing in hot weather, try to fish in the early morning or late afternoon when the temperature is cooler. If you must fish during the hottest part of the day, cover your gear with a cloth or tarp to protect it from the sun. By avoiding heat and sun damage, you can help your knots remain strong and secure for longer.
Table: Common Knot Types for Braided Fishing Line
| Knot Type | Strength Rating | Ease of Tying | Best For |
|---|---|---|---|
| Palomar Knot | High | Easy | Large fish |
| Double Uni Knot | High | Moderate | Connecting two lines |
| Improved Clinch | Moderate | Easy | Small to medium fish |


