Discover the types of fishing knots like Palomar, Improved Clinch, and Uni knots. Follow a step-by-step guide and expert tips for tying a fishing lure securely.
Types of Fishing Knots
Palomar Knot
The Palomar Knot is a popular choice among anglers for its simplicity and reliability. This knot is known for its strength, making it ideal for securing hooks and lures to the fishing line. To tie a Palomar Knot, simply double the line and pass it through the eye of the hook. Then, tie a simple overhand knot, forming a loop. Pass the loop over the hook and pull it tight. Trim any excess line for a clean finish. The Palomar Knot is a versatile knot that can be used in various fishing situations, making it a must-have in any angler’s repertoire.
Improved Clinch Knot
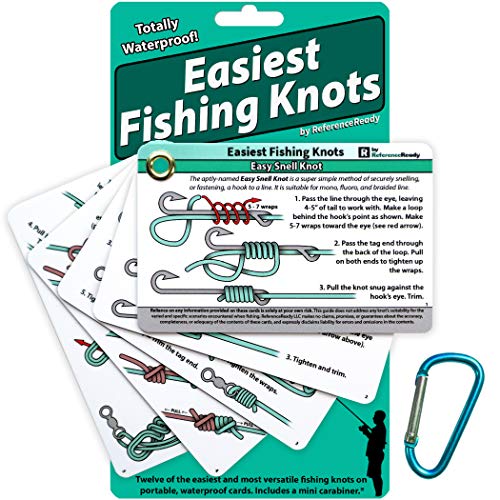
The Improved Clinch Knot is another essential knot for anglers, commonly used to attach a fishing line to a lure or hook. This knot is known for its strength and reliability, making it a go-to choice for many fishermen. To tie an Improved Clinch Knot, simply thread the line through the eye of the hook and make five to seven wraps around the standing line. Then, thread the tag end back through the loop near the eye of the hook. Moisten the knot before tightening to ensure a secure hold. Trim any excess line for a clean finish. The Improved Clinch Knot is a versatile knot that can be used in various fishing scenarios, making it a valuable skill for any angler to master.
Uni Knot
The Uni Knot, also known as the Duncan Knot, is a versatile knot that can be used for various fishing applications. This knot is known for its strength and ease of tying, making it a favorite among anglers. To tie a Uni Knot, simply double the line and pass it through the eye of the hook. Then, make a loop with the doubled line and wrap it around the standing line. Pass the tag end through the loop and pull tight. Trim any excess line for a neat finish. The Uni Knot is a reliable knot that can be used for attaching hooks, lures, swivels, and more. Whether you’re a novice angler or a seasoned pro, mastering the Uni Knot will serve you well in your fishing endeavors.
Tools Needed for Tying a Fishing Lure
When it comes to tying a fishing lure, having the right tools can make all the difference in creating a secure and effective knot. Let’s take a look at the essential tools you’ll need to have on hand:
Fishing Line
The is the most crucial tool when it comes to tying a fishing lure. It serves as the foundation for the knot and must be strong and durable to withstand the tension of reeling in a fish. When selecting a fishing line, consider the weight of the fish you’ll be targeting and choose a line that is appropriate for the task. Whether you prefer monofilament, fluorocarbon, or braided line, ensure that it is in good condition and free from any tangles or knots before starting to tie your lure.
Fishing Lure
The fishing lure itself is another essential tool for tying a successful knot. The lure is what will attract the fish to your line, so it’s important to choose the right lure for the type of fish you’re targeting. Whether you prefer soft plastics, crankbaits, spinners, or spoons, make sure that your lure is in good condition and securely attached to your line before casting it into the water. Additionally, consider the color and size of the lure to match the water conditions and the behavior of the fish in the area.
Pliers
Pliers are a handy tool to have when tying a fishing lure, especially when dealing with small hooks or tight knots. Pliers can help you grip the line securely and make it easier to manipulate the knot for a tight and secure finish. Additionally, pliers can be useful for cutting excess line or removing any barbs from the hook before tying your lure. Make sure to have a pair of durable and rust-resistant pliers in your tackle box to make the knot-tying process smoother and more efficient.
- Are you ready to take your fishing game to the next level with the right tools at your disposal?
- Remember, a well-equipped angler is a successful angler!
- Invest in quality tools to enhance your fishing skills and increase your chances of landing that big catch.
Step-by-Step Guide to Tying a Fishing Lure
Step 1: Thread the Line
When it comes to tying a fishing lure, the first step is to thread the line through the eye of the hook. This may sound simple, but it’s crucial to ensure that the line is properly threaded to prevent any mishaps while fishing. Take your time to carefully guide the line through the eye, making sure it is secure and won’t slip out easily. Remember, attention to detail in this step can make a big difference in the success of your fishing excursion.

Step 2: Form a Loop
Once the line is threaded through the hook, the next step is to form a loop. Creating a loop allows for flexibility and movement of the lure in the water, making it more enticing to fish. To form a loop, simply bring the end of the line back towards the main line, leaving a small gap between the two ends. This loop will serve as the foundation for the knot that will secure the lure in place.
Step 3: Wrap the Line
With the loop in place, it’s time to wrap the line around the main line and the loop to create a secure knot. This wrapping process may vary depending on the type of knot you choose to use, but the key is to ensure that the wraps are tight and evenly spaced. Proper wrapping will provide strength and durability to the knot, ensuring that your lure stays in place even when faced with strong currents or aggressive fish.
Step 4: Secure the Knot
The final step in tying a fishing lure is to secure the knot by pulling the ends of the line tightly. This action will tighten the wraps and lock them in place, creating a strong and reliable connection between the line and the lure. Once the knot is secure, trim any excess line to prevent tangling or interference with your fishing experience. Remember, a properly secured knot is the key to successful fishing, so take the time to ensure that it is done correctly.
Tips for Tying a Secure Fishing Knot
Wet the Line Before Tying
Before you start tying your fishing knot, it’s essential to wet the line. Why, you may ask? Well, by wetting the line, you reduce friction and heat, making it easier to manipulate and tie knots. Think of it like trying to slide two pieces of sandpaper against each other versus sliding two pieces of wet glass – which one do you think would create less resistance? Wetting the line not only helps you tie a secure knot but also prolongs the life of your fishing line.
- Remember to always keep a small container of water handy when you’re out fishing to wet your line before tying knots.
- Avoid using saliva to wet the line as it contains oils that can weaken the line over time.
Pull Tight and Trim Excess Line
Once you’ve successfully tied your fishing knot, the next step is to pull it tight. This step is crucial in ensuring that the knot is secure and won’t come undone when you’re reeling in a big catch. Imagine tying your shoelaces but leaving them loose – chances are, they’ll come undone as soon as you start walking. The same principle applies to tying fishing knots.

- Use your fingers to firmly pull both ends of the line to tighten the knot.
- After tightening the knot, trim any excess line with a pair of sharp scissors or a line cutter to prevent any interference with your fishing.
Practice Makes Perfect
As the saying goes, practice makes perfect – and this couldn’t be more true when it comes to tying fishing knots. The more you practice tying different types of knots, the more confident and proficient you’ll become. Just like learning to ride a bike or play a musical instrument, mastering the art of tying fishing knots takes time, patience, and dedication. So, don’t get discouraged if your knots don’t turn out perfectly the first few times – keep practicing, and soon enough, you’ll be able to tie knots with your eyes closed.
- Set aside some time each week to practice tying different types of fishing knots.
- Experiment with different techniques and variations to find the knots that work best for you in different fishing scenarios.
By following these tips for tying a secure fishing knot, you’ll be well on your way to becoming a master angler in no time. Remember, a properly tied knot can be the difference between landing a trophy fish or watching it swim away. So, take your time, practice diligently, and most importantly, enjoy the process of perfecting your knot-tying skills. Happy fishing!


