Discover the ultimate guide to planer boards for trolling, covering choosing the right board, setting up for success, and mastering techniques for different fish species.
Choosing the Right Planer Board
When it comes to choosing the right planer board for trolling, it’s essential to consider several factors to ensure you get the most out of your fishing experience. With so many options available, it can be overwhelming, but by understanding the different types of planer boards, their materials, and what to look for in a brand, you’ll be well on your way to making an informed decision.
Types of Planer Boards for Trolling
Planer boards come in various shapes, sizes, and materials, each designed for specific trolling techniques and fish species. Some popular types of planer boards include:
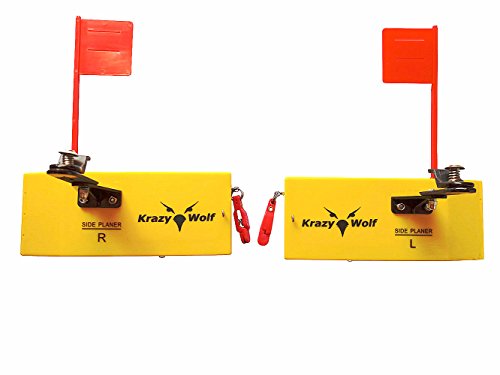
- In-line planer boards: These boards are designed for trolling at slower speeds and are ideal for catching species like salmon, trout, and walleye.
- Off-set planer boards: These boards are designed for faster trolling speeds and are suitable for catching larger species like tuna, marlin, and swordfish.
- Mini planer boards: These compact boards are perfect for species like bass, panfish, and crappie.
Factors to Consider: Size, Material, and Weight
When selecting a planer board, it’s crucial to consider the size, material, and weight of the board. Here are some key factors to keep in mind:
- Size: Larger boards are generally more stable and suitable for heavier lures, while smaller boards are better for lighter lures and smaller fish species.
- Material: Planer boards can be made from various materials, including wood, plastic, and composite materials. Each material has its advantages and disadvantages, so it’s essential to consider the pros and cons of each.
- Weight: Lighter boards are easier to handle and more suitable for smaller boats, while heavier boards provide more stability and are better suited for larger boats.
Brand and Quality: What to Look For
With so many brands and models available, it can be challenging to determine which planer board is right for you. Here are some key factors to consider when evaluating a brand and its quality:

- Durability: Look for boards made with high-quality materials that can withstand the rigors of trolling.
- Performance: Consider the board’s ability to maintain a consistent depth and angle, even in varying water conditions.
- Customer support: Choose a brand that offers reliable customer support, including instructional resources and repair services.
- Warranty: Look for brands that offer a comprehensive warranty that covers repairs and replacements.
Setting Up Your Planer Board
Properly setting up your planer board is crucial for a successful trolling experience. It’s like preparing a recipe for a delicious meal – you need to have the right ingredients, in the right proportions, at the right time. In this section, we’ll guide you through the process of setting up your planer board, ensuring you’re well on your way to catching those elusive fish.
Attaching Lures and Lines
Attaching lures and lines to your planer board may seem straightforward, but it’s a critical step that requires attention to detail. Imagine you’re threading a needle – you need to be precise and gentle to avoid tangled messes. Here are some tips to keep in mind:
- Use a sturdy clip or swivel to attach your lure or bait to the planer board. This will prevent tangles and ensure a smooth release.
- Choose the right line strength and material for your target species. Monofilament or fluorocarbon lines are good options for most species, but you may need heavier or lighter lines depending on the fish you’re after.
- Consider using a leader with a built-in swivel to minimize line twist and kinking.
Adjusting Board Depth and Angle
Getting your planer board to the right depth and angle is an art that requires patience and practice. Think of it like finding the perfect sweet spot on a golf swing – it takes trial and error, but the payoff is worth it. Here’s what you need to know:
- Experiment with different depths and angles to find the sweet spot for your target species. A good starting point is to set the board at a 30- to 45-degree angle, with the line running at a depth of 10-20 feet.
- Pay attention to the water conditions and adjust your board accordingly. In choppy waters, you may need to adjust the angle to avoid the board skipping across the surface.
Fine-Tuning for Optimal Performance
Fine-tuning your planer board setup is where the magic happens. It’s like finding the perfect rhythm on a musical instrument – it takes practice, but the results are harmonious. Here are some tips to take your setup to the next level:
- Experiment with different lure styles and presentations to see what works best for your target species. Try different retrieval speeds, pauses, and actions to mimic the natural movement of baitfish.
- Keep an eye on your board’s performance and make adjustments as needed. If you’re not getting the desired action, try adjusting the depth, angle, or lure presentation.
Trolling Techniques with Planer Boards
When it comes to trolling with planer boards, the goal is to present your lures or bait at the right depth and in the right location to catch the fish you’re after. But with so many options and variables, it can be overwhelming. Let’s dive into the techniques that’ll help you master the art of trolling with planer boards.
Lateral Fishing: Targeting Specific Depths
Imagine you’re fishing a large lake, and you know the fish are holding at a specific depth. How do you get your lure or bait to that precise spot? That’s where lateral fishing comes in. By adjusting the distance between your planer board and the boat, you can control the depth of your presentation. For example, if you’re targeting fish at 10 feet, you can set your planer board to run at 10 feet deep, ensuring your lure or bait is in the strike zone. This technique is particularly useful when fishing for species like walleye, pike, or bass.
Downrigger vs. Planer Board: When to Use Each
So, when do you use a downrigger, and when do you opt for a planer board? The answer lies in the type of fishing you’re doing and the species you’re targeting. Downriggers are ideal for deep-water fishing, like trolling for salmon or tuna, as they allow for precise control over the depth of your lure or bait. On the other hand, planer boards excel in shallower waters, where you need to cover a larger area or target specific structures like weed beds or drop-offs. Think of it like this: downriggers are precision tools for targeting specific depths, while planer boards are more flexible and adaptable, allowing you to cover more water.
Trolling Patterns for Different Fish Species
Different fish species require different trolling patterns. For example, when targeting salmon, you’ll want to use a slower, more deliberate troll, while trolling for trout might require a faster, more erratic pattern. Understanding the behavior and habits of the species you’re targeting is crucial to success. Ask yourself: What’s the natural behavior of the fish I’m after? How can I mimic that in my trolling pattern? By adapting your trolling pattern to the species, you’ll increase your chances of landing a trophy catch.
Planer Board Maintenance and Storage
Proper maintenance and storage are crucial to extending the lifespan of your planer boards and ensuring they continue to perform optimally. Failure to do so can lead to premature wear and tear, damage, or even complete breakdown of your gear.
Cleaning and Drying to Prevent Damage
Cleaning your planer boards is an essential step in maintaining their performance and longevity. After each use, give your boards a thorough inspection, looking for any signs of damage or debris accumulation. Remove any dirt, grime, or vegetation that may have accumulated during your fishing trip. A soft-bristled brush or cloth can be used to gently scrub away any stubborn debris.
Rinse your board with fresh water to remove any remaining dirt or debris. Be sure to dry your board thoroughly, paying extra attention to any crevices or areas where moisture may collect. This will help prevent corrosion and damage from moisture.
Storing Planer Boards for Long-Term Use
When not in use, proper storage is essential to maintaining the integrity of your planer boards. Avoid stacking your boards on top of each other, as this can cause scratching or damage. Instead, store them in a dry, cool place, away from direct sunlight.
Consider investing in a protective storage case or bag specifically designed for planer boards. These cases typically feature padding and compartments to keep your gear organized and protected. If a storage case is not an option, you can also wrap your board in a soft cloth or towel to prevent scratching.
Troubleshooting Common Issues and Repairs
Despite proper maintenance and storage, issues can still arise with your planer boards. Fortunately, many common problems can be easily identified and repaired. Here are a few common issues to look out for:
- Line tangles or knots: Use a line comb or your fingers to gently work out tangles. Trim any damaged or frayed lines to prevent further issues.
- Corrosion or rust: Use a gentle cleaning product and a soft-bristled brush to remove corrosion. Apply a rust-inhibiting coating to protect against future corrosion.
- Damage to the board’s surface: Use a repair kit or consult a professional for more extensive repairs.
By following these simple maintenance and storage tips, you can ensure your planer boards remain in top condition, trip after trip.


