Mounting a trolling motor on a jon boat requires careful planning and execution. Follow our step-by-step guide to ensure a safe and secure installation.
Choosing the Right Trolling Motor
When it comes to mounting a trolling motor on a jon boat, one of the most critical decisions you’ll make is choosing the right motor. It’s like selecting the right tool for the job – if you pick the wrong one, you’ll struggle to get the results you want. So, how do you make the right choice?
Consider Motor Thrust and Boat Size
The first consideration when selecting a trolling motor is the thrust of the motor versus the size of your jon boat. Think of it like this: the larger the boat, the more thrust you’ll need to move it efficiently. A good rule of thumb is to look for a motor with a minimum of 5 pounds of thrust per 200 pounds of boat weight. So, if your jon boat weighs 1000 pounds, you’ll want a motor with at least 25 pounds of thrust. However, this is just a general guideline, and you may need to adjust based on other factors like the wind, currents, and the type of fishing you’ll be doing.
Selecting the Right Propeller Style
Another crucial aspect of choosing the right trolling motor is selecting the right propeller style. There are three main types of propellers: weedless, standard, and swept-back. Weedless propellers are designed to minimize snagging on underwater vegetation, making them ideal for fishing in heavy vegetation or lily pads. Standard propellers are the most common and work well for general fishing applications. Swept-back propellers are designed for high-speed applications and may not be the best choice for trolling. When making your decision, consider the type of fishing you’ll be doing and the conditions you’ll be facing.
Preparing the Jon Boat
Before mounting your trolling motor, it’s essential to prepare your jon boat to ensure a safe and secure installation. This step is critical to prevent any potential damage to your boat or motor.
Cleaning and Preparing the Transom
Imagine your transom as a canvas, and the trolling motor is the masterpiece you’re about to create. To create a beautiful piece of art, you need a clean canvas. In this case, a clean transom. Remove any dirt, grime, or old residue from previous installations. Use a gentle cleaner and a soft-bristled brush to scrub the area. Rinse the transom thoroughly with water and let it dry completely. A clean transom ensures a strong bond between the motor and the boat, reducing the risk of damage or detachment while in use.
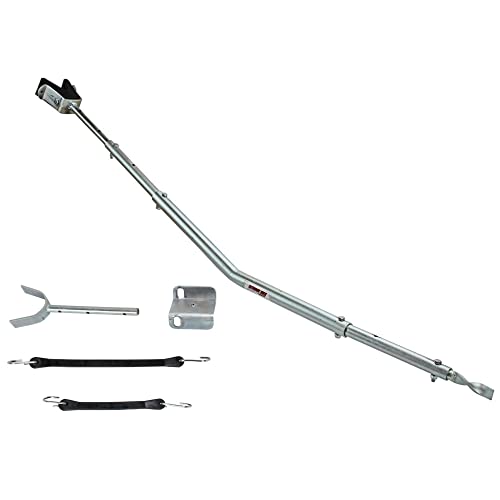
Reinforcing the Transom for Motor Mounting
Think of your transom as a strong foundation, and the trolling motor as a heavy building. You need to reinforce the foundation to support the weight of the building. To reinforce your transom, you can add additional materials such as fiberglass, plywood, or even metal plates. This extra support will prevent the transom from cracking or breaking under the weight and stress of the motor. You can also consider adding a transom saver or a motor mount plate to distribute the weight more evenly. By reinforcing your transom, you’ll create a solid base for your trolling motor, ensuring a safe and secure installation.
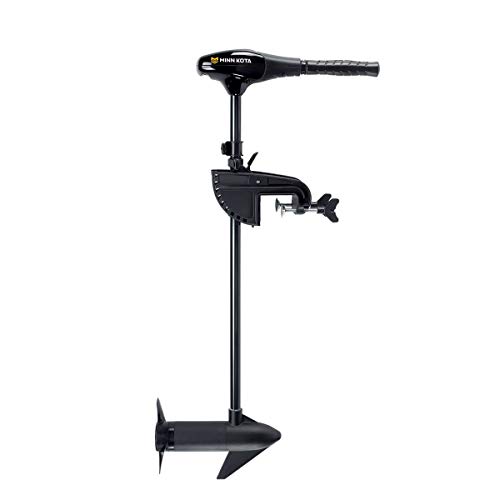
Mounting the Trolling Motor
Mounting a trolling motor on your jon boat is a crucial step that requires attention to detail and a bit of patience. But don’t worry, with the right guidance, you’ll be navigating through calm waters in no time. In this section, we’ll take you through the process of securely fastening your motor to the transom of your boat.
Attaching the Motor Clamp and Bracket
The first step in mounting your trolling motor is to attach the motor clamp and bracket to the transom of your jon boat. Think of this step as building the foundation of a sturdy house – it’s essential to get it right from the start. Start by locating the mounting holes on the transom, which should be reinforced with a sturdy plate or a transom saver. Take your motor clamp and bracket and align them with the mounting holes. Use the provided screws and washers to secure the clamp and bracket to the transom. Make sure they’re tightened firmly, but avoid overtightening, as this can damage the transom or the motor.
Securing the Motor to the Transom
Now that the motor clamp and bracket are securely attached, it’s time to mount the motor itself. This is where things can get a bit tricky, but stay with us! Carefully lift the motor and align it with the clamp and bracket. Make sure the motor is properly seated and centered, then use the provided screws and washers to secure it to the clamp and bracket. Tighten the screws firmly, but remember to check the manufacturer’s instructions for specific torque values. With the motor securely fastened, you can breathe a sigh of relief – the hardest part is behind you!

Wiring and Electrical Connections
When it comes to installing a trolling motor on your jon boat, one of the most critical components is the electrical connection. After all, without a stable power source, your motor is nothing more than a decorative ornament. In this section, we’ll delve into the world of wiring and electrical connections, ensuring that your motor is not only hooked up correctly but also safely.
Connecting the Motor to the Battery
The first step in establishing a reliable electrical connection is to connect the motor to the battery. This might seem like a straightforward process, but it’s surprising how often it’s done incorrectly. Imagine your battery as the heart of your electrical system, pumping power to all the components. To ensure a smooth flow of energy, you’ll need to:
- Verify the voltage and amperage ratings of your motor and battery to ensure compatibility
- Use the correct gauge wiring to minimize resistance and heat buildup
- Secure all connections with waterproof connectors and heat shrink tubing to prevent corrosion
Think of it like building a strong foundation for your electrical system – a solid connection between the motor and battery is essential for optimal performance.
Installing a Circuit Breaker and Fuse
Now that we have a solid connection between the motor and battery, it’s time to add an extra layer of protection to prevent electrical shocks or fires. A circuit breaker and fuse serve as the guardians of your electrical system, disconnecting power in case of an overload or short circuit. To install them correctly:
- Choose a circuit breaker and fuse with ratings that match your motor’s power requirements
- Connect the circuit breaker and fuse in series, ensuring that they can detect even the slightest anomaly in the electrical flow
- Mount them in an accessible location, away from moisture and direct sunlight
By incorporating these essential components, you’ll be able to enjoy a safe and reliable trolling motor experience. So, what’s the takeaway? A well-designed electrical connection is the backbone of your trolling motor system, and investing time in getting it right will reap rewards in the long run.
Testing and Adjusting the Motor
Now that your trolling motor is securely mounted on your jon boat, it’s time to put it through its paces. This phase is crucial in ensuring your motor is optimized for performance, safety, and fuel efficiency. Think of it as the final quality control check before you head out into the open waters.
Initial Startup and Testing
As you prepare for the initial startup, take a moment to double-check that all electrical connections are secure, and the motor is properly aligned with the transom. Now, slowly turn the key or press the start button, and listen carefully for any unusual sounds or vibrations. If everything seems normal, gradually increase the motor’s speed to test its performance.
During this initial testing phase, pay attention to the motor’s responsiveness, speed, and overall power delivery. You may want to test the motor at different speed settings to ensure it’s performing smoothly across the entire range. Remember, a well-adjusted trolling motor is essential for a successful fishing trip or leisurely cruise.
Adjusting the Motor Angle and Direction
Once you’re satisfied with the motor’s performance, it’s time to fine-tune its angle and direction. You may need to make adjustments to the motor’s tilt or direction depending on the water conditions, your fishing style, or the jon boat’s configuration.

Imagine your trolling motor as a precision instrument, and you’re the skilled craftsman fine-tuning it for optimal performance. By adjusting the motor’s angle and direction, you can achieve better propulsion, reduce drag, and improve overall fuel efficiency. Take your time, and make incremental adjustments until you reach the perfect balance.


