Master the art of mounting a trolling motor on your boat with our comprehensive guide, covering pre-mounting checks, mounting styles, and electrical connections for a safe and successful installation.
Pre-Mounting Preparations
When it comes to installing a trolling motor, preparation is key. It’s like preparing for a road trip – you want to make sure you have all the necessary goodies before hitting the open water. In this section, we’ll explore the essential pre-mounting preparations to ensure a smooth and successful installation.
Checking Trolling Motor Compatibility
Before we dive into the installation process, it’s crucial to ensure that your trolling motor is compatible with your boat. Think of it like trying to fit a square peg into a round hole – it just won’t work. Check your trolling motor’s specifications to ensure it matches your boat’s requirements. Consider factors like the motor’s weight, thrust, and voltage to guarantee a seamless integration.
Inspecting Battery and Wiring
Now that we’ve confirmed compatibility, it’s time to inspect your battery and wiring. Imagine your battery as the heart of your trolling motor system, pumping life into your motor. Ensure your battery is in good condition, with a full charge and no signs of damage or corrosion. Inspect your wiring for any signs of fraying, corrosion, or damage, which can lead to electrical issues down the line.
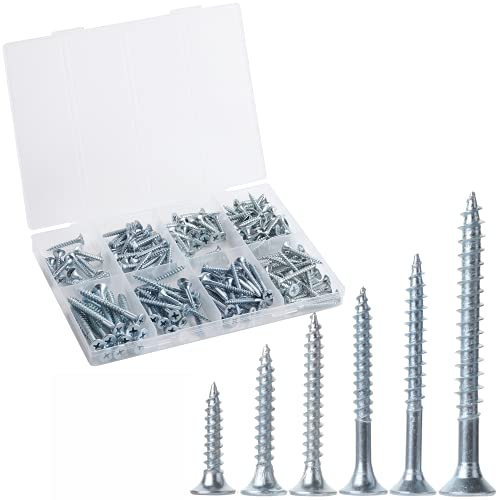
Gathering Mounting Hardware
The final step in our pre-mounting preparations is to gather all the necessary mounting hardware. It’s like preparing for a DIY project – you want to have all the tools and materials within arm’s reach. Make sure you have all the required screws, bolts, and brackets to secure your trolling motor to your boat. Double-check your owner’s manual to ensure you have all the necessary components. With these pre-mounting preparations complete, you’re now ready to start mounting your trolling motor.

Mounting the Trolling Motor
Mounting the trolling motor is a crucial step in getting your fishing gear ready for the big catch. It’s a process that requires patience, attention to detail, and a bit of finesse. Think of it as preparing a delicate recipe – every ingredient (or in this case, every component) needs to be in its right place for the final dish to turn out perfect.
Attaching Motor to Transom
Attaching the motor to the transom of your boat is the first step in this process. Imagine the transom as a strong, sturdy backbone – it needs to be able to support the weight and power of the trolling motor. To ensure a secure attachment, start by locating the mounting holes on the transom. These holes will align with the corresponding bolts on the motor. Next, slide the motor onto the transom, making sure it’s centered and even. Use the bolts to secure the motor in place, tightening them firmly but avoiding overtightening.
Securing Cables and Wires
With the motor attached, it’s time to tackle the cables and wires. Think of these as the motor’s lifelines, providing power and control to the system. Begin by identifying the positive and negative terminals on the motor and the battery. Connect the cables to the corresponding terminals, making sure to match the positive (+) cable to the positive terminal and the negative (-) cable to the negative terminal. Use wire ties or cable organizers to keep the cables organized and prevent tangling. This will make it easier to identify and troubleshoot any issues down the line.
Adjusting Motor Angle and Height
The final step in mounting the trolling motor is adjusting its angle and height. This is crucial for optimal performance and to prevent the motor from dragging or jumping out of the water. Start by adjusting the motor’s angle, tilting it slightly upward to compensate for the boat’s movement. Next, adjust the motor’s height, ensuring it’s submerged at the correct depth for your specific fishing needs. This may require some trial and error, but the end result will be well worth the effort – a smooth, quiet, and powerful trolling motor that will help you land the big one.
Transom Mounting Considerations
When it comes to mounting your trolling motor, the transom of your boat is a popular choice. But, before you start drilling holes and attaching hardware, there are a few crucial considerations to keep in mind. After all, a well-planned transom mount can make all the difference in the performance and stability of your motor.
Measuring Transom Dimensions
The transom of your boat is not a one-size-fits-all affair. Each boat has its unique dimensions, and it’s essential to measure your transom accurately to ensure a secure and balanced mount. Think of it like buying a new pair of shoes – you need to get the right fit to avoid discomfort and potential damage. Take out your tape measure and record the height, width, and any obstacles (such as navigation lights or grab rails) that might affect your mounting options.
Choosing the Right Mounting Style
With your transom dimensions in hand, it’s time to decide on the mounting style that suits your needs. Do you prefer a fixed mount, which provides a sturdy and cost-effective solution, or a quicker-release mount, which offers more flexibility and convenience? Perhaps you’re looking for a more premium option, such as a tilt-and-swivel mount, which allows for greater adjustability and customization. Whichever style you choose, make sure it’s compatible with your trolling motor and boat specifications.
Ensuring Stability and Balance
A well-balanced transom mount is crucial for maintaining stability and preventing unnecessary strain on your motor and boat. Imagine a seesaw – if the weight distribution is off, the entire system can become unstable and even dangerous. To avoid this, ensure that your mount is securely attached to the transom and that the motor is properly aligned with the boat’s centerline. Additionally, consider the weight capacity of your boat and motor, as well as any additional accessories or features that might affect the overall balance. By taking these factors into account, you can enjoy a smooth and safe boating experience.
Bow Mounting Options
When it comes to mounting your trolling motor, you’ve got options – and we’re not just talking about the type of motor you choose. No, we’re talking about where you mount it, and in this case, we’re diving into the world of bow mounting. So, why would you want to mount your motor on the bow of your boat? Well, for starters, it provides unparalleled control and maneuverability, making it perfect for precision fishing and navigating through tight spaces.
Using a Bow Mount Bracket
So, you’ve decided to take the bow mounting route – now it’s time to choose the right bracket. A bow mount bracket is specifically designed to securely fasten your motor to the bow of your boat, providing a sturdy base for your fishing adventures. These brackets usually come with adjustable clamps, allowing you to customize the fit to your boat’s unique shape and size. But what makes them so special? For starters, they provide maximum clearance, reducing the risk of snagging or getting stuck in shallow waters.

Installing a Quick Release Bracket
Okay, so you’ve got your bracket, but what if you need to quickly detach your motor for storage or transportation? That’s where a quick release bracket comes in. This clever contraption allows you to swiftly detach your motor, giving you the flexibility to move it around or store it safely. But how does it work? Simply put, a quick release bracket features a secure locking mechanism that allows you to release the motor with the flip of a lever or the turn of a handle. It’s like having a get-out-of-jail-free card for your trolling motor – convenient, right?
Rigging a Pedal Control System
Now that we’ve covered the basics of bow mounting, let’s talk about taking it to the next level with a pedal control system. Imagine having complete control over your motor at your feet – it’s like having an extra pair of hands (or should we say, an extra pair of feet?). A pedal control system allows you to focus on the fishing, leaving the motor control to your feet. It’s all about ergonomics, folks! So, how do you rig this magical system? It’s relatively straightforward: attach the pedal to your bow mount bracket, connect it to your motor, and voilà – you’ve got a seamless, hands-free fishing experience.
Wiring and Electrical Connections
Proper wiring and electrical connections are crucial to the safe and efficient operation of your trolling motor. A well-connected system ensures that your motor runs smoothly, efficiently, and safely. In this section, we’ll delve into the nitty-gritty of hooking up your battery, connecting the foot pedal, and installing a circuit breaker.
Hooking Up the Battery
Connecting your battery to the trolling motor may seem like a straightforward process, but it’s essential to get it right. Imagine your battery as the heart of your trolling motor system, pumping power to all the critical components. To hook up your battery, start by locating the positive (+) and negative (-) terminals. Typically, the positive terminal is marked with a “+” sign or a red color, while the negative terminal is marked with a “-” sign or a black color.

- Connect the positive (red) wire from the trolling motor to the positive terminal of the battery.
- Connect the negative (black) wire from the trolling motor to the negative terminal of the battery.
- Double-check your connections to ensure they’re secure and not touching any metal components.
Connecting the Foot Pedal
The foot pedal is an essential component of your trolling motor system, allowing you to control the motor’s speed and direction. Connecting the foot pedal requires attention to detail to ensure seamless communication between the pedal and the motor. Here’s a step-by-step guide:
- Locate the foot pedal’s connector and identify the corresponding plug on the trolling motor.
- Plug in the foot pedal’s connector to the motor’s plug, ensuring a snug fit.
- Test the foot pedal by pressing the pedal and observing the motor’s response. If it doesn’t respond, check your connections and consult the user manual.
Installing a Circuit Breaker
A circuit breaker is a crucial safety component that protects your trolling motor from electrical surges and overloads. Installing a circuit breaker is a straightforward process that requires minimal technical expertise. Here’s how:
- Choose a circuit breaker rated for your trolling motor’s maximum amp draw.
- Mount the circuit breaker near the battery, ensuring easy access and visibility.
- Connect the positive (red) wire from the battery to the circuit breaker’s input terminal.
- Connect the output terminal of the circuit breaker to the positive (red) wire of the trolling motor.
By following these guidelines, you’ll ensure a safe, efficient, and reliable electrical connection for your trolling motor. Remember to always consult your user manual and manufacturer’s instructions for specific guidance on wiring and electrical connections.


