Boost your catch rate with expert tips on setting up, using, and troubleshooting planer boards for a successful fishing experience.
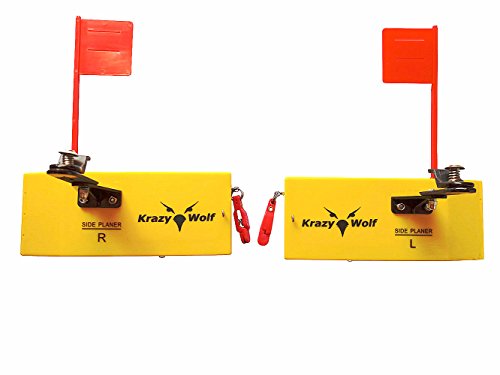
Choosing the Right Planer Boards
When it comes to choosing the right planer boards for your fishing needs, there are several factors to consider. With so many options available on the market, selecting the perfect planer board can be a daunting task. But, by understanding the key aspects of planer boards, you’ll be well on your way to making an informed decision.
Materials and Construction
The materials used to construct planer boards play a crucial role in their performance and durability. You’ll find planer boards made from a variety of materials, including wood, plastic, and graphite. Wooden planer boards are known for their buoyancy and durability, while plastic planer boards are often more affordable and lightweight. Graphite planer boards, on the other hand, offer exceptional strength and resistance to flexing. When choosing a planer board, consider the type of fishing you’ll be doing and the conditions you’ll face. For example, if you’ll be fishing in rough waters, a durable wooden or graphite planer board may be the better choice.
Size and Weight Considerations
The size and weight of a planer board are critical factors to consider when choosing the right one for your fishing needs. Larger planer boards are typically used for bigger lures and tackle, while smaller planer boards are better suited for lighter tackle and smaller lures. The weight of a planer board also affects its performance, with heavier boards providing more stability and lighter boards offering greater maneuverability. Think of it like a car – a heavier car is more stable on the highway, but a lighter car is more agile in tight spaces.
Float vs. Dive Planer Boards
Another key consideration when choosing a planer board is whether to go with a float or dive planer board. Float planer boards, as the name suggests, float on the surface of the water, while dive planer boards are designed to dive below the surface. Float planer boards are great for fishing near the surface, while dive planer boards allow you to target fish at greater depths. So, what’s the right choice for you? It all depends on the type of fishing you’re doing and the species you’re targeting. If you’re after surface-feeding fish, a float planer board is the way to go. But, if you’re targeting fish that dwell at greater depths, a dive planer board is the better choice.
Setting Up Your Planer Boards
Proper setup is crucial for getting the most out of your planer boards. This is where many anglers go wrong, but with a few simple steps, you can ensure your planer boards are set up for success.
Attaching the Line and Clip
The first step in setting up your planer boards is attaching the line and clip. This may seem like a no-brainer, but it’s amazing how often this critical step is overlooked. Imagine you’re getting ready to go on a road trip, and you forget to fill up on gas. You wouldn’t make it very far, would you? The same applies to attaching your line and clip.
To start, thread the line through the planer board’s clip, leaving enough slack to allow for adjustments later on. Make sure the knot is secure, and the line isn’t tangled or twisted. You want a smooth, seamless connection that won’t fail you in the heat of the moment. Think of it as the foundation of your entire setup – a weak foundation means a shaky structure.
Adjusting the Planer Board Angle
Now that your line and clip are attached, it’s time to adjust the planer board’s angle. This is where the magic happens, folks! Think of your planer board as a precision-guided missile, and the angle is the navigation system. You need to fine-tune this baby to hit your target.
The ideal angle depends on the type of fishing you’re doing and the species you’re targeting. As a general rule, a steeper angle is best for shallower waters, while a more gradual angle is better suited for deeper waters. Experiment with different angles to find what works best for you. Remember, it’s all about finesse – you’re not trying to muscle the fish; you’re trying to outsmart them.
Setting the Correct Depth
The final piece of the puzzle is setting the correct depth. This is where many anglers get it wrong, and it’s a shame because it’s so crucial. Imagine trying to find a specific house in a neighborhood without knowing the address – you might get close, but you’ll never find the exact spot. That’s what it’s like when you’re not setting the correct depth.
The depth will vary depending on the species, water conditions, and time of day. As a general rule, start with a depth that’s slightly above the level of the desired catch. From there, adjust as needed based on the bites you’re getting. Don’t be afraid to experiment and fine-tune your setup until you hit the sweet spot.
Trolling with Planer Boards
Trolling with planer boards is an art that requires finesse, patience, and practice. When done correctly, it can lead to a bounty of fish and a day on the water that’s hard to forget. But, what makes trolling with planer boards so effective, and how can you master this technique?
Speed and Direction Adjustments
The speed at which you troll with your planer boards can make all the difference in the world. Think of it like driving a car – you need to adjust your speed to suit the road conditions. If you’re trolling in an area with a lot of structure, such as rocks or weed beds, you’ll want to slow down to give your lures time to work their magic. On the other hand, if you’re in open water, you can crank up the speed to cover more ground. But, how do you know what speed is right?
A good rule of thumb is to start with a slow speed, around 2-3 mph, and gradually increase it until you find the sweet spot. You’ll know when you’ve hit it because your lures will start to get bites. Don’t be afraid to experiment and make adjustments on the fly. Remember, the key is to be flexible and adapt to the changing conditions.

Using Multiple Boards at Once
Using multiple planer boards at once can be a game-changer, especially when targeting species like salmon or trout. By using multiple boards, you can cover more water and increase your chances of getting a bite. But, it’s not as simple as just throwing more boards in the water. You need to consider the spacing, angle, and direction of each board to maximize your chances of success.
Imagine you’re a conductor leading an orchestra – each board is like a different section, and you need to bring them all together in harmony. Start by setting up your boards with a staggered spacing, so they’re not bunched up together. Then, adjust the angle and direction of each board to create a ‘wall of attraction’ that will draw in fish from all directions. With practice, you’ll be able to fine-tune your setup and become a master of multiple-board trolling.
Managing Your Lines and Lures
Managing your lines and lures while with planer boards can be a daunting task, especially for beginners. It’s like trying to juggle multiple balls while riding a unicycle – it takes skill, patience, and practice. But, with a few simple tips and tricks, you can avoid tangles, snags, and other common issues.
First, make sure to use high-quality lines and lures that are designed for trolling. These will be more resistant to tangles and knots, and will perform better in the water. Next, use a line separator or board clip to keep your lines organized and prevent tangles. Finally, make regular checks on your lines and lures to ensure they’re running smoothly and making the right action in the water. By following these tips, you’ll be able to manage your lines and lures like a pro and focus on what really matters – catching fish.
Reading the Water with Planer Boards
Effective planer board fishing relies heavily on the ability to read the water and understand the dynamics of the aquatic environment. This crucial skill separates experienced anglers from novices and can make all the difference in landing that elusive catch.

Identifying Structure and Cover
When scanning the water, it’s essential to identify structural elements like drop-offs, weed beds, and submerged logs. These features provide ambush points for predators, increasing the likelihood of encountering your target species. Think of structure as an underwater highway system, guiding fish movement and behavior. By recognizing these hotspots, you can position your planer boards to maximize encounters with hungry fish.
To expand your structural awareness, ask yourself:
- Where do I typically find fish in this lake or river?
- Are there any hidden features, like sunken islands or underwater humps, that could be attracting fish?
- How do changes in water depth or vegetation influence fish behavior?
Locating Schools and Baitfish
Baitfish, the primary food source for many game fish, are often found congregating around structural features or areas with abundant food sources. By locating schools of baitfish, you’re likely to find the predators that feed on them. Imagine following a trail of breadcrumbs, leading you to the main course – the fish you’re after.
When searching for baitfish, look for:
- Areas with abundant food sources, such as aquatic insect hatches or algae blooms
- Schools of baitfish breaking the surface or creating noticeable ripples
- Changes in water color or clarity, indicating the presence of baitfish
Reading Planer Board Movement
As your planer board moves through the water, it’s essential to pay attention to subtle changes in its movement. These cues can indicate the presence of fish or changes in the underwater environment. Think of your planer board as a probe, gathering information about the underwater world.
Monitor your planer board for:
- Sudden stops or changes in direction, which may indicate a fish is interested
- Changes in planer board angle or speed, which can signal the presence of structure or a school of fish
- Unusual vibrations or actions, which could be a sign of a fish biting or a snag
By sharpening your skills in reading the water with planer boards, you’ll increase your chances of landing more fish and enhance your overall fishing experience.
Troubleshooting Common Issues
When it comes to using planer boards, things don’t always go as smoothly as we’d like. Tangles, snags, and malfunctions can be frustrating and costly. But fear not, dear angler! With a few troubleshooting tips and tricks up your sleeve, you’ll be back to reeling in the big ones in no time.
Dealing with Tangles and Snags
Tangles and snags are the bane of many an angler’s existence. But before you throw your planer board into the depths of despair, take a deep breath and try to identify the source of the problem. Is it a knotty mess or a snag on the board itself? Sometimes, all it takes is a gentle tug or a quick adjustment to free the line. Other times, you may need to take a closer look at your rigging and make some adjustments to prevent future tangles.
Here are a few tips to help you avoid tangles and snags in the first place:
- Regularly inspect your line and leaders for signs of wear and damage
- Use swivels or anti-twist devices to reduce line twist
- Keep your planer board and lines organized and tidy
- Avoid using lines that are too long or too thin for your planer board
Fixing Planer Board Malfunctions
Uh-oh, your planer board has stopped planing! Don’t panic just yet. Malfunctions can usually be traced back to a few common issues. Take a closer look at your board and check for:
- Loose or damaged components
- Clogged or faulty bearings
- Bent or warped boards
- Incorrectly set depth clips
A quick clean or replacement of faulty parts can get your planer board up and running in no time. If you’re still unsure, consult your user manual or contact the manufacturer for guidance.
Overcoming Wind and Current Challenges
Wind and currents can make planer boarding a real challenge. But with a few adjustments and some clever tactics, you can outsmart the elements and still catch those fish. Here are a few tips to help you battle the wind and currents:
- Adjust your trolling speed to compensate for wind and current
- Use a heavier planer board or add weights to counteract the force of the wind
- Experiment with different line angles and depths to find the sweet spot
- Consider using a downrigger or other specialized gear to help you overcome the elements
Advanced Planer Board Techniques
To take your planer board fishing to the next level, you need to master some advanced techniques that will help you catch more fish and increase your chances of success. In this section, we’ll explore some expert-level strategies for getting the most out of your planer boards.
Using Planer Boards with Downriggers
Downriggers and planer boards are a match made in heaven. By combining these two tools, you can target fish at precise depths and create a highly effective fishing system. Here’s how to make it work:
- Start by attaching your downrigger to your boat’s side rail or transom. Make sure it’s securely fastened and adjusted to the correct depth.
- Next, attach your planer board to the downrigger’s cable or clip. This will allow the planer board to ride at the same depth as the downrigger.
- Now, attach your line and lure to the planer board’s clip or loop. This will allow you to target fish at the exact depth you’re seeking.
- As you troll, adjust the downrigger and planer board to maintain the desired depth and speed. This will help you target specific species and structures.
Night Fishing with Planer Boards
Night fishing with planer boards can be incredibly effective, especially for species like walleye, trout, and salmon. Here are some tips for making it work:
- First, choose the right lures and lines for the job. Glow-in-the-dark lures or bioluminescent baits can be highly effective in low-light conditions.
- Next, adjust your planer board’s angle and speed to compensate for the reduced visibility. You may need to slow down and use a more aggressive angle to get the attention of nocturnal predators.
- Finally, pay close attention to your line and rod tips. In the dark, it’s easy to miss bites, so make sure you’re using sensitive rods and keeping a close eye on your lines.
Targeting Specific Species with Planer Boards
Different species require different tactics, and planer boards are no exception. Here are some tips for targeting specific species with planer boards:
- For walleye, try using smaller, subtler lures and slower speeds. Walleye are often finicky, so it pays to be patient and finesse them into biting.
- For trout, try using more aggressive lures and faster speeds. Trout are often more aggressive, so don’t be afraid to try bigger baits and more active presentations.
- For salmon, try using larger, more dramatic lures and slower speeds. Salmon are often caught in deeper water, so make sure you’re using the right tackle and presentations for the job.
By mastering these advanced techniques, you’ll be able to take your planer board fishing to the next level and start catching more fish than ever before.


