Discover the best techniques for using a fishing stringer, from choosing the right one to securing and releasing the fish properly. Improve your fishing experience with these tips.
Choosing the Right Fishing Stringer
When it comes to choosing the right fishing stringer, there are a few key factors to consider. The material and durability of the stringer, as well as its length and weight capacity, play crucial roles in ensuring a successful fishing trip. Let’s delve into each of these aspects in more detail to help you make an informed decision.
Material and Durability
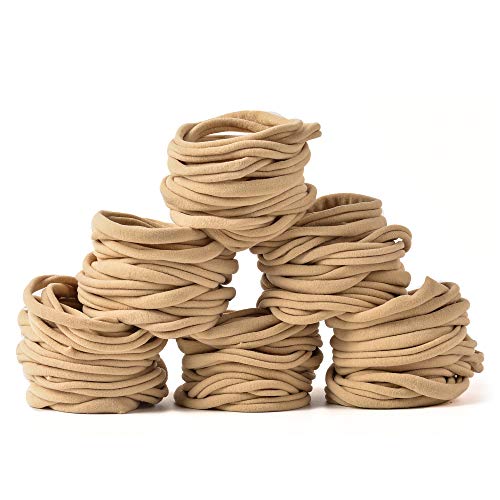
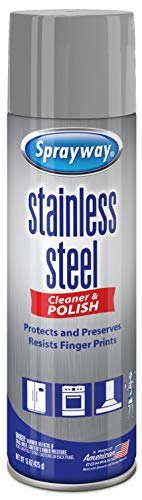
The material of the fishing stringer is an important consideration, as it directly affects its durability and performance. One popular option is stainless steel, which offers excellent corrosion resistance and can withstand the harsh conditions of saltwater fishing. Another reliable choice is nylon, known for its strength and resistance to wear and tear.
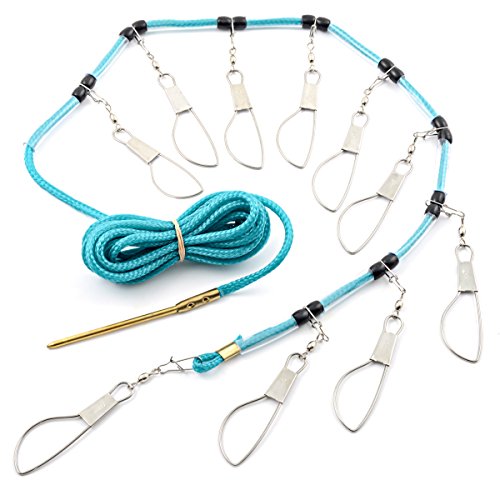
When selecting a fishing stringer, it’s essential to consider the durability of the attachment points. Look for strong and sturdy clips or hooks that can securely hold the fish without bending or breaking. Additionally, opt for a stringer with a coating or finish that prevents rust and ensures long-lasting use.
Length and Weight Capacity
The length and weight capacity of the fishing stringer are crucial factors to consider, as they determine its versatility and suitability for different fishing situations. A longer stringer allows you to keep your catch at a safe distance from the fishing spot, reducing the chances of scaring away other fish. It also gives you more flexibility in terms of where you can secure the stringer.

When it comes to weight capacity, it’s important to choose a fishing stringer that can comfortably handle the size and weight of the fish you typically catch. Consider the maximum weight capacity of the stringer and ensure it exceeds the average weight of your target species. This will prevent any strain on the stringer and minimize the risk of it breaking or tearing.
In summary, when choosing a fishing stringer, prioritize materials like stainless steel or nylon for durability and longevity. Look for strong attachment points and consider the length and weight capacity that best suits your fishing needs. By considering these factors, you can ensure you have a reliable and efficient fishing stringer that will enhance your fishing experience.
Preparing the Fish for Stringing
When it comes to preparing a fish for stringing, there are a few essential steps to follow. Properly cleaning and gutting the fish is crucial to ensure its freshness and to prevent any unwanted odors or flavors. Additionally, removing the scales and fins can make the fish more manageable and easier to string.
Cleaning and Gutting the Fish
Cleaning and gutting the fish is an important first step in preparing it for stringing. Here’s how you can do it effectively:
- Start by rinsing the fish under cold water to remove any dirt or debris.
- Use a sharp knife to make a shallow incision from the anus to the base of the throat.
- Carefully remove the entrails and organs, being cautious not to puncture the intestines.
- Rinse the cavity thoroughly to remove any remaining blood or residue.
- Pat the fish dry with a clean towel or paper towels to remove excess moisture.
Removing Scales and Fins
Removing the scales and fins from the fish can make it more manageable and easier to handle. Here’s how you can do it:
- Hold the fish firmly by its tail and use a scaling tool or the back of a knife to scrape off the scales.
- Start from the tail and work your way towards the head, applying firm pressure.
- Rinse the fish under cold water to remove any loose scales.
- To remove the fins, use a sharp knife to make a small cut just behind the fin.
- Hold the fin firmly and cut along the base to remove it completely.
- Repeat this process for all the fins, including the dorsal fin, pectoral fins, and anal fin.
By properly cleaning and gutting the fish and removing the scales and fins, you’ll have a fish that is ready to be strung and prepared for cooking or storage. Remember to handle the fish with care and maintain hygiene throughout the process.
Stringing the Fish
Selecting the Proper Attachment Point
When it comes to stringing a fish, selecting the proper attachment point is crucial. This is where you will secure the fish to the stringer, so it’s important to choose a location that can handle the weight and won’t tear or break.
One common attachment point is the fish’s gills. The gill plate provides a sturdy and secure spot to tie the stringer. You can thread the stringer through the gills and tie a knot to keep the fish in place. However, it’s important to note that stringing a fish through the gills may cause damage to the delicate gill tissue, so it’s not always the best option.
Another option is to string the fish through the mouth. This can be done by inserting the stringer through the fish’s mouth and out through the gill plate. By tying a secure knot around the fish’s mouth, you can ensure that it stays in place on the stringer. This method is less likely to cause damage to the fish’s gills.
Ultimately, the choice of attachment point depends on the type of fish you’re stringing and personal preference. It’s important to consider the size and weight of the fish, as well as the durability of the stringer and the overall handling of the fish.
Inserting the Stringer Through the Fish
Once you have chosen the proper attachment point, it’s time to insert the stringer through the fish. This step requires precision and care to avoid injuring the fish or damaging its internal organs.
To insert the stringer through the fish, start by identifying the entry point. This is typically the lower part of the fish’s body, near the anal vent. Gently guide the stringer through this entry point, being careful not to puncture any vital organs. Slowly and steadily push the stringer through the fish’s body, ensuring that it remains straight and doesn’t deviate from its intended path.
If you encounter any resistance while inserting the stringer, stop immediately and reassess your approach. It’s possible that you may have hit a bone or encountered an obstruction. In such cases, it’s best to find an alternative entry point or consider using a different stringing method.
Once the stringer is successfully inserted through the fish, you can secure it by tying a knot or using a clip or clasp, depending on the type of stringer you’re using. Make sure the knot or clasp is tight enough to hold the fish securely, but not so tight that it causes discomfort or restricts movement.
Remember, the goal is to keep the fish safe and secure while you continue fishing. By selecting the proper attachment point and carefully inserting the stringer through the fish, you can ensure that it stays in place and remains in optimal condition until you’re ready to remove it.
Securing the Fish on the Stringer
When it comes to securing the fish on a stringer, there are a few important considerations to keep in mind. First, you’ll want to make sure you tie a secure knot that will hold the fish in place. Additionally, adjusting the fish’s position on the stringer can help ensure its safety and prevent any damage.
Tying a Secure Knot
The knot you use to secure the fish on the stringer is crucial. You want to make sure it’s strong enough to hold the weight of the fish but also easy to untie when you’re ready to remove it. One popular knot for this purpose is the slip knot. This knot allows you to adjust the tightness as needed and is relatively easy to untie.
To tie a slip knot, start by making a loop with the stringer and passing the loose end through the loop. Then, tighten the loop around the fish’s gills or mouth, ensuring it’s secure but not too tight. This knot allows you to easily adjust the fish’s position on the stringer if needed.
Adjusting the Fish Position
Once you’ve tied a secure knot, it’s important to consider the fish’s position on the stringer. You want to make sure the fish is balanced and not hanging too low or too high. This will help prevent the fish from getting tangled in weeds or other obstacles in the water.

To adjust the fish’s position, simply slide it up or down the stringer until it’s balanced. You can also use additional attachments, such as clips or rings, to help keep the fish in place. Just make sure these attachments are secure and won’t easily come undone.
By taking the time to tie a secure knot and adjust the fish’s position on the stringer, you’ll ensure the fish is safe and secure while you continue fishing. This not only helps prevent the fish from escaping but also allows you to easily keep track of your catch without the need for constant monitoring.
Best Practices for Using a Fishing Stringer
Keeping the Fish in the Water
When using a fishing stringer, it’s important to keep the fish in the water as much as possible. This helps to ensure the fish stays alive and healthy until you are ready to clean and prepare it. By keeping the fish in the water, you are providing it with oxygen and minimizing stress.
To keep the fish in the water, follow these tips:
- Choose a fishing stringer with a long length. This will allow you to keep the fish submerged in the water while still being attached to the stringer.
- Find a suitable spot to secure the stringer. Look for a calm and shallow area where the fish can stay submerged without being swept away by strong currents.
- If possible, use a floating stringer. This type of stringer keeps the fish near the surface of the water, allowing it to breathe easily.
Remember, the longer the fish stays out of water, the higher the risk of it becoming stressed or even dying. By following these tips, you can ensure that the fish remains in optimal condition until you are ready to handle it.
Avoiding Tangled Lines
One of the challenges of using a fishing stringer is avoiding tangled lines. Tangled lines can be frustrating and time-consuming to untangle, and they can also pose a risk to the fish if they become entangled in the stringer.
To avoid tangled lines, consider the following suggestions:
- Use a fishing stringer with multiple attachment points. This allows you to separate the fish and prevent their lines from getting tangled.
- When inserting the stringer through the fish, be careful to avoid crossing the lines. Take your time and ensure that each fish is properly threaded onto the stringer without any entanglements.
- If you are catching multiple fish, consider using individual stringers for each fish. This eliminates the risk of lines becoming tangled altogether.
Additionally, it’s important to be mindful of your own fishing line while using a stringer. Avoid casting or reeling in your line near the fish on the stringer to prevent any accidental entanglements.
By following these tips, you can minimize the chances of tangled lines and ensure a smooth and efficient fishing experience with your stringer.
Remember, keeping the fish in the water and avoiding tangled lines are key best practices when using a fishing stringer. These practices not only improve the overall fishing experience but also prioritize the well-being of the fish.
Removing the Fish from the Stringer
Releasing the Knot
Now that you’ve had a successful fishing trip, it’s time to remove the fish from the stringer and prepare them for further processing or cooking. The first step in this process is releasing the knot that holds the fish securely.
To release the knot, carefully untie it, ensuring that you maintain a firm grip on the fish. Take your time to avoid any sudden movements that may startle the fish or cause it to slip away. Gently loosen the knot, making sure not to pull too forcefully as this could damage the fish or the stringer.
If the knot seems particularly tight, you can use a small tool, like a pair of pliers or a fish hook, to gently pry it open. Remember to be gentle and patient, as the fish’s safety and well-being should always be a priority.
Handling the Fish Properly
Once you have released the knot, it’s crucial to handle the fish properly to minimize stress and potential harm. Proper handling not only ensures the fish’s welfare but also maintains the quality and taste of the fish for cooking or release.
- Wet your hands: Before handling the fish, wet your hands to minimize the removal of its protective slime coating. This slime helps protect the fish against infections and parasites.
- Support the fish: When lifting the fish off the stringer, support it firmly but gently. Cradle the fish with both hands, one hand supporting the belly and the other supporting the tail. This technique provides stability and prevents the fish from slipping out of your grasp.
- Avoid squeezing or dropping: Be cautious not to squeeze the fish tightly or drop it, as this could cause internal injuries or damage to the fish’s delicate structure. Treat the fish with respect and care, just as you would handle any living creature.
- Use a net or landing mat: If you are struggling to handle a larger fish, consider using a fishing net or landing mat. These tools provide additional support and make it easier to lift the fish off the stringer without exerting excessive force.
Remember, when handling fish, it’s essential to be mindful of their well-being. By following these guidelines, you can ensure a safe and stress-free experience for both you and the fish.
So, go ahead and release the knot with care, then handle the fish properly to maintain their quality and ensure their welfare. Whether you’re planning to cook them up or release them back into the water, these steps will help you make the most of your fishing adventure.


