Tying a fishing line loop can be a challenge, but with the right technique, you can ensure a secure connection and catch more fish.
Choosing the Right Fishing Line
The right fishing line can make all the difference between reeling in a prize catch and coming up empty-handed. So, how do you choose the perfect line for your fishing adventure?
Selecting the Correct Line Strength
Imagine you’re about to embark on a battle with a feisty fish. You wouldn’t want your line to snap under the pressure, would you? That’s why selecting the correct line strength is crucial. The strength of your line is measured in pounds (lb), and the ideal strength depends on the type of fish you’re after. For example, if you’re targeting panfish, a 4-6 lb line would suffice. However, if you’re going after larger fish like bass or pike, you’ll need a heavier line, typically ranging from 10-20 lb.
Considerations for Line Material
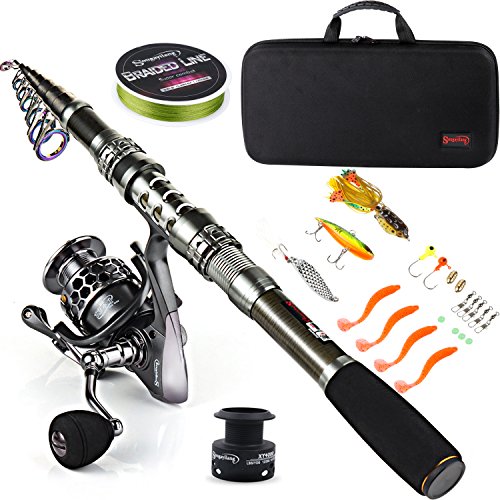
Now that we’ve covered line strength, let’s talk about the type of material your line is made of. You’ve got three main options: monofilament, fluorocarbon, and braid. Monofilament lines are inexpensive and have a lot of stretch, making them ideal for beginners. Fluorocarbon lines are nearly invisible underwater, making them perfect for clear water and finicky fish. Braid lines, on the other hand, are ultra-sensitive and have minimal stretch, making them ideal for detecting even the lightest of bites. So, which one is right for you? That depends on your fishing style, the type of fish you’re after, and the water conditions you’ll be fishing in.
Preparing the Fishing Line
Preparing your fishing line is a crucial step in tying a strong and secure loop knot. It’s like preparing a cake recipe – you need to have all the ingredients ready and in the right proportions before you can start mixing. In this case, your ingredients are the fishing line and a few simple tools.

Cutting the Line to the Right Length
So, how do you know what the right length is? The answer depends on the type of fishing you’ll be doing and the type of tackle you’re using. As a general rule of thumb, you’ll want to leave enough line to tie the knot and still have some extra for when you need to adjust the length of your leader. A good starting point is to cut a piece of line that’s about 1.5 to 2 times the length of your leader. This will give you enough room to tie the knot and make any necessary adjustments.
Removing Line Twist
Now that you have your line cut to the right length, it’s time to remove any twists that may have developed. Line twist is a common problem that can cause knots to form and weaken the line. To remove twists, simply hold the line between your thumb and index finger, with the tag end facing away from you. Then, use your other hand to gently rotate the line in a circular motion, working your way down the length of the line. This should help to remove any kinks or twists that may have formed. Think of it like untangling a pair of headphones – you need to take your time and be gentle to avoid causing more knots.
Forming the Loop
Forming the loop is where the magic happens, and your fishing line finally starts to take shape. A well-crafted loop can make all the difference in securing your catch, so let’s dive into the essential steps to get it right.
Creating a Consistent Circle
Imagine holding a perfectly round doughnut – that’s the shape you’re aiming for when creating a consistent circle for your loop. A uniform circle ensures that your knot sits snugly and doesn’t compromise the structural integrity of your fishing line. To achieve this, make sure to maintain a steady tension while forming the loop, and gently rotate the line as you go to prevent any twists or kinks.
Think of it like casting a circle with a rope – you want the rope to form a smooth, even curve, rather than a wobbly, irregular shape. A consistent circle will give you a solid foundation for the rest of your knot, so take your time, and be patient. It may take some practice to get it just right, but the payoff is worth it.

Using the Right Knot
Now that you have your circle in place, it’s time to choose the right knot to secure it. When it comes to forming a reliable loop, the knot you use can make all the difference. The key is to select a knot that won’t slip or come undone under pressure – you want your catch to stay hooked, after all! Some popular knot options for forming a loop include the Perfection Loop, the Surgeon’s Loop, and the Loop-to-Loop Knot. Each has its own strengths and weaknesses, so it’s essential to experiment and find the one that works best for you.
Remember, practice makes perfect, so don’t be discouraged if it takes a few attempts to get the hang of forming a reliable loop. With patience, persistence, and the right knot, you’ll be well on your way to landing that prized catch.
Tying the Loop Knot
Tying the loop knot is the final stage in creating a secure and reliable fishing line loop. It’s the culmination of all your hard work, and it’s essential to get it right. So, take a deep breath, and let’s dive into the process.
Making the Initial Loop
To start, hold the fishing line between your thumb and index finger, leaving a small loop at the end. The size of the loop will depend on the type of fishing you’re doing and the size of the hook or lure you’re using. A good rule of thumb is to make the loop about the same size as the hook’s eye. Imagine a small circle that the hook can comfortably fit through – that’s the size you’re aiming for.

Passing the Tag End
Now, take the tag end of the line and pass it through the loop you just created. This is where things can get a bit fiddly, so take your time. Think of it like threading a needle – you need to guide the tag end through the loop without twisting or kinking the line. As you pass the tag end through, keep the line relatively taut, but not too tight. You want to maintain a consistent tension to ensure the knot forms correctly.
Mooring the Loop in Place
With the tag end through the loop, you can start to moor the loop in place. Take the tag end and wrap it around the standing part of the line (the longer part of the line, not the tag end). This will start to form the base of the knot. Think of it like tying a shoelace – you’re creating a foundation for the knot to build upon. As you wrap the tag end, keep the tension even and consistent, making sure not to overtighten or loosen the line.
Tightening and Securing
After successfully tying the loop knot, it’s essential to tighten and secure it to ensure a strong and reliable connection. This step requires patience and attention to detail, as a loose or poorly secured knot can compromise the entire fishing line.
Pulling the Knot Tight
Imagine holding a delicate thread that’s on the verge of snapping. That’s what your knot can be like if you don’t pull it tight. To avoid this, gently pull the tag end to tighten the knot. You’ll know it’s secure when you feel a slight resistance. Be cautious not to over-tighten, as this can cause the line to weaken or even break. It’s a delicate balance, but one that’s crucial for a successful catch.
Trimming Excess Tag End
Now that the knot is secure, it’s time to trim the excess tag end. Think of it like pruning a branch on a tree – it’s necessary to maintain a clean and neat appearance. Using scissors or clippers, carefully trim the tag end, leaving about 1/8 inch of excess. This will prevent any loose ends from getting in the way of your fishing experience. A well-trimmed tag end also reduces the risk of tangles and knots, making your fishing line more efficient and effective.