Discover the types of fishing line swivels and the tools needed for tying a swivel. Follow our step-by-step guide and tips for a secure knot.
Types of Fishing Line Swivels
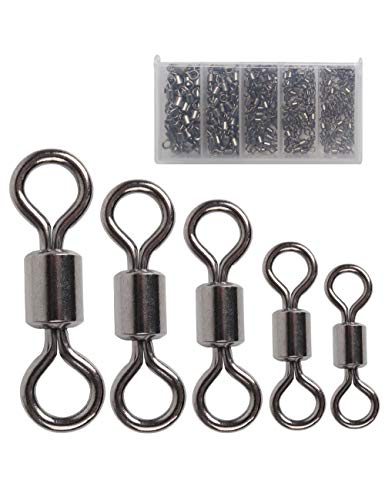
Barrel Swivel
When it comes to fishing line swivels, the barrel swivel is a popular choice among anglers. This type of swivel consists of a barrel-shaped body with rings on either end for attaching the fishing line and the lure. The design of the barrel swivel allows for smooth rotation, preventing your line from twisting and tangling during retrieval. It is ideal for various fishing techniques, from trolling to casting.
Crane Swivel
Another type of fishing line swivel is the crane swivel, which features a more elongated body compared to the barrel swivel. The crane swivel is known for its durability and strength, making it suitable for handling larger fish species. Its design allows for increased flexibility and reduced line resistance, ensuring that your bait or lure moves naturally in the water without any hindrance.
Ball Bearing Swivel
For anglers looking for the ultimate in smooth rotation and reduced friction, the ball bearing swivel is the go-to choice. This type of swivel contains tiny ball bearings within its structure, allowing for unparalleled performance in terms of rotation and flexibility. The ball bearing swivel is particularly effective when targeting fast-swimming fish or when using heavy lures that require maximum maneuverability.
In summary, each type of fishing line swivel offers its unique advantages, catering to different fishing scenarios and preferences. Whether you prioritize durability, smooth rotation, or reduced line resistance, there is a swivel out there to suit your needs. Experimenting with different types of swivels can help you determine which one works best for your fishing style and target species.

- Barrel swivel: Ideal for preventing line twists and tangles
- Crane swivel: Known for durability and strength, suitable for larger fish
- Ball bearing swivel: Offers smooth rotation and reduced friction, perfect for fast-swimming fish
By understanding the characteristics of each type of fishing line swivel, you can make an informed decision when selecting the right swivel for your next fishing adventure.
Tools Needed for Tying a Swivel
Fishing Line
When it comes to tying a swivel, having the right fishing line is essential. The fishing line serves as the foundation of the knot, providing strength and durability to ensure that your swivel stays securely in place. It is important to choose a fishing line that is appropriate for the type of fishing you will be doing, as different lines have varying levels of strength and flexibility. Whether you prefer monofilament, fluorocarbon, or braided line, make sure to select a high-quality line that is suitable for the size and weight of the fish you are targeting.
Swivel
Of course, you can’t tie a swivel without actually having a swivel! Swivels come in a variety of types and sizes, each designed for specific fishing applications. From barrel swivels to crane swivels to ball bearing swivels, choosing the right swivel for your setup is crucial for ensuring smooth and tangle-free fishing. Make sure to select a swivel that is strong enough to handle the weight of your bait and the fish you are targeting, while also allowing for smooth rotation to prevent line twists.
Pliers
Last but not least, pliers are an essential tool for tying a swivel effectively. Pliers are used to cinch down knots tightly, trim excess line, and make adjustments to your rigging. A good pair of fishing pliers will have a comfortable grip, sharp cutting blades, and durable construction to withstand the rigors of fishing. Whether you are tying a swivel for freshwater or saltwater fishing, having a reliable set of pliers in your tackle box is a must for ensuring that your knots are secure and your gear is ready for action.
Step-by-Step Guide to Tying a Swivel
Step 1: Thread the Fishing Line Through the Swivel
When it comes to tying a swivel, the first step is crucial. You need to thread the fishing line through the swivel carefully to ensure a secure connection. This step sets the foundation for the entire knot-tying process. Make sure the line is properly aligned with the swivel to avoid any twists or tangles.
Step 2: Create a Loop with the Fishing Line
Once you have threaded the line through the swivel, the next step is to create a loop with the fishing line. This loop will serve as the starting point for wrapping the line around the swivel. Ensure that the loop is of the right size, neither too loose nor too tight, to maintain the integrity of the knot.
Step 3: Wrap the Line Around the Swivel
Now comes the intricate part of tying the swivel knot – wrapping the line around the swivel. This step requires precision and attention to detail. Make sure to wrap the line around the swivel multiple times to create a strong and secure knot. The number of wraps may vary depending on the type of fishing line and swivel you are using.
Step 4: Secure the Knot with a Half Hitch
After wrapping the line around the swivel, it’s time to secure the knot with a half hitch. This additional step adds extra reinforcement to the knot, making it more durable and reliable. A half hitch involves looping the line around itself and pulling it tight to lock the knot in place. This step is essential for preventing the knot from slipping or coming undone while fishing.
Step 5: Trim the Excess Line
Once you have secured the knot with a half hitch, the final step is to trim the excess line. Trimming the excess line not only improves the aesthetics of the knot but also reduces the chances of tangling or interference while fishing. Use a pair of pliers or scissors to cut the line close to the knot without compromising its integrity.
Tips for Tying a Secure Swivel Knot
Ensure the Knot is Tight
When it comes to tying a secure swivel knot, one of the most important things to remember is to ensure that the knot is tight. A loose knot can easily come undone when you’re out on the water, leading to lost fish and frustration. To make sure your knot is tight, give it a firm tug after tying it to ensure that it holds strong. Remember, a tight knot is a reliable knot.

Use Moisture to Lubricate the Line
Another helpful tip for tying a secure swivel knot is to use moisture to lubricate the line before tying the knot. This can help the line slide more easily through the swivel, making it easier to create a tight and secure knot. Simply wetting the line with some water or saliva can make a big difference in how smoothly the knot ties and how well it holds.
Test the Knot Before Fishing
Before you cast your line into the water, it’s essential to test the knot to ensure its strength and security. Give the line a few gentle tugs to see if the knot holds up under pressure. If the knot slips or comes undone easily, it’s better to discover this on land than when you have a fish on the line. Testing the knot before fishing can save you from losing that big catch.
Remember, when tying a secure swivel knot, attention to detail and proper technique are key. By ensuring the knot is tight, using moisture to lubricate the line, and testing the knot before fishing, you can increase your chances of success on the water. So, next time you’re preparing to tie a swivel knot, keep these tips in mind to ensure a secure and reliable connection between your line and swivel. Happy fishing!


