Tying a spinner bait can be a daunting task, but with the right materials and techniques, you can create a lure that catches fish. Learn how to tie a spinner bait with our step-by-step guide.
Choosing the Right Materials
When it comes to crafting the perfect spinner bait, selecting the right materials is crucial. You wouldn’t build a house on shaky ground, would you? Similarly, your ‘s performance relies heavily on the components you choose. In this section, we’ll delve into the world of hooks, wires, and lure bodies to ensure you make informed decisions.
Selecting the Perfect Spinner Bait Hook
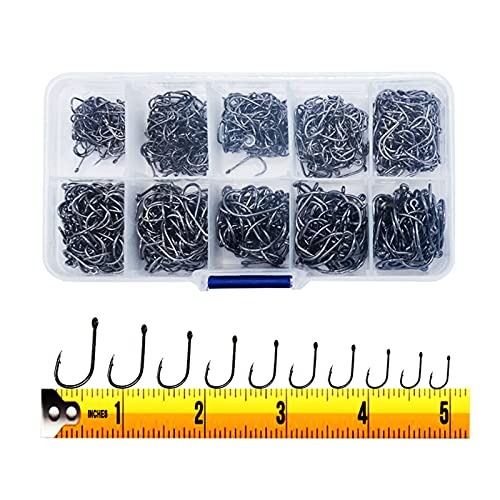
The hook is the business end of your spinner bait, responsible for setting and holding onto fish. With so many options available, it’s essential to understand what makes a great spinner bait hook. Look for hooks with a razor-sharp point and a durable finish to withstand the rigors of battling fish. A hook’s gap (the distance between the point and the shank) should be appropriate for the size of bait you’re using. A larger gap can accommodate thicker baits, while a smaller gap is better suited for slender lures.
Picking the Ideal Spinner Bait Wire
The wire is the backbone of your spinner bait, providing the framework for your creation. You’ll encounter various wire types, including stainless steel, nickel-plated, and aluminum. Stainless steel wires offer exceptional durability and corrosion resistance, making them ideal for saltwater or heavy-duty applications. Nickel-plated wires, on the other hand, provide a more affordable option without sacrificing performance. Aluminum wires are lightweight and suitable for finesse fishing applications.
Choosing the Right Lure Body Material
The lure body is the heart of your spinner bait, responsible for attracting and enticing fish. You’ll encounter a range of materials, including soft plastics, hard plastics, and wood. Soft plastic bodies are often used for their lifelike action and flexibility. Hard plastic bodies, like those made from nylon or ABS, provide a more durable and buoyant option. Wooden bodies, often used for handcrafted lures, offer a unique, natural aesthetic. Consider the water conditions, target species, and desired action when selecting the perfect lure body material for your spinner bait.

Preparing the Spinner Bait Component
Preparing the spinner bait component is a crucial step in creating a high-quality spinner bait that will attract fish. It requires attention to detail and precision to ensure that each component is crafted correctly.
Cutting and Shaping the Lure Body
The first step in preparing the spinner bait component is to cut and shape the lure body. This is a critical step, as the shape and size of the lure body will determine the overall appearance and movement of the spinner bait in the water. To cut and shape the lure body, you’ll need a lure body material, such as plastic or wood, and a hobby knife or lure-making tools. Start by cutting the material to the desired shape and size, taking into account the type of fish you’re targeting and the water conditions.
Think of it like baking a cake: you need to have the right ingredients and mix them together in the right proportions to get the desired result. Similarly, when cutting and shaping the lure body, you need to have the right material and shape it correctly to create a lure that will appeal to fish.
Creating the Spinner Bait Wire Form
Once you have the lure body cut and shaped, the next step is to create the spinner bait wire form. This involves bending a wire into a specific shape that will allow the spinner to spin freely when moved through the water. The wire form should be sturdy enough to support the weight of the spinner and the lure body, yet flexible enough to allow for movement.
Imagine a tiny, intricate dancer, twirling and spinning to the rhythm of the water’s flow. That’s what you want your spinner bait wire form to resemble – a delicate balance of strength and agility.
Attaching the Hook to the Wire Form
Finally, you’ll need to attach the hook to the wire form. This is a crucial step, as the hook will determine the overall effectiveness of the spinner bait. To attach the hook, you’ll need to tie a knot or use a special adhesive to secure it to the wire form. Make sure the knot is secure and the hook is positioned correctly to ensure that it will snag fish efficiently.
Think of it like building a bridge: you need a strong foundation (the wire form) and a sturdy connection (the hook) to ensure that the entire structure (the spinner bait) remains intact and functional.
Tying the Spinner Bait
The moment of truth has finally arrived – it’s time to bring all the components together to create a spinner bait that’s sure to entice even the most discerning fish. This crucial step requires patience, attention to detail, and a dash of creativity. So, grab your materials and let’s dive in!
Creating the Bait’s Body Shape
Before we start attaching the spinner and other components, we need to create the body shape of our lure. Think of this step as building the foundation of a sturdy house – it’s essential to get it right to ensure the entire structure stands tall. To achieve the perfect body shape, hold the wire form in one hand and the lure body material in the other. Gently shape the material around the wire form, making sure to maintain a smooth, consistent curve.
Imagine you’re molding clay – gently squeeze, pull, and shape the material until it takes on the desired form. Don’t be afraid to experiment and try different shapes until you’re satisfied with the result. Remember, the goal is to create a bait that resembles a natural food source, so keep it realistic and proportional.
Attaching the Spinner to the Wire
Now that our bait body shape is taking form, it’s time to attach the spinner to the wire. This is where things can get a bit tricky, but with a few simple techniques, you’ll be a pro in no time. Hold the wire form in one hand and the spinner in the other. Carefully thread the spinner onto the wire, making sure it’s securely attached.
Think of this step as adding the icing to a cake – it’s the finishing touch that brings everything together. As you attach the spinner, make sure it’s positioned correctly, taking into account the natural flow of water and the movement you want to achieve. You want the spinner to rotate smoothly, creating a hypnotic effect on your target fish.
Securing the Bait with Thread or Glue
The final step in tying the spinner bait is to secure everything in place. You can use a strong thread or glue to ensure all the components stay together, even in the most turbulent waters. Apply a small amount of glue to the joint where the spinner meets the wire, or wrap a few strands of thread around the connection.
Imagine you’re building a fort – you want to make sure the structure is stable and can withstand the elements. Take your time, and make sure every component is securely attached. With a few quick twists and turns, you’ll have a spinner bait that’s ready to take on the challenge of the water.

Adding the Final Touches
The final stretch! You’ve come a long way in crafting your spinner bait, and now it’s time to add those finishing touches that’ll make it irresistible to fish.
Adding a Trailer Hook or Soft Plastic
Think of a trailer hook or soft plastic as the icing on the cake. It adds an extra layer of enticement to your spinner bait, making it more likely to lure in those finicky fish. When choosing a trailer hook or soft plastic, consider the type of fish you’re targeting and the water conditions you’ll be fishing in. For example, if you’re after bass, a curly tail or swim bait might do the trick, while for trout, a more subdued approach with a smaller, more natural-looking trailer hook or soft plastic might be more effective.
Applying Paint or Finishing Touches
Now it’s time to get creative! Applying paint or other finishing touches can give your spinner bait a professional, eye-catching appearance that’ll grab the attention of even the most discerning fish. Remember to use paints specifically designed for lure-making, and follow safety precautions to avoid inhaling fumes or getting paint on your skin. You can also experiment with different textures, like glitter or scale patterns, to give your spinner bait an extra layer of realism.
Inspecting and Testing the Spinner Bait
The moment of truth! Before you cast your spinner bait into the water, give it a thorough inspection to ensure everything is in working order. Check that the hook is securely attached, the wire form is evenly shaped, and the lure body is properly aligned. Then, take your spinner bait for a test spin – literally! Tie it to a sturdy object, like a chair leg, and spin it to make sure the blades rotate smoothly and evenly. Make any necessary adjustments before you hit the water, and get ready to reel in those fish!


