Learn how to thread a fishing rod with our step-by-step guide. From choosing the right line to securing the line guides, we cover everything you need to know for successful fishing.
Choosing the Right Line for Your Fishing Rod
Understanding Different Types of Fishing Lines
When it comes to fishing lines, there are several options to choose from, each with its own unique characteristics and uses. Understanding the different types of fishing lines can help you make an informed decision and select the right line for your fishing rod.
- Monofilament Line: This is a popular choice among anglers due to its versatility and affordability. Monofilament lines are made from a single strand of nylon, which makes them strong and resistant to abrasion. They also have good knot strength and are available in a wide range of diameters and strengths to suit various fishing conditions.
- Fluorocarbon Line: Fluorocarbon lines have gained popularity in recent years due to their invisibility in water. These lines are made from a polymer material that is nearly invisible underwater, making them ideal for situations where fish are easily spooked. Fluorocarbon lines also have low stretch, which means you can feel even the slightest nibble on your bait.
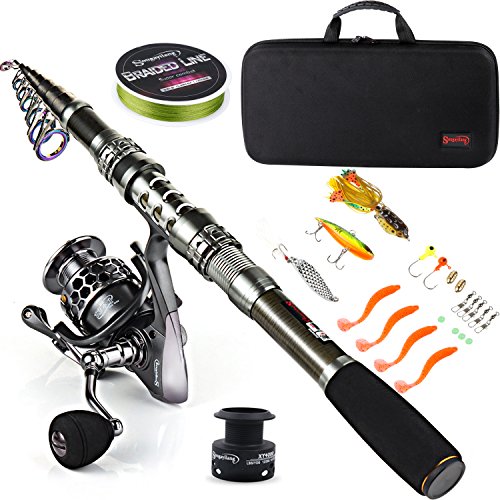
- Braided Line: Braided lines are made by weaving together several strands of synthetic fibers like Spectra or Dyneema. These lines are known for their high strength-to-diameter ratio, making them incredibly strong and durable. They have little to no stretch, providing excellent sensitivity and hook-setting power. However, braided lines are more visible in the water and may require the use of a leader for certain fishing situations.
Factors to Consider When Choosing a Fishing Line
Choosing the right fishing line for your rod involves considering various factors that can affect your fishing experience. Here are some key factors to keep in mind:
- Fishing Conditions: Consider the type of fishing you’ll be doing and the conditions you’ll be fishing in. Different lines perform better in specific environments. For example, monofilament lines are great for general freshwater fishing, while fluorocarbon lines excel in clear water or when targeting finicky fish.
- Target Species: The species of fish you’re targeting can also influence your line choice. Some fish have sharp teeth or tend to make quick runs, requiring a strong and abrasion-resistant line like braided line. Others may be more line-shy, necessitating the use of a nearly invisible fluorocarbon line.
- Line Strength: The strength of the line, measured in pounds (lbs), should match the weight of the fish you plan to catch. It’s important to use a line that can handle the maximum weight of the fish without breaking under pressure.
- Line Diameter: Thicker lines have more strength but are also more visible in the water. Thinner lines, on the other hand, are less visible but may have reduced strength. Consider the balance between visibility and strength based on the fishing conditions and target species.
- Budget: Lastly, consider your budget when choosing a fishing line. Different lines come at different price points, and while quality is important, you don’t always need the most expensive line on the market. Choose a line that suits your needs and fits within your budget.
By understanding the different types of fishing lines and considering the factors mentioned above, you can make an informed decision and choose the right line for your fishing rod. Remember, the right line can greatly enhance your fishing experience and increase your chances of success on the water.
Preparing Your Fishing Rod for Threading
Removing the Old Line from Your Fishing Rod
Before you can begin threading a new fishing line onto your rod, it’s important to remove the old line first. This ensures that you have a clean slate and can start fresh with a new line. Here are the steps to follow when removing the old line from your fishing rod:

- Locate the line attachment point: Look for the point where the old line is attached to the reel. It may be secured with a knot or a clip.
- Untie the knot or unclip the line: If there is a knot, carefully untie it using your fingers or a small tool. If there is a clip, release it to detach the line from the reel.
- Pull the line out: Slowly and steadily, pull the old line out of the line guides and off the rod. Be careful not to yank it too forcefully, as this can damage the rod or the guides.
- Dispose of the old line properly: Once the old line is removed, it’s important to dispose of it properly. Many fishing supply stores offer recycling programs for fishing line, so check if there is a drop-off location near you. If not, you can secure the old line in a plastic bag and dispose of it in a trash bin.
Cleaning and Inspecting Your Fishing Rod
After removing the old line, it’s a good idea to clean and inspect your fishing rod before threading a new line. Cleaning your rod helps to remove any dirt, debris, or residue that may have accumulated over time. Inspecting your rod allows you to identify any potential issues or damage that may need to be addressed. Here’s how you can clean and inspect your fishing rod:
- Wipe down the rod: Use a clean, damp cloth to wipe down the entire length of the rod. Pay special attention to the handle, reel seat, and line guides. This will help remove any dirt or grime that may have accumulated.
- Check for damage: Carefully inspect the rod for any signs of damage, such as cracks, chips, or loose guides. If you notice any issues, it’s important to address them before threading a new line. Depending on the severity of the damage, you may need to repair or replace the rod.
- Lubricate the reel seat: If your fishing rod has a reel seat, consider applying a small amount of reel lubricant to ensure smooth operation. This can help prevent any sticking or binding when attaching the reel.
- Inspect the line guides: Take a close look at each line guide to ensure they are aligned properly and free of any damage. If you notice any misalignment or damage, gently adjust or replace the guides as needed.
By following these steps to remove the old line and clean and inspect your fishing rod, you’ll be well-prepared to thread a new line and get back out on the water. Taking the time to properly prepare your rod ensures that you’ll have a smooth and enjoyable fishing experience.
Threading the Fishing Line onto the Rod
Attaching the Line to the Reel
When it comes to threading the fishing line onto your rod, one of the first steps is attaching the line to the reel. This may seem simple, but it’s important to do it correctly to ensure a smooth fishing experience.
To attach the line to the reel, you’ll need to locate the line attachment point on the reel. This is typically a small hole or slot where the line will be secured. Start by passing the end of the fishing line through this attachment point, making sure to leave a few inches of line hanging free.
Next, you’ll want to secure the line to the reel. One common method is to tie an arbor knot. To do this, create a loop with the free end of the line and pass it over the main line. Then, bring the free end of the line back through the loop and tighten the knot by pulling both ends of the line. This will securely attach the line to the reel.
Properly Spooling the Line onto the Reel
Once you have attached the line to the reel, the next step is to properly spool the line onto the reel. This is essential for avoiding tangles and ensuring that the line is evenly distributed.
To spool the line onto the reel, start by holding the reel in one hand and the line spool in the other. Begin reeling in the line, making sure to apply steady and even pressure. As you do this, it’s important to keep the line taut and prevent it from becoming loose or tangled.
To ensure the line is evenly distributed on the reel, you can use your other hand to guide the line as it is being spooled. This will help to prevent any overlapping or bunching of the line, which can lead to casting issues later on. As you continue to reel in the line, periodically check for any tangles or knots and address them promptly.
Remember, properly spooling the line onto the reel is crucial for smooth casting and efficient fishing. Taking the time to do it right will save you frustration and improve your overall fishing experience.
Now that you know how to attach the line to the reel and properly spool the line onto the reel, you’re ready to move on to securing the line guides.

Securing the Line Guides
Identifying and Inspecting the Line Guides
When it comes to securing the line guides on your fishing rod, it’s important to first identify and inspect them. Line guides are the small loops or rings that run along the length of your fishing rod, guiding the fishing line and preventing it from tangling or snagging.
To identify the line guides, take a close look at your fishing rod. You’ll notice several small metal rings evenly spaced along the rod. These are the line guides. Inspect them carefully to ensure they are in good condition and free from any damage or wear. Look for any signs of rust, cracks, or bent edges that may affect the performance of your fishing line.
If you notice any issues with the line guides, such as rust or damage, it’s important to address them before securing the line. Rust can cause friction and weaken the line, while damaged or bent line guides can lead to line breakage or poor casting. Consider replacing any damaged line guides to ensure optimal performance and prevent any potential problems while fishing.
Properly Aligning and Securing the Line Guides
Once you have identified and inspected the line guides, the next step is to properly align and secure them on your fishing rod. Proper alignment ensures that the line flows smoothly through the guides, reducing friction and allowing for better casting and retrieval.
To align the line guides, start by positioning them evenly along the length of your fishing rod. This will ensure that the line follows a straight path from the reel to the tip of the rod. Check that the guides are aligned horizontally and vertically, as any misalignment can cause the line to twist or tangle during casting.
To secure the line guides, use the provided guide wraps or thread wraps. These are usually made of a thin, durable thread that is wrapped around the base of each line guide. The wraps help to hold the guides in place and prevent them from shifting or rotating during use.
Start by wrapping the thread around the base of the first line guide, making several tight loops. Then, move on to the next line guide and repeat the process until all the guides are secured. Make sure to apply enough tension to keep the line guides in place, but be careful not to overtighten and damage the rod.
Another option for securing the line guides is to use a specialized fishing rod epoxy. This adhesive is applied to the base of each line guide and provides a strong and permanent bond. Follow the manufacturer’s instructions for application and curing times to ensure a secure attachment.
By properly aligning and securing the line guides on your fishing rod, you can ensure smooth line flow, reduce friction, and improve your overall fishing experience. Take the time to inspect and maintain your line guides regularly to ensure they are in optimal condition for your next fishing adventure.
Finishing Touches and Tips
When it comes to preparing your fishing rod for a successful day on the water, there are a few finishing touches and tips that can make all the difference. In this section, we will explore two important aspects: adding backing to the reel and knotting the line to the reel.

Adding Backing to the Reel
Adding backing to your reel is a crucial step that ensures you have enough line to handle any potential trophy fish. Backing is a thin, strong line that is attached to the reel before adding the main fishing line. It provides extra length and allows you to fight larger fish without the risk of running out of line.
To add backing to your reel, follow these steps:
- Start by attaching the backing to the reel arbor. The arbor is the central spindle of the reel where the line is wound. Tie a secure knot, such as an arbor knot, to ensure the backing stays in place.
- Once the backing is attached, begin winding it onto the reel. Use consistent tension and make sure the line is evenly distributed across the spool.
- Continue winding the backing until you have enough to provide a solid foundation for the main fishing line. The amount of backing needed will depend on the type of fishing you plan to do and the size of the reel.
Adding backing to your reel not only gives you extra line length but also helps prevent the main fishing line from slipping on the spool. It is a simple step that can greatly increase your chances of success on the water.
Knotting the Line to the Reel
Knotting the line to the reel is another essential step in preparing your fishing rod. The knot you choose should be strong, secure, and easy to tie. There are several different knots that can be used to attach the line to the reel, but one of the most popular and reliable options is the arbor knot.
To knot the line to the reel using the arbor knot, follow these steps:
- Start by tying a simple overhand knot in the end of the fishing line.
- Pass the free end of the line through the loop of the overhand knot, creating a second loop.
- Hold onto the loop and wrap the free end of the line around the main line and the reel arbor. Make at least three to five wraps.
- Pass the free end of the line back through the second loop you created in step 2.
- Moisten the knot with water or saliva to lubricate it, then pull both ends of the line to tighten the knot. Make sure the knot is snug and secure.
By knotting the line to the reel properly, you can ensure that it stays securely in place during your fishing adventures. A strong and reliable knot will give you the confidence to cast with ease and reel in your catch without any worries.
Remember, the finishing touches of adding backing to the reel and knotting the line to the reel are important steps in preparing your fishing rod. These small details can make a big difference when it comes to landing that trophy fish.
Testing and Adjusting the Line
As an angler, it’s crucial to test and adjust the line on your fishing rod to ensure optimal performance and prevent any issues while you’re out on the water. In this section, we will explore how to check for proper line tension and how to adjust it if needed.
Checking for Proper Line Tension
Before you head out for a day of fishing, it’s important to check if your fishing line has the right amount of tension. Proper line tension is essential for casting accuracy and sensitivity to detect bites. Here are some steps to help you determine if your line has the correct tension:
- Visual Inspection: Start by visually inspecting the line on your reel. Look for any visible signs of slack or loose loops. If you notice any loose parts, it indicates that your line might have insufficient tension.
- Manual Tug Test: Gently tug the line with your fingers. The line should have a slight amount of give but not be overly loose. If the line feels too loose or slips easily, it may require adjustment.
- Casting Test: Practice a few casting motions with your rod and reel. Observe how the line behaves during the cast. If you notice excessive line slippage or tangling, it could be a sign of inadequate tension.
- Sensitivity Test: While holding the rod, lightly tap the line with your finger. You should be able to feel a subtle vibration or movement. If the line feels overly slack and unresponsive, it may need more tension.
Adjusting Line Tension as Needed
If you find that your fishing line is lacking proper tension, don’t worry! It’s relatively easy to adjust and improve the line’s performance. Here are a few methods to help you achieve the desired tension:
- Reel Drag Adjustment: Most fishing reels have a drag adjustment knob or lever. This feature allows you to increase or decrease the resistance on the line when a fish pulls. By tightening the drag slightly, you can add more tension to the line.
- Manual Tension Adjustment: If your reel doesn’t have a drag adjustment or if you need more precise control, you can manually add tension to the line. Hold the line with your fingers as you reel it in, applying gentle resistance to create the desired tension. Be careful not to apply too much force, as it could cause the line to break.
- Line Replacement: In some cases, the fishing line itself may be the issue. If you have tried adjusting the tension but still experience problems, it might be time to replace the line. Over time, fishing line can become worn out, lose its elasticity, or develop weak spots. Replace the line with a fresh one to ensure optimal performance.
Remember, the proper tension of your fishing line can greatly impact your fishing experience. It affects your casting accuracy, lure presentation, and the ability to detect subtle bites. By regularly testing and adjusting the line’s tension, you can maximize your chances of success on the water.


