Discover the tools needed, knot tying techniques, and tips for successful fishing with a rigged fluke. Improve your fishing game with our expert advice.
Tools Needed for Rigging a Fluke
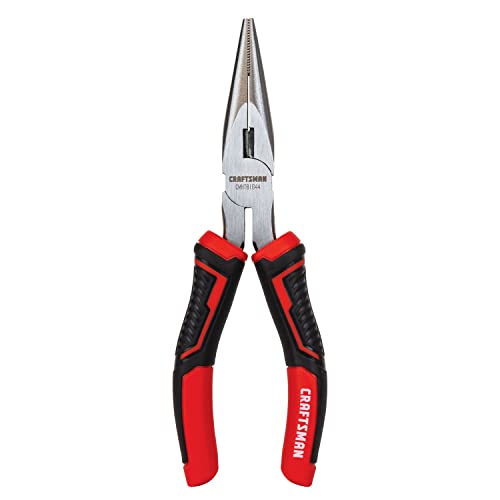
Pliers
When it comes to rigging a fluke, having a good pair of pliers is essential. Pliers will help you securely attach the hooks to the leader material, making sure everything is in place for a successful fishing trip. Look for pliers that are durable and comfortable to use for extended periods of time.
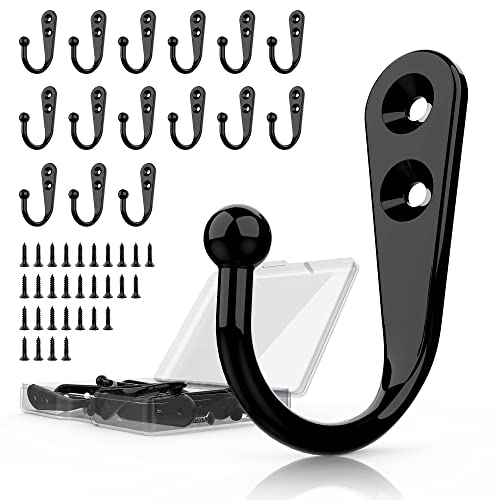
Hooks
Choosing the right hooks for your fluke rig is crucial. The type and size of the hooks will depend on the size of the fluke you are using and the fish you are targeting. Make sure to have a variety of hooks on hand, including both regular and weighted hooks, to suit different fishing conditions.
Leader Material
The leader material is what connects the fluke to your main fishing line. It needs to be strong enough to withstand the weight of the fluke and any fish you may catch. Look for leader material that is abrasion-resistant and has a high breaking strength. Fluorocarbon leaders are a popular choice for rigging a fluke as they are virtually invisible underwater.
In summary, having the right tools for rigging a fluke, such as pliers, hooks, and leader material, is essential for a successful fishing trip. Make sure to invest in quality tools that will last and help you rig your fluke effectively.
Choosing the Right Fluke
When it comes to choosing the right fluke for your fishing excursion, there are a few key considerations to keep in mind. Let’s delve into the details of size and color selection, as well as weight considerations to ensure you have the best possible setup for a successful day out on the water.
Size and Color Selection
Selecting the right size and color of fluke can make a significant difference in your fishing success. The size of the fluke you choose should be based on the type of fish you are targeting and the conditions of the water you will be fishing in. Larger flukes are generally better suited for bigger fish, while smaller flukes may be more effective for targeting smaller species.
When it comes to color selection, it’s essential to consider the visibility of the fluke in the water. Bright colors like chartreuse or pink can be effective in murky or stained water, while natural colors like white or silver may be more suitable for clear water conditions. Experimenting with different colors can help you determine what works best in the specific environment you are fishing in.
Weight Considerations
In addition to size and color, the weight of your fluke is another crucial factor to consider. The weight of the fluke will determine how deep it will sink in the water and how it moves through the water column. Heavier flukes are better suited for fishing in deeper waters or in strong currents, while lighter flukes may be more effective in shallow or calm waters.
When selecting the weight of your fluke, it’s essential to consider the depth at which you want to fish and the speed at which you want the fluke to sink. Adding weight to your fluke rig can help you achieve the desired depth and movement, allowing you to effectively target fish at different levels of the water column.
By carefully considering the size, color, and weight of your fluke, you can increase your chances of success on your next fishing trip. Experimenting with different combinations and observing how fish respond can help you fine-tune your setup for optimal results. So, next time you’re gearing up for a day of fishing, remember to choose your fluke wisely for a rewarding experience on the water.
Tying the Fluke Rig
Snell Knot
When it comes to rigging a fluke, one of the essential knots to master is the Snell Knot. This knot is known for its strength and reliability, making it perfect for securing your fluke in place. To tie a Snell Knot, follow these simple steps:
- Pass the line through the eye of the hook and form a loop.
- Wrap the tag end of the line around the hook shank and the standing line.
- Continue wrapping the tag end around the standing line, creating several tight wraps.
- Pass the tag end through the loop you formed in the beginning.
- Moisten the knot and pull it tight, ensuring that the wraps are snug against the hook shank.
The Snell Knot is ideal for fluke fishing as it helps keep the hook in the optimal position for a successful hookset. Practice tying this knot until you can do it quickly and efficiently out on the water.
Loop Knot
Another important knot for rigging a fluke is the Loop Knot. This knot allows for increased movement and action in your fluke, making it more enticing to fish. Here’s how to tie a Loop Knot:
- Form a small loop at the end of your line.
- Pass the tag end of the line through the eye of the hook.
- Wrap the tag end around the standing line and back through the loop you created.
- Moisten the knot and pull it tight, ensuring that the loop is secure but still allows for movement.
The Loop Knot is great for adding extra action to your fluke, mimicking the natural movement of baitfish in the water. Experiment with different sizes of loops to see what works best for the fishing conditions you encounter.

By mastering both the Snell Knot and Loop Knot, you’ll be well-equipped to rig your fluke effectively and attractively. These knots are simple yet crucial components of successful fluke fishing, so take the time to practice and perfect your technique before hitting the water.
Setting Up the Rigging System
Attaching the Fluke to the Leader
When it comes to attaching the fluke to the leader, there are a few important steps to keep in mind. The first thing you’ll want to do is select the right size and style of fluke for the type of fish you’re targeting. Once you have your fluke selected, it’s time to tie it onto the leader.
One popular knot for attaching a fluke to the leader is the improved clinch knot. This knot is strong and reliable, ensuring that your fluke stays securely in place while you’re out on the water. To tie the improved clinch knot, follow these steps:
- Insert the end of the leader through the eye of the fluke.
- Double back and make five turns around the standing part of the leader.
- Bring the end of the leader back through the first loop formed near the eye of the fluke.
- Then, bring the end of the leader through the big loop created in the previous step.
- Moisten the knot and pull it tight against the eye of the fluke.
Adding Weight for Depth
Adding weight to your rig is essential for getting your fluke down to the desired depth where the fish are biting. The amount of weight you’ll need will depend on factors such as the size of the fluke, the depth of the water, and the current conditions.
One popular method for adding weight to your rig is to use split shot sinkers. These small, round weights can be easily added to the leader above the fluke to help it sink quickly to the desired depth. To attach a split shot sinker, simply pinch it onto the leader using a pair of pliers.

Another option for adding weight to your rig is to use a sliding sinker setup. This involves attaching a sinker to a separate piece of line above the leader, allowing the sinker to slide up and down the line as needed. This can be a great option for adjusting the depth of your fluke quickly and easily while you’re out on the water.
By properly attaching your fluke to the leader and adding the right amount of weight for the depth you’re fishing, you’ll be well on your way to success on the water. Experiment with different setups and techniques to find what works best for you and the fish you’re targeting.
Techniques for Fishing with a Rigged Fluke
Casting and Retrieving
When it comes to fishing with a rigged fluke, one of the most common techniques is casting and retrieving. This method involves casting your line out into the water and then slowly reeling it back in, mimicking the movement of a baitfish. The key to success with this technique is to vary your retrieval speed to entice the fish. By speeding up or slowing down your retrieve, you can trigger a reaction strike from predatory fish.
To effectively cast and retrieve with a rigged fluke, it’s important to use the right equipment. Make sure you have a quality rod and reel that can handle the weight of the fluke and the potential size of the fish you’re targeting. Additionally, using a fluorocarbon leader can help prevent line visibility and increase your chances of getting a bite.
Jigging and Twitching
Another effective technique for fishing with a rigged fluke is jigging and twitching. This method involves making quick, jerky movements with your rod to make the fluke dart and dive in the water. This erratic movement can trigger a predatory response from fish, making them more likely to strike.
To jig and twitch with a rigged fluke, start by casting your line out and letting it sink to the desired depth. Once your fluke is in position, use short, sharp movements with your rod tip to make the fluke dance in the water. Experiment with different cadences and patterns to see what works best for enticing fish in your area.
Using a combination of casting and retrieving, as well as jigging and twitching, can help you cover a variety of water depths and fishing conditions. By staying versatile and adapting your techniques to the situation at hand, you can increase your chances of success on the water.
By incorporating a variety of techniques and staying adaptable, you can maximize your chances of success when fishing with a rigged fluke. Whether you prefer casting and retrieving or jigging and twitching, the key is to keep the fish guessing and present your bait in a way that triggers their predatory instincts. So grab your gear, hit the water, and start experimenting with different techniques to see what works best for you. Happy fishing!
Tips for Success
Vary Your Retrieval Speed
When it comes to fishing with a rigged fluke, one of the most important tips for success is to vary your retrieval speed. Flukes are versatile lures that can mimic the erratic movements of baitfish, so changing up your retrieval speed can help attract more bites. Try starting with a slow and steady retrieve, then switch to a faster pace to see what entices the fish in your area.
- Experiment with different speeds to see what works best in different conditions
- Pay attention to how the fish are reacting to your retrieval speed
- Don’t be afraid to mix it up and try something new
Experiment with Different Fluke Styles
Another key tip for success when fishing with a rigged fluke is to experiment with different fluke styles. Flukes come in a variety of sizes, shapes, and colors, so don’t be afraid to try out a few different options to see what the fish are biting on. Some fish may prefer a larger, more realistic looking fluke, while others may be more attracted to a smaller, more brightly colored option.
- Try different sizes and colors to see what the fish are responding to
- Pay attention to the water conditions and adjust your fluke style accordingly
- Don’t be afraid to switch it up if one style isn’t working
By varying your retrieval speed and experimenting with different fluke styles, you can increase your chances of success when fishing with a rigged fluke. Remember to stay patient and keep trying new techniques until you find what works best for you in different fishing situations.


