Rig your ChatterBait like a pro! Follow our expert guide to master the art of rigging and boost your catch rate. From choosing the right hook to fine-tuning your retrieve, we’ve got you covered.
Choosing the Right ChatterBait
When it comes to rigging a chatterbait, the first and most crucial step is choosing the right one for the job. With so many options available, it can be overwhelming, but don’t worry, we’ve got you covered.
Selecting Hook Size and Type
The hook is the backbone of your chatterbait, and selecting the right size and type is vital. Think of it like choosing the right key for a lock – if you don’t get it right, you’ll be left struggling to open the door (or in this case, catch fish). For example, a larger hook may be needed for bigger bass, while a smaller hook is better suited for panfish. As a general rule of thumb, a 3/0 to 5/0 hook is a good starting point for most applications. When it comes to hook type, consider using a high-carbon hook for added strength and durability.
Picking the Right Trailer Bait
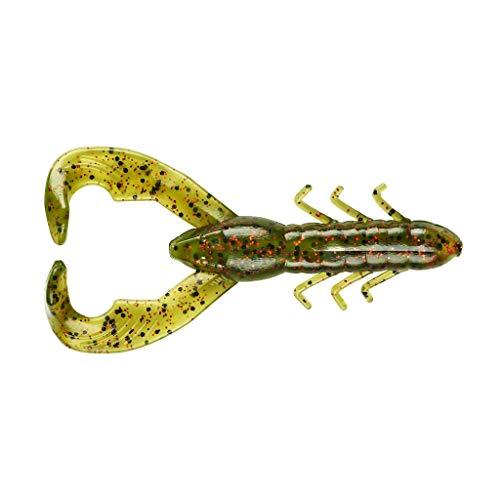
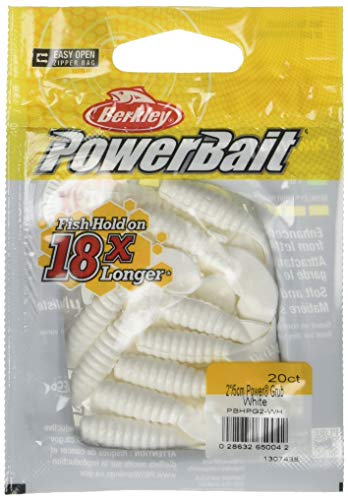
The trailer bait is the unsung hero of the chatterbait world. It’s what adds movement and action to your lure, making it irresistible to fish. So, what makes a good trailer bait? For starters, consider the size and shape of the trailer. A smaller trailer is better suited for finesse fishing, while a larger trailer is perfect for making a bigger splash. Soft plastics, curly tail grubs, and crawdads are all popular trailer options, each with their own unique benefits. For example, a curly tail grub can add a tantalizing flutter to your chatterbait, while a crawdad can mimic the movement of a fleeing crustacean.
Considering Water Conditions
The water conditions you’re fishing in can greatly impact the type of chatterbait you choose. Ask yourself, what kind of water are you fishing in? Is it murky, clear, or somewhere in between? In murky water, a brightly colored chatterbait can be a game-changer, while in clear water, a more subtle approach may be needed. Additionally, consider the water’s temperature, structure, and depth. For example, in colder water, a slower-moving chatterbait may be more effective, while in warmer water, a faster-moving bait can trigger more strikes.
Preparing the ChatterBait
Properly preparing your ChatterBait can make all the difference between a mediocre fishing trip and a memorable one. This crucial step is often overlooked, but trust us, it’s worth taking the time to get it right.
Attaching the Trailer Hook
When it comes to attaching the trailer hook, the goal is to create a secure connection that can withstand the strength of those feisty bass. Imagine a trailer hook as a loyal sidekick, working in tandem with your ChatterBait to lure in those fish. To attach it, simply thread the trailer hook onto the ChatterBait’s hook, making sure it’s snug and secure. You can use a split ring to add extra protection against those pesky fish teeth.
Adding Soft Plastics or Crawdads
Soft plastics and crawdads are the perfect trailer baits to pair with your ChatterBait. They add a tantalizing action and scent that fish find irresistible. When choosing soft plastics, consider using curly tail grubs or plastic worms, which mimic the natural movement of baitfish. For crawdads, select ones that match the size and color of the local crawdad population. Always rig them securely to the trailer hook, ensuring they’re not spinning wildly out of control.
Securing the Bait with a Swivel
A swivel is an often-overlooked but crucial component in your ChatterBait setup. It prevents line twist, which can be a real game-changer when fighting those big ones. Attach the swivel to the main line and then tie the ChatterBait to the swivel. This setup allows the bait to move freely, preventing any clumsy presentations that might spook the fish. Think of the swivel as the referee in a high-stakes wrestling match – it keeps everything in check, ensuring a smooth and successful fight.
Rigging the ChatterBait
Rigging a chatterbait can make all the difference in your fishing experience. After choosing and preparing your chatterbait, it’s time to put it all together. In this section, we’ll dive into the nitty-gritty of rigging your chatterbait for optimal results.

Tying the Knot Securely
Tying a secure knot is crucial to ensuring your chatterbait stays attached to your line. A lost lure can be frustrating, and it’s even more so when it happens repeatedly. To avoid this, make sure to use a reliable knot that can withstand the fight of a fish. The Palomar knot is a popular choice among anglers, as it’s easy to tie and extremely secure. Take your time when tying the knot, making sure it’s snug against the eye of the hook. A well-tied knot will give you peace of mind, allowing you to focus on the more exciting aspects of fishing.
Setting the Bait Depth
Once your knot is secure, it’s time to set the bait depth. This is where you’ll want to consider the water conditions and the type of fish you’re targeting. In general, you’ll want to set the bait to hover just above the bottom of the lake or riverbed. This will increase your chances of catching bigger fish that tend to lurk near the bottom. Use a weighted chatterbait or add a split shot to your line to achieve the desired depth.
Using the Right Retrieval Speed
Now that your chatterbait is rigged and at the desired depth, it’s time to think about retrieval speed. This is where experience and experimentation come into play. The right retrieval speed will depend on the type of fish you’re targeting and the water conditions. Ask yourself: Are you fishing in calm or turbulent water? Are you targeting aggressive or finicky fish? The answers to these questions will help you determine the optimal retrieval speed. For example, in calm water, you may want to use a slower retrieval speed to mimic a natural baitfish swimming pattern. In turbulent water, a faster retrieval speed can help your chatterbait stand out amidst the commotion. Experiment with different retrieval speeds to see what works best for your specific fishing scenario.
Fine-Tuning the Rig
Once you’ve successfully rigged your chatterbait, it’s time to fine-tune it to maximize its effectiveness. This is where the magic happens, and you start to see the fish biting. So, what does it take to fine-tune your rig?
Adjusting the Bait Action
Think of your chatterbait as a dynamic system. Each component interacts with the others to create a unique action that can entice or repel fish. By adjusting the bait action, you can change the way the lure moves through the water, making it more appealing to finicky fish. For example, if you’re using a soft plastic trailer, you can increase or decrease the movement of the bait by adjusting the trailer’s tail. This can help you target specific species or adapt to changing water conditions.
Experimenting with Different Retrieves
Imagine your chatterbait as a dynamic conversation with the fish. You’re asking the fish to take the bait, and the way you retrieve the lure is like asking the question. Different retrieves can evoke different responses from the fish. Try experimenting with slow and steady retrieves, rapid fire, or even paused retrieves to see what triggers a strike. Pay attention to the fish’s response and adjust your retrieve accordingly.
Making Adjustments Based on Fish Behavior
So, you’ve cast your chatterbait, and you’re waiting for that big catch. But what if the fish aren’t biting? It’s time to read their behavior and adjust your rig accordingly. Are the fish swimming lazily near the surface, or are they holding tight to structure? Observe their behavior and adjust your bait action, retrieve, or even the type of trailer to match their mood. Remember, the key to success lies in adaptability. By fine-tuning your rig to the fish’s behavior, you’ll increase your chances of landing a monster catch.


