Master the technique of filleting walleye with this easy-to-follow guide, covering every step from preparation to storage.
Preparing to Fillet
The crucial first step in filleting a walleye is preparation. It’s like baking a cake – you need to have all the right ingredients and tools before you can even think about sinking your teeth into that sweet, sweet goodness.
Gathering Filleting Tools
Before you begin, make sure you have the following essential tools within arm’s reach:
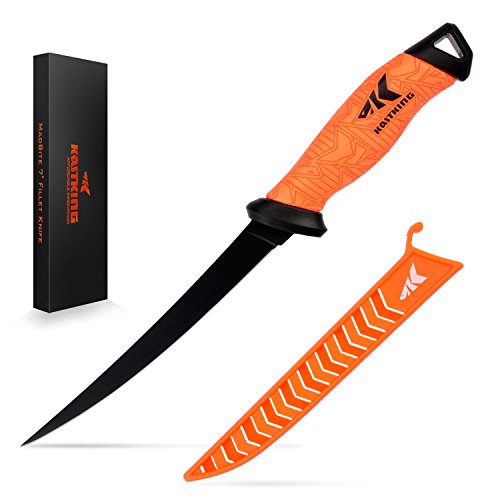
- A sharp fillet knife with a flexible blade (preferably 6-8 inches long)
- A pair of kitchen shears or scissors
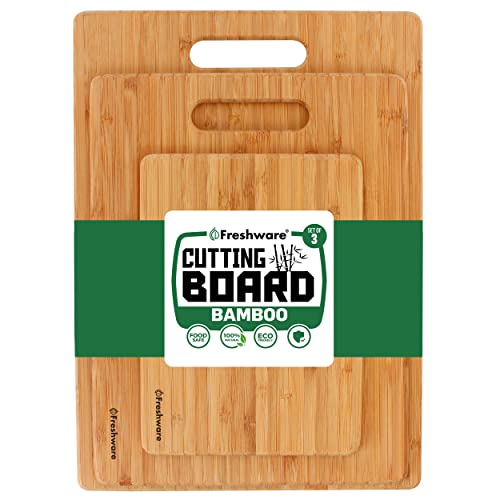
- A cutting board or other stable, clean surface
- A container filled with cold water and ice (for storing the fillets)
- Paper towels or a clean cloth for drying
- A trash can for disposing of the guts and other waste
Having all these tools ready will save you time and frustration in the long run. Think of it like setting up a workspace – you want everything you need to be within easy reach, so you can focus on the task at hand.
Cleaning and Rinsing the Walleye
Now that you have your tools, it’s time to give your walleye a quick cleaning. Rinse the fish under cold running water to remove any loose scales or debris. Hold the fish firmly, belly up, and gently scrub the skin with your fingers or a soft-bristled brush to remove any dirt or slime. This may seem like a tedious step, but trust us – it’s crucial for ensuring food safety and avoiding any off-flavors in your final product. Pat the fish dry with a paper towel or clean cloth to remove excess moisture. Your walleye is now ready for the next step: removing the gills and guts.

Removing the Gills and Guts
Making the First Incision
The first incision is where the magic begins! Before you start cutting, take a deep breath and mentally prepare yourself for the task at hand. You’re about to embark on a journey that requires finesse, patience, and attention to detail.
To make the first incision, hold the walleye firmly on a cutting board, belly side up. Locate the anus, which is the small opening just behind the anus vent (the vent is the area where the fish excretes waste). Take your fillet knife and insert the tip into the anus, making a small, gentle cut about 1-2 inches in length. This initial incision should be shallow, as you’re only aiming to create an entry point for further dissection.
Think of this step as opening a book – you’re not trying to read the entire story at once, but rather, you’re creating an entry point to explore the contents within. In this case, the contents within are the gills and innards, which you’ll soon be removing.
Removing the Gills and Innards
Now that you’ve made the first incision, it’s time to remove the gills and innards. Hold the walleye at an angle, with the belly facing upwards, and carefully cut around the anus, following the natural curve of the fish’s body. This will help you avoid cutting too deeply and potentially damaging the fillet.
As you cut, use your fingers or a pair of tweezers to gently tease out the innards, taking care not to spill any contents onto your work surface. You may encounter some resistance as you work your way around the gills, but don’t worry – this is normal. Simply take your time, and the innards should come out relatively easily.

Remember, the goal is to remove the innards intact, without breaking them open and spilling their contents. Think of it like carefully unwrapping a delicate gift – you want to preserve the wrapping paper (the innards) as much as possible to avoid making a mess.
With the innards removed, take a moment to inspect your handiwork. Your walleye should now have a neat, elliptical incision, with the gills and innards neatly extracted. You’re one step closer to filleting your catch!
Filleting the Walleye
Filleting a walleye is an art that requires patience, attention to detail, and a gentle touch. You’ve made it this far, and now it’s time to get down to business. In this section, we’ll guide you through the filleting process, helping you to extract the most delicious and tender meat from your catch.
Making the Initial Cut
The initial cut is the most crucial step in filleting a walleye. It’s where the magic begins, and it’s essential to get it right. Hold the walleye firmly, belly up, and locate the spine. Make a small incision just above the spine, starting from the head and working your way down to the tail. The cut should be about 1/4 inch deep and should follow the natural curve of the spine. Think of it as creating a zipper line that will help you access the meat.
Imagine holding a delicate vase, and you need to create a precise line around it without breaking it. That’s the level of precision you need for this cut. Take your time, and don’t be afraid to take small, gentle strokes. Remember, the goal is to create a smooth, even cut that will help you separate the fillet from the bone.

Separating the Fillet from the Bone
Now that you’ve made the initial cut, it’s time to separate the fillet from the bone. Hold the walleye firmly with one hand, and use your other hand to gently pry the fillet away from the bone. Start at the head and work your way down to the tail, using a gentle sawing motion to release the fillet from the ribcage. Think of it as carefully unwrapping a delicate gift.
As you separate the fillet, you’ll notice that it will start to come away from the bone in one piece. Be gentle, as you don’t want to tear the fillet or leave any meat behind. Take your time, and work slowly, as this is a crucial step in getting the perfect fillet.
Removing the Bloodline and Dark Meat
The bloodline and dark meat can give your fillet a bitter taste and a soft texture, so it’s essential to remove them. The bloodline is the dark red line that runs along the spine, and the dark meat is the soft, dark flesh that surrounds the spine. Use your fingers or a pair of needle-nose pliers to gently pull away the bloodline and dark meat from the fillet. You can also use a fillet knife to carefully cut out the dark meat, but be careful not to cut too deeply and damage the fillet.
Think of it as cleaning a delicate brush – you want to remove any impurities that might affect the taste and texture of your fillet. By removing the bloodline and dark meat, you’ll be left with a pristine, white fillet that’s ready for cooking.
Deboning and Skinning
Deboning and skinning are crucial steps in filleting walleye, as they allow you to remove the bones, spine, and skin, resulting in a tender and flavorful fillet. In this section, we’ll guide you through the process of deboning and skinning your walleye, ensuring you end up with a pristine fillet ready for cooking.
Removing the Rib Cage and Spine
Imagine the rib cage and spine of the walleye as a delicate, intricate puzzle. To remove them, you’ll need to carefully navigate around the bones, taking care not to tear or puncture the fillet. Hold the walleye firmly, with the belly facing upwards, and locate the rib cage. Gently pry the rib cage away from the spine, working your way along the fish, starting from the head and moving towards the tail. Be patient and precise, as this step requires finesse to avoid damaging the fillet.
Skinning the Fillet
With the rib cage and spine removed, it’s time to skin the fillet. Hold the fillet skin-side down and locate the thin layer of skin that’s still attached. Take your fillet knife and make a shallow incision along the edge of the skin, being careful not to cut too deeply and ruin the fillet. Gently pry the skin away from the fillet, working your way along the length of the fish. As you remove the skin, take care to avoid tearing the delicate flesh beneath.
Removing Pin Bones and Bloodline
The pin bones and bloodline are the final obstacles standing between you and a perfectly filleted walleye. To remove the pin bones, hold the fillet firmly and locate the row of small bones that run along the lateral line. Take your tweezers and carefully pluck out each pin bone, working from the head towards the tail. Next, locate the bloodline, a dark, reddish-brown line that runs along the length of the fillet. Use your fillet knife to make a shallow incision along the bloodline, and gently pry it away from the fillet. With the pin bones and bloodline removed, your walleye fillet is now ready for cooking, free from bones, skin, and imperfections.
Final Touches
The final stretch! You’ve made it through the filleting process, and now it’s time to add those finishing touches to your freshly filleted walleye.
Trimming the Fillet
Think of this step as putting the final embellishments on a masterpiece. You’ve got a beautifully filleted walleye, but there might be some straggling pieces of skin or fat clinging to the edges. Take your trusty fillet knife and gently trim away any unnecessary bits, making sure to follow the natural curve of the fillet. This step is crucial in ensuring your fillet looks appetizing and, more importantly, is safe to eat.
Rinsing and Pat Drying the Fillet
Now that your fillet is trimmed to perfection, it’s time to give it a quick rinse under cold running water to remove any remaining scales or debris. Be gentle, as you don’t want to bruise the delicate flesh. Next, use a paper towel or clean cloth to pat the fillet dry, removing excess moisture. This step is vital in preventing bacterial growth and keeping your fillet fresh for longer.
Storing the Fillet for Later Use
You’ve made it! Your beautifully filleted walleye is now ready to be stored away for later use. Wrap the fillet tightly in plastic wrap or aluminum foil, making sure to press out as much air as possible before sealing. You can then store it in the refrigerator for up to three days or freeze it for up to six months. When storing, consider labeling the packaging with the date and contents, so you can easily keep track of how long it’s been stored. Now, go ahead and give yourself a pat on the back – you’ve successfully filleted a walleye!


