Want to switch your baitcaster reel to left-handed? Follow our simple guide on how to change a baitcaster reel from right to left-handed. Learn the needed, how to remove the side plate, adjust the brake system, flip the handle, and reassemble the reel for a smooth left-handed fishing experience.
Tools Needed for Changing a Baitcaster Reel
When it comes to changing a baitcaster reel, having the right can make the process much smoother. Here are the essential you’ll need:
Screwdriver
A screwdriver is a must-have tool for changing a baitcaster reel. It allows you to remove and tighten screws that hold different parts of the reel together. When selecting a screwdriver, make sure it has a comfortable handle grip and a variety of interchangeable tips. This way, you can easily access and work with different screw sizes on your reel.
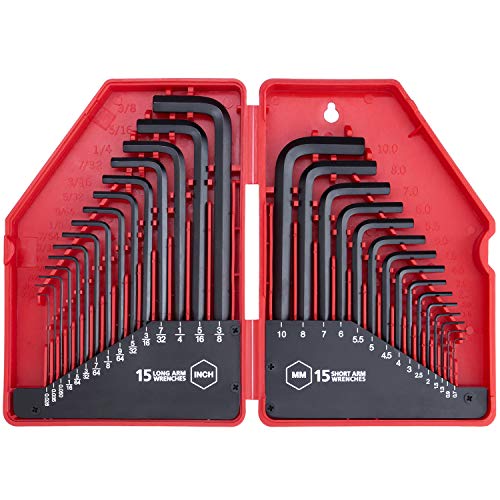
Allen wrench
Another tool you’ll need is an Allen wrench. This hexagonal-shaped tool is commonly used to tighten or loosen screws with hexagonal sockets. In the case of a , you’ll typically find screws that require an Allen wrench to remove or tighten them. It’s important to have a set of Allen wrenches in various sizes to accommodate different screw sizes on your reel.
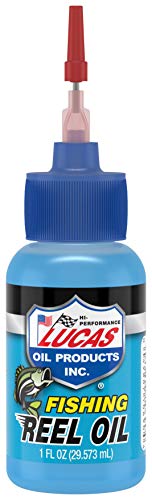
Reel oil
Reel oil is an essential lubricant for maintaining and changing a baitcaster reel. It helps reduce friction between moving parts, ensuring smooth operation and prolonging the lifespan of your reel. When selecting reel oil, look for a high-quality lubricant specifically designed for fishing reels. Apply a small amount of oil to the necessary parts of your reel during the reassembly process, following the manufacturer’s instructions.
Having these readily available will save you time and frustration when changing a . With a screwdriver, Allen wrench, and reel oil in your toolkit, you’ll be well-equipped to tackle the various steps involved in reel maintenance and adjustment.
Removing the Side Plate of the Reel
When it comes to changing a baitcaster reel, the first step is to remove the side plate. This will give you access to the inner components of the reel and allow you to make any necessary adjustments or repairs. Here’s a step-by-step guide on how to remove the side plate:
Locate the screws on the side plate
Take a close look at the side plate of your . You’ll notice several screws holding it in place. These screws are typically located on the outer edges of the side plate. Identifying and locating these screws is the first task in removing the side plate.
Unscrew the screws using a screwdriver
Once you’ve located the screws, it’s time to remove them. Grab a screwdriver that fits the size and shape of the screws on your reel. With a steady hand, gently apply pressure to unscrew each screw. Make sure to keep track of the screws as you remove them, as you’ll need them later when reassembling the reel.
Lift off the side plate
Once all the screws have been removed, the side plate should be loose. Carefully lift off the side plate, taking note of any resistance or obstacles along the way. In some cases, the side plate may be held in place by additional mechanisms, such as tabs or clips. If this is the case, gently release these mechanisms to completely remove the side plate.

Removing the side plate is an essential step in accessing the inner workings of your baitcaster reel. It sets the stage for further adjustments and repairs that may be needed. With the side plate off, you’ll have a clearer view of the brake system, handle assembly, and other components that may require attention.
Adjusting the Brake System
Find the brake adjustment knob
When it comes to adjusting the brake system on your baitcaster reel, the first step is to locate the brake adjustment knob. This knob is typically located on the side plate of the reel and is used to control the amount of braking applied during casting.
Turn the knob counterclockwise to decrease braking
To decrease the braking on your , simply turn the brake adjustment knob counterclockwise. This will loosen the brake system and allow for longer casting distances. It’s important to note that decreasing the braking too much can result in backlash, so it’s best to make small adjustments and test the reel after each adjustment.
Turn the knob clockwise to increase braking
If you find that your baitcaster reel is experiencing backlash or you want to have more control over your casts, you can increase the braking by turning the knob clockwise. This tightens the brake system, reducing the speed of the spool and providing more resistance. By increasing the braking, you can achieve more accurate casts and prevent the line from tangling.
Adjusting the brake system on your baitcaster reel is a crucial step in optimizing your casting performance. By finding the brake adjustment knob and making small adjustments, you can achieve the perfect balance of distance and control. Experiment with different settings to find what works best for your fishing style and conditions.
Removing the Handle Assembly
The handle assembly is an essential component of a baitcaster reel and may need to be removed for maintenance or replacement. Follow these simple steps to remove the handle assembly:
Locate the handle nut
Before you can remove the handle assembly, you need to locate the handle nut. The handle nut is typically located on the opposite side of the handle, near the base. It is a small, round nut that holds the handle assembly in place.
Unscrew the handle nut using an Allen wrench
To remove the handle assembly, you’ll need to unscrew the handle nut. An Allen wrench is the perfect tool for this task. Insert the appropriate-sized Allen wrench into the handle nut and turn it counterclockwise to loosen the nut. Make sure to hold onto the handle assembly as you loosen the nut to prevent it from falling off.
Slide off the handle assembly
Once the handle nut is loosened, you can easily slide off the handle assembly from the reel. Gently pull the handle assembly away from the reel, making sure not to force it. If it doesn’t come off easily, double-check that the handle nut is fully loosened.

Removing the handle assembly gives you access to other parts of the baitcaster reel for cleaning, lubrication, or any necessary repairs. Remember to keep track of the handle nut and handle assembly so you can reassemble the reel correctly.
Here’s a summary of the steps to remove the handle assembly:
- Locate the handle nut.
- Unscrew the handle nut using an Allen wrench.
- Slide off the handle assembly.
By following these simple instructions, you’ll be able to remove the handle assembly from your with ease.
Flipping the Handle to the Left Side
Locate the handle tabs
When it comes to changing a baitcaster reel to a left-handed setup, the first step is to locate the handle tabs. These tabs are usually located on the side of the reel and are used to secure the handle assembly in place. Take a moment to familiarize yourself with the reel and locate these tabs.
Remove the handle tabs using a screwdriver
Once you have located the handle tabs, you will need a screwdriver to remove them. Carefully unscrew the tabs, making sure to keep track of any small screws that may be involved. It’s important to be gentle and take your time to avoid damaging any parts of the reel.

Reattach the handle tabs on the left side
After successfully removing the handle tabs, it’s time to reattach them on the left side of the reel. This step is crucial in converting the reel to a left-handed setup. Make sure to align the tabs properly and securely fasten them using the same screws you removed earlier.
By flipping the handle to the left side, you are creating a more comfortable and efficient setup for left-handed anglers. This adjustment allows for smoother and more natural casting and reeling motions.
Remember, practice makes perfect. Take the time to get familiar with your new left-handed setup and adjust your casting technique accordingly. With a little practice, you’ll be reeling in the big catches with ease.
Reassembling the Reel
Now that you have successfully disassembled your baitcaster reel, it’s time to put it back together. Reassembling the reel may seem daunting, but with the right and step-by-step instructions, it can be a straightforward process. In this section, we will guide you through reassembling the reel, ensuring that each component is correctly placed and secured.
Slide the handle assembly back onto the reel
The first step in reassembling your baitcaster reel is to slide the handle assembly back onto the reel. Take the handle assembly and align it with the reel’s handle shaft. Make sure the handle fits snugly onto the shaft, ensuring smooth operation when rotating.
Tighten the handle nut using an Allen wrench
Once the handle assembly is in place, you’ll need to secure it by tightening the handle nut. Locate the handle nut on the opposite side of the handle assembly and use an Allen wrench to tighten it. Ensure that the handle nut is securely fastened, but be careful not to overtighten, as it may cause damage to the reel.
Place the side plate back on the reel
With the handle assembly securely in place, it’s time to put the side plate back onto the reel. Take the side plate and align it with the reel’s frame, ensuring that all the screw holes line up correctly. The side plate provides protection and stability to the internal components of the reel, so it’s crucial to position it accurately.
Screw in the side plate screws using a screwdriver
To complete the reassembling process, you’ll need to screw in the side plate screws using a screwdriver. Start by inserting the screwdriver into one of the screw holes and turn it clockwise to tighten the screw. Repeat this process for all the remaining screws, making sure they are securely fastened.
Remember, each step in the reassembling process is essential for ensuring the proper functioning of your . Take your time and double-check that all components are correctly aligned and secured. Now that you have successfully reassembled your reel, you are one step closer to enjoying its smooth operation and optimal performance.
Below is a summary of the reassembling process:
- Slide the handle assembly back onto the reel.
- Tighten the handle nut using an Allen wrench.
- Place the side plate back on the reel, aligning it correctly.
- Screw in the side plate screws using a screwdriver.
With these steps completed, you can move on to the final section, where we will guide you through testing the left-handed baitcaster reel to ensure its smooth operation and make any necessary adjustments to the brake system.
Testing the Left-Handed Baitcaster Reel
Rotate the handle to ensure smooth operation
When you’ve successfully flipped the handle to the left side of your , it’s important to test its functionality. Start by rotating the handle in a smooth motion to ensure that it moves freely without any resistance. This will ensure that the reel is properly assembled and will provide you with a seamless fishing experience.
Adjust the brake system for optimal casting
Now that you’ve confirmed the smooth operation of the handle, it’s time to fine-tune the brake system for optimal casting. Locate the brake adjustment knob, which is typically found on the side plate of the reel. By turning the knob counterclockwise, you can decrease the braking force, allowing for longer and more accurate casts. On the other hand, turning the knob clockwise will increase the braking force, which can be useful in windy conditions or when using lighter lures. Experiment with different settings to find the perfect balance that suits your fishing style.
Practice casting with the new left-handed setup
With the handle flipped to the left side and the brake system adjusted, it’s time to put your new left-handed baitcaster reel to the test. Find an open area, preferably near water, where you can practice your casting technique. Start with short and controlled casts, gradually increasing the distance as you gain confidence. Pay attention to the smoothness of your casts and the accuracy of your lure placement. Remember, practice makes perfect, so don’t get discouraged if it takes some time to get used to the left-handed setup. With patience and practice, you’ll soon become comfortable and proficient with your new reel.
By following these steps and taking the time to test and adjust your left-handed , you’ll not only ensure its proper functioning but also enhance your overall fishing experience. So get out there, cast with confidence, and enjoy the benefits of using a reel that suits your dominant hand. Happy fishing!


