Transform your boating experience with a custom DIY boat trailer. Follow our DIY guide to build a sturdy and reliable trailer that meets your boat’s needs.
Planning Your DIY Boat Trailer
Planning a DIY boat trailer project can be a daunting task, but with a clear understanding of the essential factors, you’ll be well on your way to creating a safe and reliable trailer for your beloved boat. In this section, we’ll delve into the crucial considerations you should make before starting your project.
Determine Your Boat’s Weight Capacity
Before you begin building your trailer, it’s essential to determine your boat’s weight capacity. This may seem like a no-brainer, but you’d be surprised at how many DIY enthusiasts overlook this critical step. Your boat’s weight capacity is the maximum weight it can safely carry, including the weight of the boat itself, fuel, passengers, and any additional gear.
Think of it like this: Imagine your boat is a giant suitcase, and you’re packing it with all the essentials for a weekend getaway. You need to know how much “stuff” you can fit in that suitcase without exceeding its weight limit. Similarly, you need to know your boat’s weight capacity to ensure your trailer can handle the load.
To determine your boat’s weight capacity, check your boat’s documentation or manufacturer’s website for the recommended gross trailer weight rating (GTW). This rating includes the weight of the boat, trailer, and any additional cargo.

Choose the Right Trailer Size
Now that you know your boat’s weight capacity, it’s time to choose the right trailer size. This is a critical step, as a trailer that’s too small can compromise safety and put unnecessary stress on your vehicle.
When selecting a trailer size, consider the following factors:
- The length and width of your boat
- The weight capacity of your boat
- The type of terrain you’ll be towing on (e.g., smooth roads, rough terrain, or boat ramps)
Think of choosing the right trailer size like buying a pair of shoes. You need a pair that fits comfortably, provides enough support, and meets your specific needs. A trailer that’s too small is like wearing shoes that are too tight – it’s uncomfortable and can lead to problems down the road.
Consider Local Towing Regulations
Last but not least, it’s essential to consider local towing regulations in your area. These regulations can vary greatly depending on your location, so it’s crucial to do your research.
Ask yourself:
- Are there any specific towing restrictions in my area?
- Do I need a special permit to tow my boat?
- Are there any specific safety requirements or inspections I need to adhere to?
By understanding local towing regulations, you can avoid potential fines, ensure a safe towing experience, and comply with local authorities. It’s like knowing the rules of the road before embarking on a road trip – you want to be prepared and avoid any unexpected surprises along the way.
By carefully considering your boat’s weight capacity, choosing the right trailer size, and familiarizing yourself with local towing regulations, you’ll be well-prepared to start building your DIY boat trailer. In the next section, we’ll dive into the process of building the trailer frame, so buckle up and let’s get started!
Building the Trailer Frame
When it comes to building the trailer frame, you’re essentially creating the skeleton of your DIY boat trailer. This is a critical stage that requires precision, patience, and attention to detail. Think of it as building the foundation of a house – if the foundation is weak, the entire structure will collapse.
Cutting and Assembling the Frame
Before you start welding, you need to cut and assemble the frame. This involves creating the individual components, such as the side rails, crossbeams, and tongue. You’ll need to use a combination of measuring, marking, and cutting to get the pieces just right. Imagine building a giant puzzle – each piece must fit together perfectly to create a sturdy structure.
Here are some tips to keep in mind:

- Use a miter saw or a band saw to make precise cuts.
- Deburr the edges to prevent scratches and injuries.
- Assemble the frame on a level surface to ensure it’s square and even.
Welding the Frame Together
With your frame assembled, it’s time to weld the pieces together. This is a crucial stage that requires skill, practice, and caution. Think of welding as cooking a delicate sauce – you need to get the heat, timing, and technique just right. Here are some welding tips:
- Use the correct welding technique for the type of metal you’re working with.
- Ensure the welding area is clean, dry, and free from wind.
- Wear protective gear, including gloves, goggles, and a welding helmet.
Adding Support Brackets and Axles
Once the frame is welded, you need to add support brackets and axles to create a sturdy and balanced trailer. This is like adding the roof and walls to your house – it provides additional strength and support. Here’s what to keep in mind:
- Attach the support brackets to the frame using high-strength bolts and nuts.
- Ensure the axles are properly aligned and secured to the frame.
- Consider adding additional features, such as spring suspension, to improve the trailer’s ride and stability.
Installing the Wheels and Brakes
Installing the wheels and brakes on your DIY boat trailer is a critical step that requires careful consideration and attention to detail. A well-designed wheel and brake system can make all the difference in ensuring a safe and smooth towing experience.
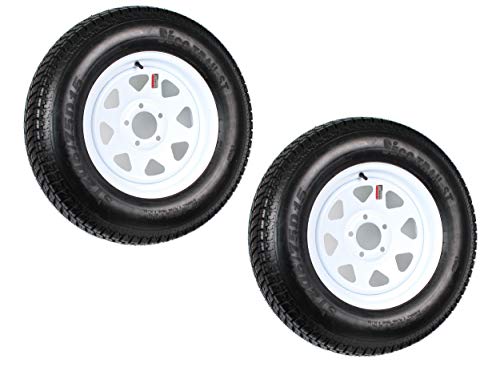
Choosing the Right Tires and Rims
When it comes to selecting the right tires and rims for your trailer, there are several factors to consider. First and foremost, you need to ensure that your tires are rated for the weight capacity of your trailer and the speed at which you plan to tow. You should also consider the terrain you’ll be towing on – if you’ll be towing on rough or uneven roads, you may want to opt for more heavy-duty tires. Another important consideration is the size and type of rim – steel or aluminum rims are both popular options, but steel rims are generally more affordable and durable.
Installing Brake Assemblies and Wiring
Installing brake assemblies and wiring is a complex task that requires careful planning and execution. You’ll need to ensure that your brake assemblies are compatible with your trailer’s wiring system, and that all wiring is securely connected and protected from the elements. One common mistake to avoid is using inadequate wiring – make sure you choose wiring that’s rated for the weight and speed of your trailer.

Ensuring Proper Wheel Alignment
Proper wheel alignment is crucial for ensuring a smooth and safe towing experience. Misaligned wheels can cause uneven tire wear, reduced fuel efficiency, and even loss of control while towing. To ensure proper wheel alignment, you’ll need to consult your trailer’s manufacturer instructions and use specialized tools to adjust the wheels accordingly. A good rule of thumb is to check wheel alignment every time you change your trailer’s tires or after any major repairs.
Adding the Trailer Bed and Rails
The trailer bed and rails are critical components of your DIY boat trailer, providing a sturdy platform for your boat and ensuring safe transportation. In this section, we’ll guide you through the process of cutting and assembling the trailer bed, attaching the rails and bunks, and installing the winch and tie-downs.
Cutting and Assembling the Trailer Bed
Imagine a puzzle with many intricate pieces – that’s what cutting and assembling the trailer bed can feel like. You’ll need to carefully measure and cut the metal sheets or wooden planks to fit your trailer’s frame, ensuring a snug and secure fit. Consider using a template or a design software to visualize your trailer bed’s layout and minimize errors. Once you have your pieces cut, assemble them using bolts, screws, or welding, depending on your chosen material.
Attaching the Rails and Bunks
Now it’s time to attach the rails and bunks, which will cradle your boat during transportation. Think of the rails as the “arms” that will hold your boat securely in place, while the bunks provide additional support and cushioning. When attaching the rails, ensure they’re level, sturdy, and evenly spaced to prevent any damage or shifting during transit. The bunks should be securely fastened to the trailer bed, with sufficient clearance for your boat’s hull.
Installing the Winch and Tie-Downs
The winch and tie-downs are essential for securing your boat to the trailer during transportation. Imagine trying to tie down a slippery fish – that’s what it can feel like without a reliable winch and tie-down system. Choose a winch with sufficient capacity to handle your boat’s weight, and ensure the tie-downs are securely attached to the trailer frame and your boat’s hull. Don’t forget to leave enough slack for easy loading and unloading. With these components in place, you’ll be able to transport your boat with confidence.

Wiring and Lighting the Trailer
Electrical systems can be intimidating, but don’t let that stop you from building a safe and functional DIY boat trailer. In this section, we’ll break down the process of wiring and lighting your trailer, so you can hit the road with confidence.
Understanding Wiring and Electrical Systems
Think of your trailer’s electrical system like a roadmap – it’s essential to know where everything connects and how it all works together. The wiring system consists of three main components: the tow vehicle, the trailer, and the connector. The connector is the bridge that links the tow vehicle’s electrical system to the trailer’s, allowing them to communicate and function in harmony.
When it comes to wiring, there are a few key terms to understand:
- Grounds: These are the wires that connect to the trailer’s frame, providing a safe path for electricity to flow.
- Hots: These are the wires that carry power from the tow vehicle to the trailer.
- Neutrals: These wires complete the circuit, allowing electricity to flow back to the source.
Installing Lights and Reflectors
Now that you have a basic understanding of how the electrical system works, it’s time to install lights and reflectors on your trailer. This is a critical safety feature, as it helps other drivers see your trailer, especially in low-light conditions.
When choosing lights, consider the following:
- LED lights: Energy-efficient and long-lasting, LED lights are a popular choice for trailers.
- Incandescent lights: A more affordable option, incandescent lights still get the job done.
- Reflectors: These are essential for providing visibility from the side and rear of the trailer.
When installing lights and reflectors, make sure to:
- Follow the manufacturer’s instructions
- Use waterproof connectors to prevent corrosion
- Test your lights regularly to ensure they’re functioning properly
Adding a Breakaway Switch and Battery
Imagine you’re hauling your boat down the highway, and suddenly, the trailer becomes disconnected from your tow vehicle. Without a breakaway switch and battery, your trailer’s brakes would be inactive, leading to a potential disaster. This safety feature is designed to engage the trailer’s brakes in the event of a separation, allowing you to regain control.
Here’s how it works:
- The breakaway switch is connected to the trailer’s battery and brakes.
- If the trailer becomes disconnected, the switch activates, applying the brakes and bringing the trailer to a safe stop.
Remember to:
- Choose a battery with sufficient power to activate the brakes
- Install the breakaway switch according to the manufacturer’s instructions
- Regularly inspect and maintain the breakaway system to ensure it’s functioning properly
Safety Considerations and Inspections
When it comes to building a DIY boat trailer, safety should always be top of mind. After all, you’re not just building a trailer – you’re building a vessel that will carry your prized boat, and potentially, your loved ones. In this section, we’ll cover the essential safety considerations and inspections to ensure your trailer is roadworthy and seaworthy.
Regular Maintenance and Inspections
Regular maintenance is crucial to ensure your trailer remains safe and reliable. Think of it like maintaining your car – you wouldn’t drive it for years without checking the oil, tire pressure, and brakes, would you? Your DIY boat trailer deserves the same attention. Set a schedule to inspect your trailer regularly, looking for signs of wear and tear, rust, or damage. Check the tire pressure, brake pads, and lights to ensure they’re functioning properly. A well-maintained trailer is a safe trailer.
Ensuring Proper Weight Distribution
Imagine your boat and trailer as a delicate balance scale. If the weight is unevenly distributed, the entire system can come crashing down – literally. To avoid this, make sure your trailer is designed to handle the weight of your boat, and that the weight is evenly distributed across the axles. Consult your boat’s manual to determine its center of gravity, and then position it accordingly on the trailer. Remember, a well-balanced trailer is a safe trailer.
Safety Precautions for Towing and Launching
The final hurdle in your DIY boat trailer journey is towing and launching your boat safely. Always check the weather forecast before heading out, and never tow your trailer in strong winds or rough seas. When launching, ensure the trailer is properly positioned on the ramp, and that the boat is securely tied down. Never stand behind the trailer while it’s in motion, and keep loose items like ropes and straps clear of moving parts. By following these simple safety precautions, you’ll be enjoying your time on the water in no time.


