Explore the world of fish finders for jon boats, from choosing the right one to installing and customizing it for a successful fishing trip.
Choosing the Right Fish Finder
When it comes to choosing a fish finder for your jon boat, there are several factors to consider. With so many options available, it can be overwhelming to make a decision. But don’t worry, we’ve got you covered. In this section, we’ll break down the types of fish finders available for jon boats and the key features to look for.
Types of Fish Finders for Jon Boats
There are several types of fish finders available, each with its own strengths and weaknesses. Do you need a budget-friendly option or are you looking to invest in a high-end model with advanced features? The type of fish finder you choose will depend on your fishing style, the size of your jon boat, and your budget.
Some popular types of fish finders for jon boats include:
- Portable fish finders: These are great for small jon boats or for those who want a more affordable option. They’re lightweight, easy to use, and can be easily transported.
- Fixed-mount fish finders: These are ideal for larger jon boats or for those who want a more permanent installation. They offer more advanced features and better performance than portable models.
- Combination fish finders: These models combine a fish finder with a GPS unit, providing you with a comprehensive navigation system.
Key Features to Consider
When choosing a fish finder, there are several key features to consider. Ask yourself:
- What is your budget? Fish finders can range from a few hundred to several thousand dollars. Set a budget and stick to it.
- What type of fishing will you be doing? Will you be fishing in shallow waters or deep waters? Do you need a model with advanced features like side imaging or CHIRP sonar?
- How important is screen size and resolution? Do you want a larger screen with high resolution or a smaller screen with lower resolution?
- Do you need GPS capabilities? If so, look for a combination fish finder with GPS.
- How important is portability? If you plan to use your fish finder on multiple boats or need a more affordable option, consider a portable model.
By considering these factors, you can find the perfect fish finder for your jon boat and start reeling in those fish in no time!
Installing a Fish Finder on a Jon Boat
Installing a fish finder on a jon boat can be a daunting task, especially for those who are new to DIY boat modifications. However, with the right guidance, it can be a straightforward process. In this section, we’ll explore the key considerations for mounting and powering your fish finder, ensuring a seamless and successful installation.
Mounting Options for Jon Boats
When it comes to mounting your fish finder on a jon boat, you have several options to choose from, each with its own set of advantages and disadvantages. You can opt for a flush mount, where the device is recessed into the console or dashboard, providing a sleek and streamlined look. Alternatively, you can choose a bracket mount, which allows for more flexibility in terms of positioning and adjustability.
Another popular option is a ram mount, which provides even greater versatility and can be easily repositioned as needed. Whatever mounting option you choose, make sure it is sturdy and secure, as you’ll be relying on it to hold your fish finder in place, even in choppy waters.
Wiring and Powering Your Fish Finder
Once you’ve chosen your mounting option, it’s time to focus on wiring and powering your fish finder. This can be a complex process, but don’t worry, we’ve got you covered! The first step is to identify a suitable power source for your fish finder. You can either hardwire it directly to your boat’s electrical system or use a portable power source, such as a battery.

When running power cables, make sure to use heavy-gauge wires and protect them from exposure to water and UV damage. It’s also essential to follow proper safety protocols, such as installing a fuse or circuit breaker to prevent electrical overloads. By taking your time and following these guidelines, you’ll be able to enjoy a hassle-free and reliable power supply for your fish finder.
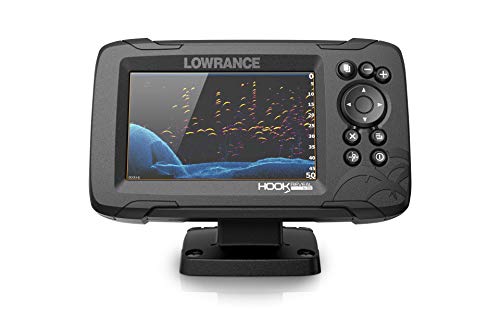
Fish Finder Display and Transducer
When it comes to choosing a fish finder for your jon boat, the display and transducer are two of the most critical components to consider. These elements will directly impact the accuracy and readability of your fish finder, so it’s essential to understand what to look for.
Display Size and Resolution
Imagine you’re trying to read a map while driving on a bumpy road. It’s not easy, right? Similarly, if your fish finder’s display is too small or has low resolution, it can be challenging to interpret the data, especially when you’re on the move. Look for a display that’s at least 5 inches in diagonal size, with a resolution of 480×640 pixels or higher. This will ensure that you can easily read the data, even in bright sunlight or when wearing polarized sunglasses.
You might be wondering, what’s the ideal display type for a fish finder? Well, TFT (thin-film transistor) or IPS (in-plane switching) displays are excellent choices. They offer excellent color reproduction, wide viewing angles, and are often more power-efficient.
Transducer Types and Frequencies
Think of the transducer as the “eyes” of your fish finder. It’s responsible for sending and receiving sonar signals, which are then translated into visual data on your display. There are two primary types of transducers: single-frequency and dual-frequency.

Single-frequency transducers operate at a fixed frequency, usually around 200 kHz. They’re great for general-purpose fishing, providing a good balance between depth penetration and target separation. Dual-frequency transducers, on the other hand, can operate at multiple frequencies (e.g., 50 kHz and 200 kHz). These offer greater flexibility, as you can adjust the frequency to suit different fishing conditions.
When choosing a transducer, consider the type of fishing you’ll be doing most often. If you’ll be fishing in shallow waters, a higher frequency (like 200 kHz) might be suitable. For deeper waters, a lower frequency (like 50 kHz) may provide better penetration. Always check the transducer’s specifications to ensure it’s compatible with your fish finder and suitable for your fishing environment.
Setting Up and Using a Fish Finder
To get the most out of your fish finder, you need to understand how to set it up and use it effectively. This is where the magic happens, and you start reeling in those fish! But before we dive into the details, let’s ask ourselves, “What’s the point of having a fish finder if you don’t know how to use it?” Exactly! So, let’s get started!
Understanding Sonar and GPS
Imagine you’re on a treasure hunt, but instead of a map, you have a device that shows you exactly where the treasure is hidden. That’s basically what sonar and GPS do for you on your jon boat. Sonar (Sound Navigation and Ranging) uses high-frequency sound waves to detect objects underwater, creating a virtual map of the sea floor. GPS (Global Positioning System), on the other hand, uses satellites to provide your location and speed. When combined, sonar and GPS give you a powerful tool to find those fish and navigate the waters.
Think of it like this: sonar is like having a flashlight that illuminates the seafloor, while GPS is like having a compass that guides you through the waterways. Without both, you’d be fishing in the dark, literally!

Customizing Settings for Better Results
Now that you understand how sonar and GPS work together, it’s time to customize your fish finder to get the best results. This is where you tailor your device to your fishing style and the environment you’re in. Ask yourself, “What kind of fish am I after?” “What’s the water depth and clarity like?” “What’s the best sensitivity setting for my sonar?”
By adjusting settings like sensitivity, range, and zoom, you can fine-tune your fish finder to detect even the smallest fish or to ignore unwanted targets like weeds or debris. It’s like adjusting the focus on a camera lens – you want the perfect clarity to spot those fish! With a little practice and patience, you’ll be hooked (pun intended!) on using your fish finder to catch more fish.
Fish Finder Accessories for Jon Boats
Fish finder accessories can elevate your fishing experience and provide more accurate readings. Imagine having the perfect combination of gadgets that help you locate and catch more fish. It’s like having your own personal fishing guide, minus the guide.
Transducer Mounts and Trolling Motors
A transducer mount is a crucial accessory that ensures your fish finder is functioning correctly. It secures the transducer in place, allowing it to send and receive sonar signals accurately. Imagine the transducer as the eyes of your fish finder, and the mount is the perfect pair of glasses that helps it focus. Without the right mount, your transducer might not provide accurate readings, making it challenging to find fish.
Trolling motors are another essential accessory for your jon boat. They allow you to move quietly and slowly, reducing the likelihood of scaring fish away. It’s like having a stealth mode for your boat, enabling you to sneak up on those elusive fish. Some trolling motors come with built-in transducer mounts, making it easy to set up your .

Additional Sensors and Modules
Additional sensors and modules can further enhance your fish finder’s capabilities. For example, you can add a temperature sensor to monitor water temperature, which is essential for identifying feeding patterns. It’s like having a thermometer that helps you find the perfect spot to catch fish. Other modules include GPS antennas, which provide more accurate location data, and wireless networking modules that enable you to connect your fish finder to your smartphone or tablet.
These accessories can significantly improve your fishing experience, making it easier to locate and catch fish. By investing in the right accessories, you’ll be well on your way to becoming a fishing master.
Troubleshooting Fish Finder Issues
When your fish finder isn’t behaving as expected, it can be frustrating, especially when you’re in the middle of a fishing trip. But don’t worry, troubleshooting common problems can be a breeze with the right guidance. In this section, we’ll explore the most frequent issues you might encounter with your fish finder and provide solutions to get you back on track.
Common Problems and Solutions
Fish finders can be finicky devices, and sometimes, they may not perform as expected. Here are some common problems you might encounter and how to resolve them:
- No Signal or Weak Signal: If your fish finder isn’t picking up any signals or the signals are weak, check that the transducer is properly installed and positioned in the water. Make sure there are no obstructions between the transducer and the water, and that the transducer is clean and free of debris.
- Inaccurate Readings: If your fish finder is providing inaccurate readings, check that the device is properly calibrated. Ensure that the speed and temperature sensors are functioning correctly, and that the device is set to the correct unit of measurement.
- Display Issues: If your fish finder’s display is not functioning correctly, check that the brightness and contrast settings are adjusted correctly. Also, ensure that the device is powered off and on again to reset the display.
Maintenance and Calibration
Regular maintenance and calibration are crucial to ensure your fish finder remains accurate and reliable. Here are some tips to keep in mind:
- Clean the Transducer: Regularly clean the transducer to remove any debris or sediment that might affect the signal.
- Update Software: Regularly check for software updates and install them to ensure your fish finder remains compatible with the latest features and technologies.
- Calibrate the Device: Calibrate your fish finder regularly to ensure accurate readings. Refer to your device’s user manual for specific calibration instructions.
By following these troubleshooting tips and maintaining your fish finder regularly, you can minimize downtime and ensure your device continues to provide accurate and reliable readings.


