Boost your skills with our expert guide to setup and customization, covering slip bobber, jigging, and bottom bouncer rigs.
Crappie Rig Components
When it comes to building a crappie-catching machine, it’s essential to understand the various components that make up a well-crafted rig. Think of these components as the building blocks of a successful fishing trip. Without the right combination, you might as well be trying to catch a fish with your bare hands!
Jigs and Lures
Jigs and lures are the bread and butter of crappie fishing. These tempting treats are designed to mimic the natural food sources that crappies love to snack on. From curly tail grubs to tiny jigs, the options are endless. But what makes a great jig or lure? For starters, consider the size, shape, and color of your chosen jig or lure. Crappies have excellent eyesight, so it’s essential to choose a lure that closely resembles their natural prey. Ask yourself, “What would I eat if I were a crappie?”
Hooks and Sinkers
Hooks and sinkers might seem like the unsung heroes of crappie fishing, but they’re just as crucial as the jigs and lures. A quality hook can make all the difference in landing a monster crappie. Consider the type of hook, its size, and the material it’s made of. Will it withstand the fight of a feisty crappie? Sinkers, on the other hand, help get your jig or lure to the desired depth. From split shot to egg sinkers, the options are varied, but the goal remains the same: to get your bait in front of those hungry crappies.
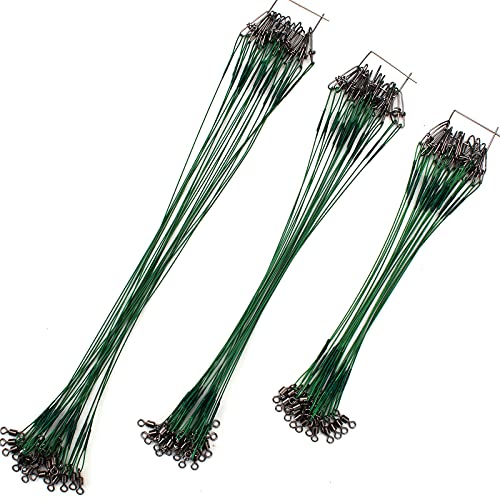
Lines and Leaders
The often-overlooked lines and leaders are the unsung heroes of crappie fishing. A quality line and leader can make all the difference in detecting even the lightest of bites. When choosing a line, consider the water conditions, the size of your jig or lure, and the type of fishing you’re doing. Will you be fishing in clarity-challenged waters or crystal-clear lakes? Do you need a line that can withstand the strength of a large crappie or one that’s sensitive enough to detect the lightest of bites? By selecting the right line and leader, you’ll be one step closer to landing the crappie of a lifetime.

Choosing the Right Rig
Choosing the right rig is crucial to a successful crappie fishing trip. It’s like baking a cake – you need the right ingredients and the right mixing technique to get the desired outcome. In this case, the right rig can make all the difference between a bucket full of crappie and a bunch of disappointing nibbles.
Selecting Jig Size and Style
When it comes to jig size and style, it’s essential to consider the type of fishing you’ll be doing. Will you be fishing in open water or structures like weed beds or submerged logs? Jigs come in various sizes, shapes, and materials, each designed for specific fishing scenarios. A larger jig might be suitable for open water, while a smaller jig is better suited for fishing structures.
For example, a 1/8 ounce curly tail jig is an excellent choice for open water, while a 1/16 ounce swim bait is better suited for fishing weed beds. It’s also essential to choose a jig that mimics the natural baitfish in the water you’re fishing. A jig that resembles a shad or shiner will be more appealing to crappie than one that looks like a guppy.
Matching Lure to Water Conditions
The type of lure you choose should also be matched to the water conditions. In clear water, a more transparent or translucent lure might be more effective, while in murky water, a brighter or more vibrant lure might be better. Consider the water temperature, clarity, and the time of day you’re fishing, as these factors can affect the type of lure that will be most effective.
For instance, in cold water, a slower-moving lure like a curly tail jig might be more appealing to crappie, while in warmer water, a faster-moving lure like a spinnerbait might be more effective. By matching your lure to the water conditions, you’ll increase your chances of catching more crappie.

Choosing the Right Hook and Sinker
The hook and sinker you choose are just as crucial as the jig or lure. A hook that’s too small can straighten or bend, causing you to lose fish, while a hook that’s too large can be difficult to set in a crappie’s mouth. When choosing a hook, consider the size of the bait you’re using and the type of fishing you’ll be doing.
The sinker you choose should also be matched to the water conditions and the type of fishing you’re doing. A heavier sinker might be necessary in strong currents or deep water, while a lighter sinker might be better suited for fishing in shallow water or structures. By selecting the right hook and sinker, you’ll be able to present your lure or bait effectively and increase your chances of catching more crappie.
Setting Up a Slip Bobber Rig
Setting up a slip bobber rig is a crucial part of crappie fishing, as it allows you to present your bait or lure at the desired depth and wait for those pesky crappies to bite. But, have you ever wondered how to set up a slip bobber rig that actually attracts crappies? Let’s dive in and explore the world of slip bobber rigs!
Selecting the Right Bobber
Selecting the right bobber is the first step in setting up a slip bobber rig. You see, not all bobbbers are created equal, and the right one can make all the difference in your fishing trip. So, what makes a good bobber for crappie fishing? Well, for starters, you’ll want a bobber that’s sensitive enough to detect even the lightest of bites. You’ll also want a bobber that’s durable enough to withstand the elements and the occasional snag.
When choosing a bobber, consider the water conditions you’ll be fishing in. In calm waters, a smaller, more sensitive bobber might be perfect. But in choppy waters, you might need a larger, more buoyant bobber to keep your line afloat. And, let’s not forget about the style of bobber – do you prefer a classic round bobber or a sleek, aerodynamic slip bobber?
Attaching the Hook and Sinker
Once you’ve selected the perfect bobber, it’s time to attach the hook and sinker. This is where things can get a bit tricky, but don’t worry, we’ve got you covered! Start by threading your line through the bobber, making sure it’s securely attached. Then, tie your hook to the end of the line, leaving enough room for the sinker.
When choosing a hook, consider the size and style of the bait or lure you’re using. You’ll want a hook that’s sturdy enough to hold your bait or lure, yet small enough to allow for a natural presentation. And, don’t forget to choose a sinker that’s heavy enough to get your bait or lure to the desired depth.
Setting the Bobber Depth
Setting the bobber depth is where the magic happens in a slip bobber rig. You see, the bobber acts as a strike indicator, signaling when a crappie has taken the bait. But, if the bobber is set too high or too low, you might miss those subtle bites. So, how do you set the perfect bobber depth?
One way to set the bobber depth is to use a depth chart or a fish finder to determine the depth of the water. Then, set your bobber to suspend your bait or lure at the desired depth. Another way is to use the “countdown method,” where you let your bait or lure sink to the desired depth, then set the bobber. Either way, the key is to be patient and experiment with different depths until you find what works best for you.
Setting Up a Jigging Rig
Setting up a jigging rig can be a game-changer for crappie anglers. With the right components and a little practice, you’ll be catching slab-sized crappies in no time.

Selecting the Right Jig
Choosing the right jig for your jigging rig is crucial. You’ll want to consider the type of crappie you’re targeting, the water conditions, and the time of year. For example, in the spring, crappies tend to congregate in shallower waters, making smaller, lighter jigs more effective. In the summer, when crappies move to deeper structures, larger, heavier jigs are often more productive.
Think of your jig as a key that unlocks the door to crappie country. With so many jigs on the market, it can be overwhelming to choose the right one. Here’s a tip: start with a few proven jig styles, such as a curly tail or a swim bait, and experiment with different colors and sizes.
Choosing the Right Line and Leader
The right line and leader can make all the difference in your jigging rig. You’ll want a line that provides the right amount of sensitivity, strength, and abrasion resistance. Monofilament or fluorocarbon lines are popular choices for jigging, as they offer a good balance of these qualities.
When choosing a leader, consider the type of jig you’re using and the water conditions. A shorter leader (1-2 feet) is often preferred for jigging, as it allows for more precise control over the jig. However, in clearer waters, a longer leader (2-4 feet) can help to reduce line visibility.
Attaching the Jig to the Line
Attaching the jig to the line is a critical step in setting up your jigging rig. You’ll want to use a reliable knot that can withstand the stress of fighting a feisty crappie. The Palomar knot is a popular choice for jigging, as it provides a secure connection and is relatively easy to tie.

To avoid tangles and knots, make sure to wet your line before attaching the jig, and use a gentle, pulsing motion to set the hook. With a little practice, you’ll be able to attach your jig quickly and efficiently, getting you back to the business of catching crappies in no time.
Setting Up a Bottom Bouncer Rig
When it comes to catching crappie, having the right rig can make all the difference. In this section, we’ll dive into the world of bottom bouncer rigs, a popular choice among crappie anglers.
Selecting the Right Weight and Bouncer
The weight and bouncer are the backbone of a bottom bouncer rig. The weight, typically a split shot, egg sinker, or pyramid sinker, gets your lure to the bottom of the water quickly, while the bouncer, usually a stiff wire or spring, helps you feel even the lightest of bites. But how do you choose the right weight and bouncer for your rig? It’s quite simple, really. Consider the water conditions you’re fishing in. If you’re fishing in heavy current or deep water, you’ll want a heavier weight to get your lure down quickly. In calmer waters, a lighter weight will do the trick.
Attaching the Hook and Sinker
Now that you’ve got your weight and bouncer, it’s time to attach the hook and sinker. This is where things can get a little tricky. You want to make sure your hook is securely attached to the bouncer, with the sinker swivel attached to the end of the hook. This allows the sinker to move freely, reducing the risk of tangles and lost fish. To attach your hook, simply thread the hook onto the bouncer, leaving enough room for the sinker to move up and down.
Setting the Desired Depth
Setting the right depth is crucial when using a bottom bouncer rig. You want your lure to be right in the face of those crappie, tantalizing them into biting. But how do you know what depth to set your rig to? That’s a great question! The answer lies in understanding the water you’re fishing in. In deeper waters, you may need to set your rig to 10-15 feet deep, while in shallower waters, 5-7 feet may be the sweet spot. Experiment with different depths to see what works best for you.
Tips for Customizing Your Rig
Customizing your crappie rig is an art that requires patience, experimentation, and a willingness to adapt to changing conditions. Think of it as cooking your favorite recipe – you start with a solid foundation, but the magic happens when you add your own secret ingredients and tweaks.
Adding Attractants and Trailers
Attractants and trailers are like the secret sauces that make your dish stand out. In crappie fishing, these can be anything from bright-colored soft plastics to shiny spinner blades or enticing scents. By adding these extras to your rig, you’re increasing the chances of catching a crappie’s attention. Imagine your lure as a dinner bell, and the attractants and trailers are the savory aromas wafting from the kitchen, drawing in hungry crappies from afar.
When selecting attractants and trailers, consider the water conditions and the type of crappie you’re targeting. For example, in murky waters, a bright-colored soft plastic might be more visible, while in clear waters, a more subtle approach might be necessary. Remember, the goal is to entice, not overwhelm.
Experimenting with Different Presentations
Imagine your crappie rig as a chameleon, adapting to its surroundings to catch its prey. Experimenting with different presentations is all about mixing and matching various components to create a unique look that resonates with the local crappie population. Ask yourself: What if I add a curly tail to my jig? Would a slower retrieve work better than a faster one? Can I combine two different lures to create a hybrid that’ll drive crappies wild?
The beauty of experimenting with different presentations lies in its unpredictability. You might stumble upon a unique combination that becomes your go-to rig, or you might discover that a particular lure or technique simply doesn’t work in your water. Either way, you’ll gain valuable insights into the minds of those finicky crappies.
Adjusting Rigging for Changing Conditions
Fishing is a dynamic game, and conditions can change rapidly. Water levels rise, currents shift, and weather patterns evolve – all of which can impact the behavior of your target crappies. By staying attuned to these changes, you can adjust your rigging to stay ahead of the game.
Think of it like a chess match: the environment makes a move, and you respond by adjusting your strategy. Maybe you need to switch to a heavier weight in strong currents or swap out a lure that’s no longer effective in changing light conditions. By staying flexible and observant, you’ll be better equipped to outsmart those cunning crappies and land the big ones.


